After the sucessful implementation of my new FibreChannel storage in Stage XI, it was time to redesign my Backup / DR solution….
VMware vDP Advanced
I have implemented my Desaster Recovery Project in Stage VII with a VMware vDP appliance and a Synology DS411slim.
I am very happy with the VMware vDP Advanced appliance. I tweaked the appliance a little bit to suit it into my environment.

Here are my modifications:
2 vCPUs
4GB RAM
Hard disk 1, 100GB Eagerzeroed on a FusionIO datastore
Hard disk 2, 1TB Thin on a NFS datastore
Hard disk 3, 1TB Thin on a NFS datastore
Hard disk 4, 1TB Thin on a NFS datastore
I configured two simultaneous backup and restore Jobs: (The default is 8)

My existing Synology DS411slim was OK, but the Performance was not the best. (It had only 4 x 1TB Notebook HDDs inside, an Intel Single Core Atom and 512MB RAM)
It was time for a new Desaster Recovery storage…..
This time, I build my own Synology NAS with xpenology. What is xpenology?
XPEnology is an operating system based on Synology DiskStation Manager (DSM). This is possible because Synology DSM has developed under the GPL license . As a result, it is free to use and adapt by third parties. The advantage of XPEnology is that it is compatible with many different hardware and so you almost any old PC / server can use as a NAS. Also you can also XPEnology as a virtual machine (VM) running on ESXi for example.
With this flexibility, functionality and ease XPEnology offers a good alternative to a Synology NAS or other NAS Solutions.
XPEnology consists of two parts:
- Bootloader (Installed on USB Stick or boot VM from ISO)
- DSM Software (official Synology Releases)
I used the DSM 5.0-4528 Update 2 release and installed it on an old 1GB USB Stick and attached it to my custom built NAS Server.
My custom “Synology” (XPEnology) NAS Server
A few years ago, I bought an Intel Atom Dual Core Mainboard and used it for I think a VMware Server Installation. Do you remember the VMware Server Software? It was the replacement for the VMware GSX Server. Long time ago….
I decided to reuse that old piece of hardware:
MSI-945GC
Intel Atom 330 1,6 GHz Dual Core with Hyperthreading
2 GB RAM
2 x Intel 1GbE LAN ports
4 x SATA II ports
Low Power consumption
I already had 4 x 1TB WD green 3,5″ HDDs here

Rack Chassis
I bought a used Chenbro rack chassis from ebay
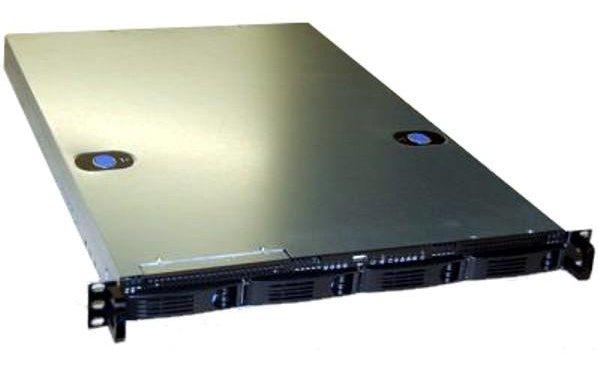
I installed the Mainboard, 4 x 1TB HDDs inside the chassis and powered the system up with the XPEnology Bootloader USB Stick attached.

After the boot procedure, I started the Synology Assistant and installed DSM 5.0-4528 on my new NAS. The Installation took about 10 minutes, after that the server booted and I installed the Update2 patch.
I configured a Raid 5 of all my 4 x 1TB hard disks and created the first shared folders with NFS Access. My NAS was ready to use…..
I added the NFS mount points into my ESXi hosts and migrated my existing vDP appliance VM onto the newly added NFS mount point.
This is the actual state of my HomeLab:
Datacenter I:
EMC SAN switch 16 port
Cisco SG-500X 24port 1GbE and 4 port 10GbE Switch
Old TFT Display
Custom NAS storage with 4 x 1TB SATA HDDs
2 x Apple Mac Mini Server with Sonnet Rackmac Mini Chassis
Thunderbolt PCIe Expansion with 1 x 10GbE, 1 x Dual Port FC + FusionIO Card
Thunderbolt PCIe Expansion with 1 x 10GbE, 1 x Dual Port FC + Teradici APEX 2800
Custom storage server with Nexenta and 12 x 1TB SATA HDDs + FC
KVM Switch
Rack Keyboard with mouse integrated
IBM x336 for hardware testing
IBM x336 for hardware testing
IBM DS3512 storage with 12 x 2TB NL SAS HDDs + FC
APC UPS 1500VA RM
IBM x3550 for hardware testing
IBM x3550 for hardware testing
HP Storageworks appliance with LTO-2 drive
Eurostor storage with 16 x 500GB SATA HDDs + FC
HP DL360 for hardware testing

Datacenter II:
1 x Apple Mac Mini Server
1x Intel NUC vCenter Server
1 x Thunderbolt PCIe Desktop Expansion with 1 x 10GbE + 1 x Dual Port FC

This completes this Stage XII, but I already have plans for another modification of my HomeLab. Read the Story of Stage XIII: PernixData FVP here.