After increasing my VMware SD-WAN (Velocloud) environment in the last posting, it was time to invest a little bit more in network documentation….
I am using the Infoblox IPAM system at several customer environments, why not inside my Lab?
I need a working IPAM system!! I am always struggeling when finding free IP adresses…..

Deployment:
You need to download the ova/ovf appliance and you need to think about the licensing…..
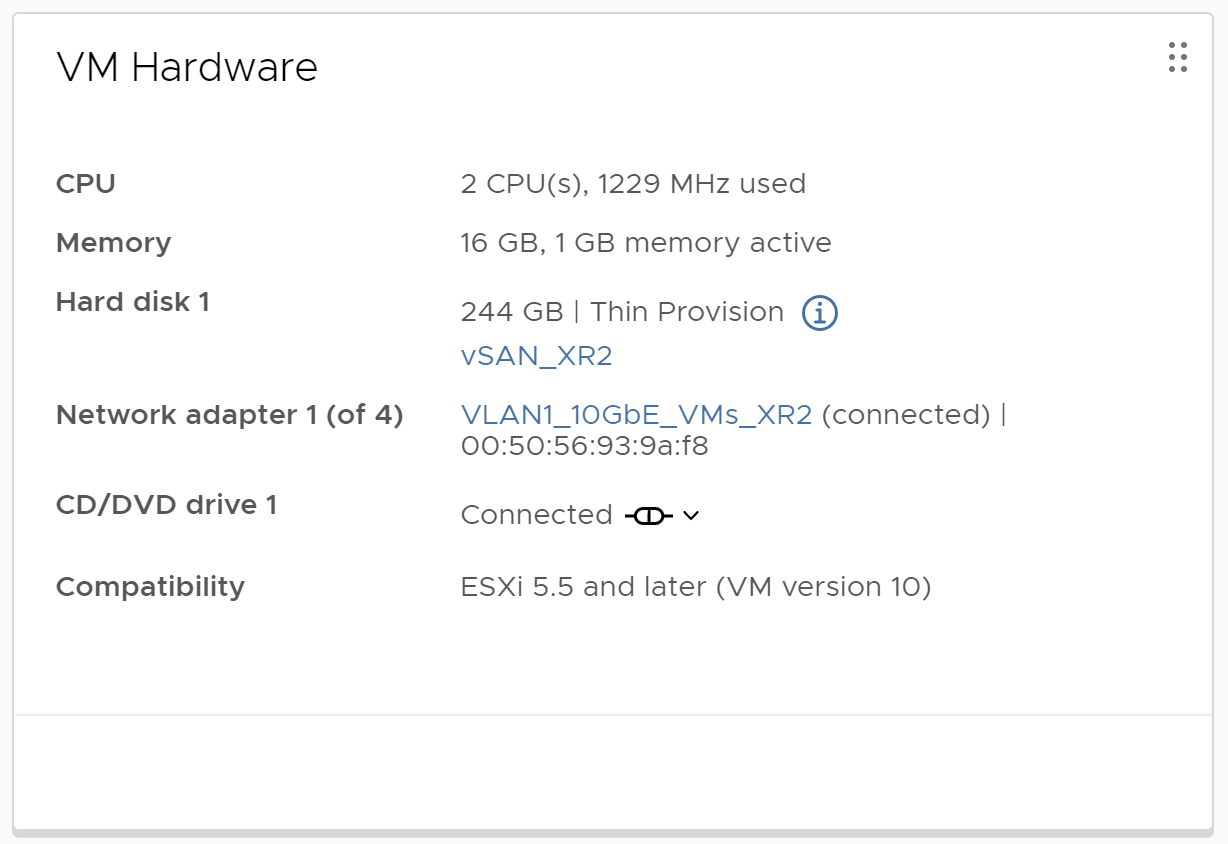
I deployed two Infoblox DDI virtual appliances, one inside each datacenter with HA setup in mind. Hardware requirements for the VMs are OK for my Homelab, but you must decide for your own enviroment.
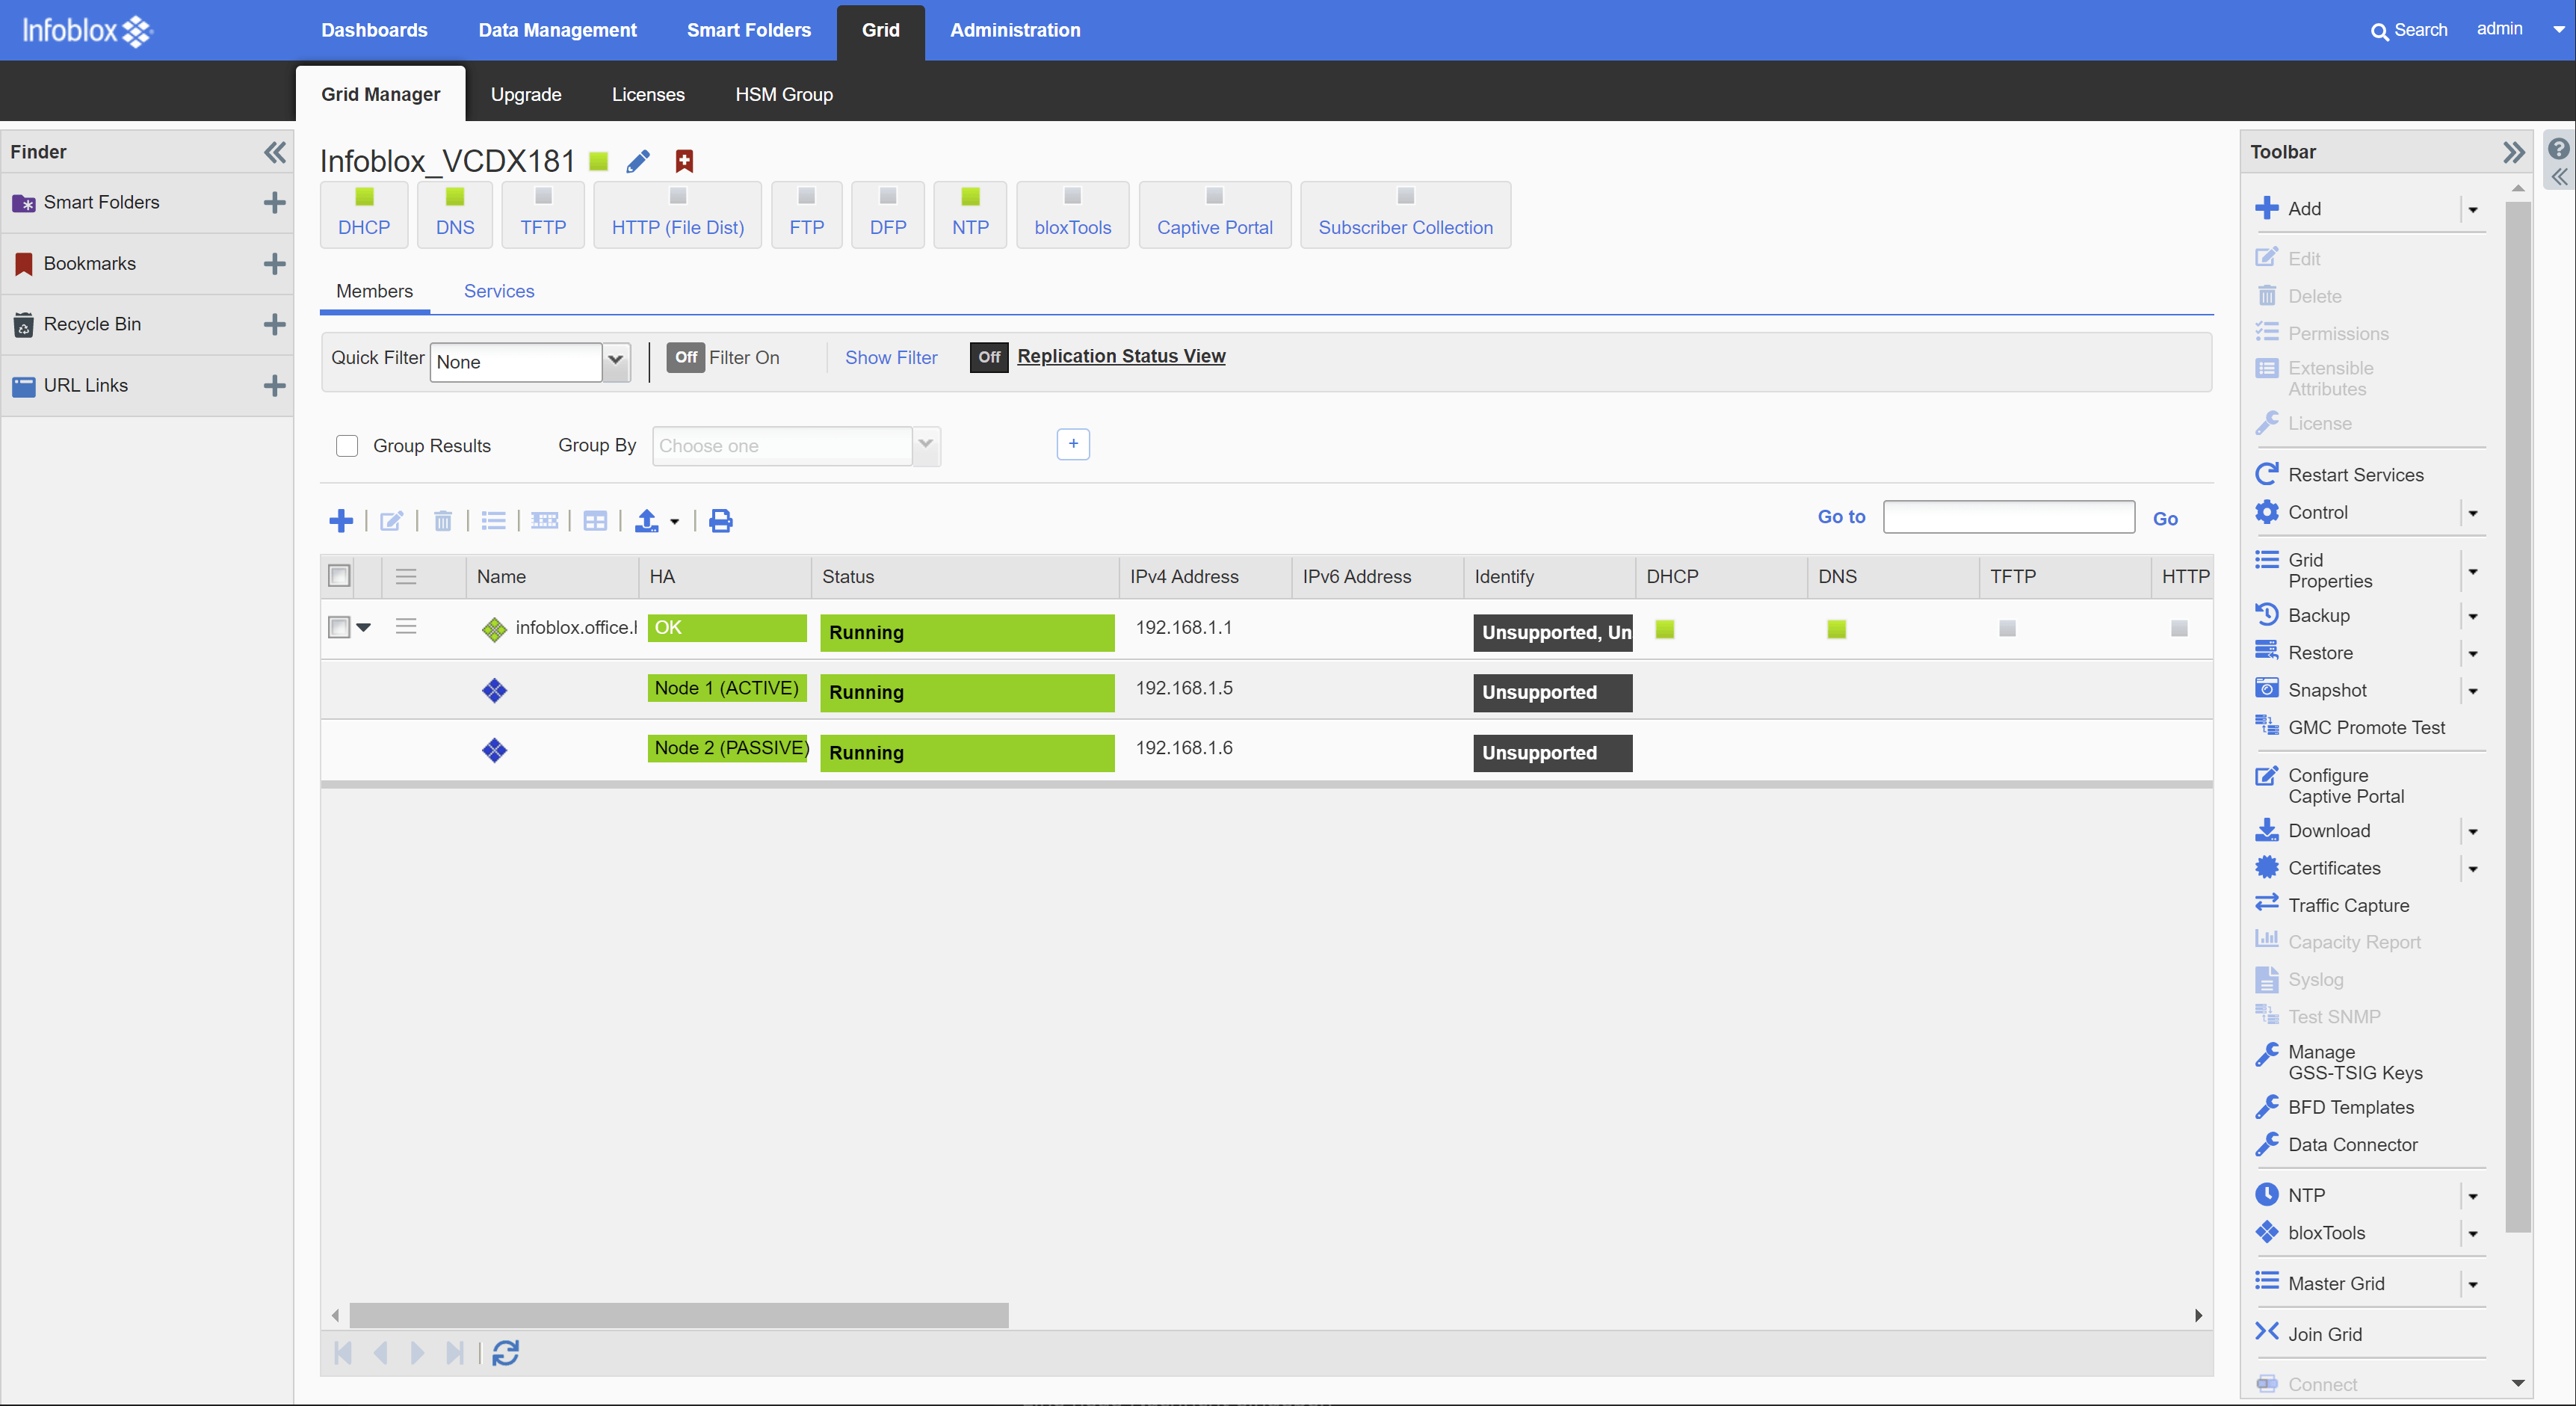
I configured both in Active / Passive cluster config: (the wizards are very easy to understand). Each appliance got his own identity including an individual IP and an cluster IP.
Software upgrades are also eays and the wizard for it is straight forward. You need to download a newer package first, than deploy it via the UI, it will stage it, test it and than install it.
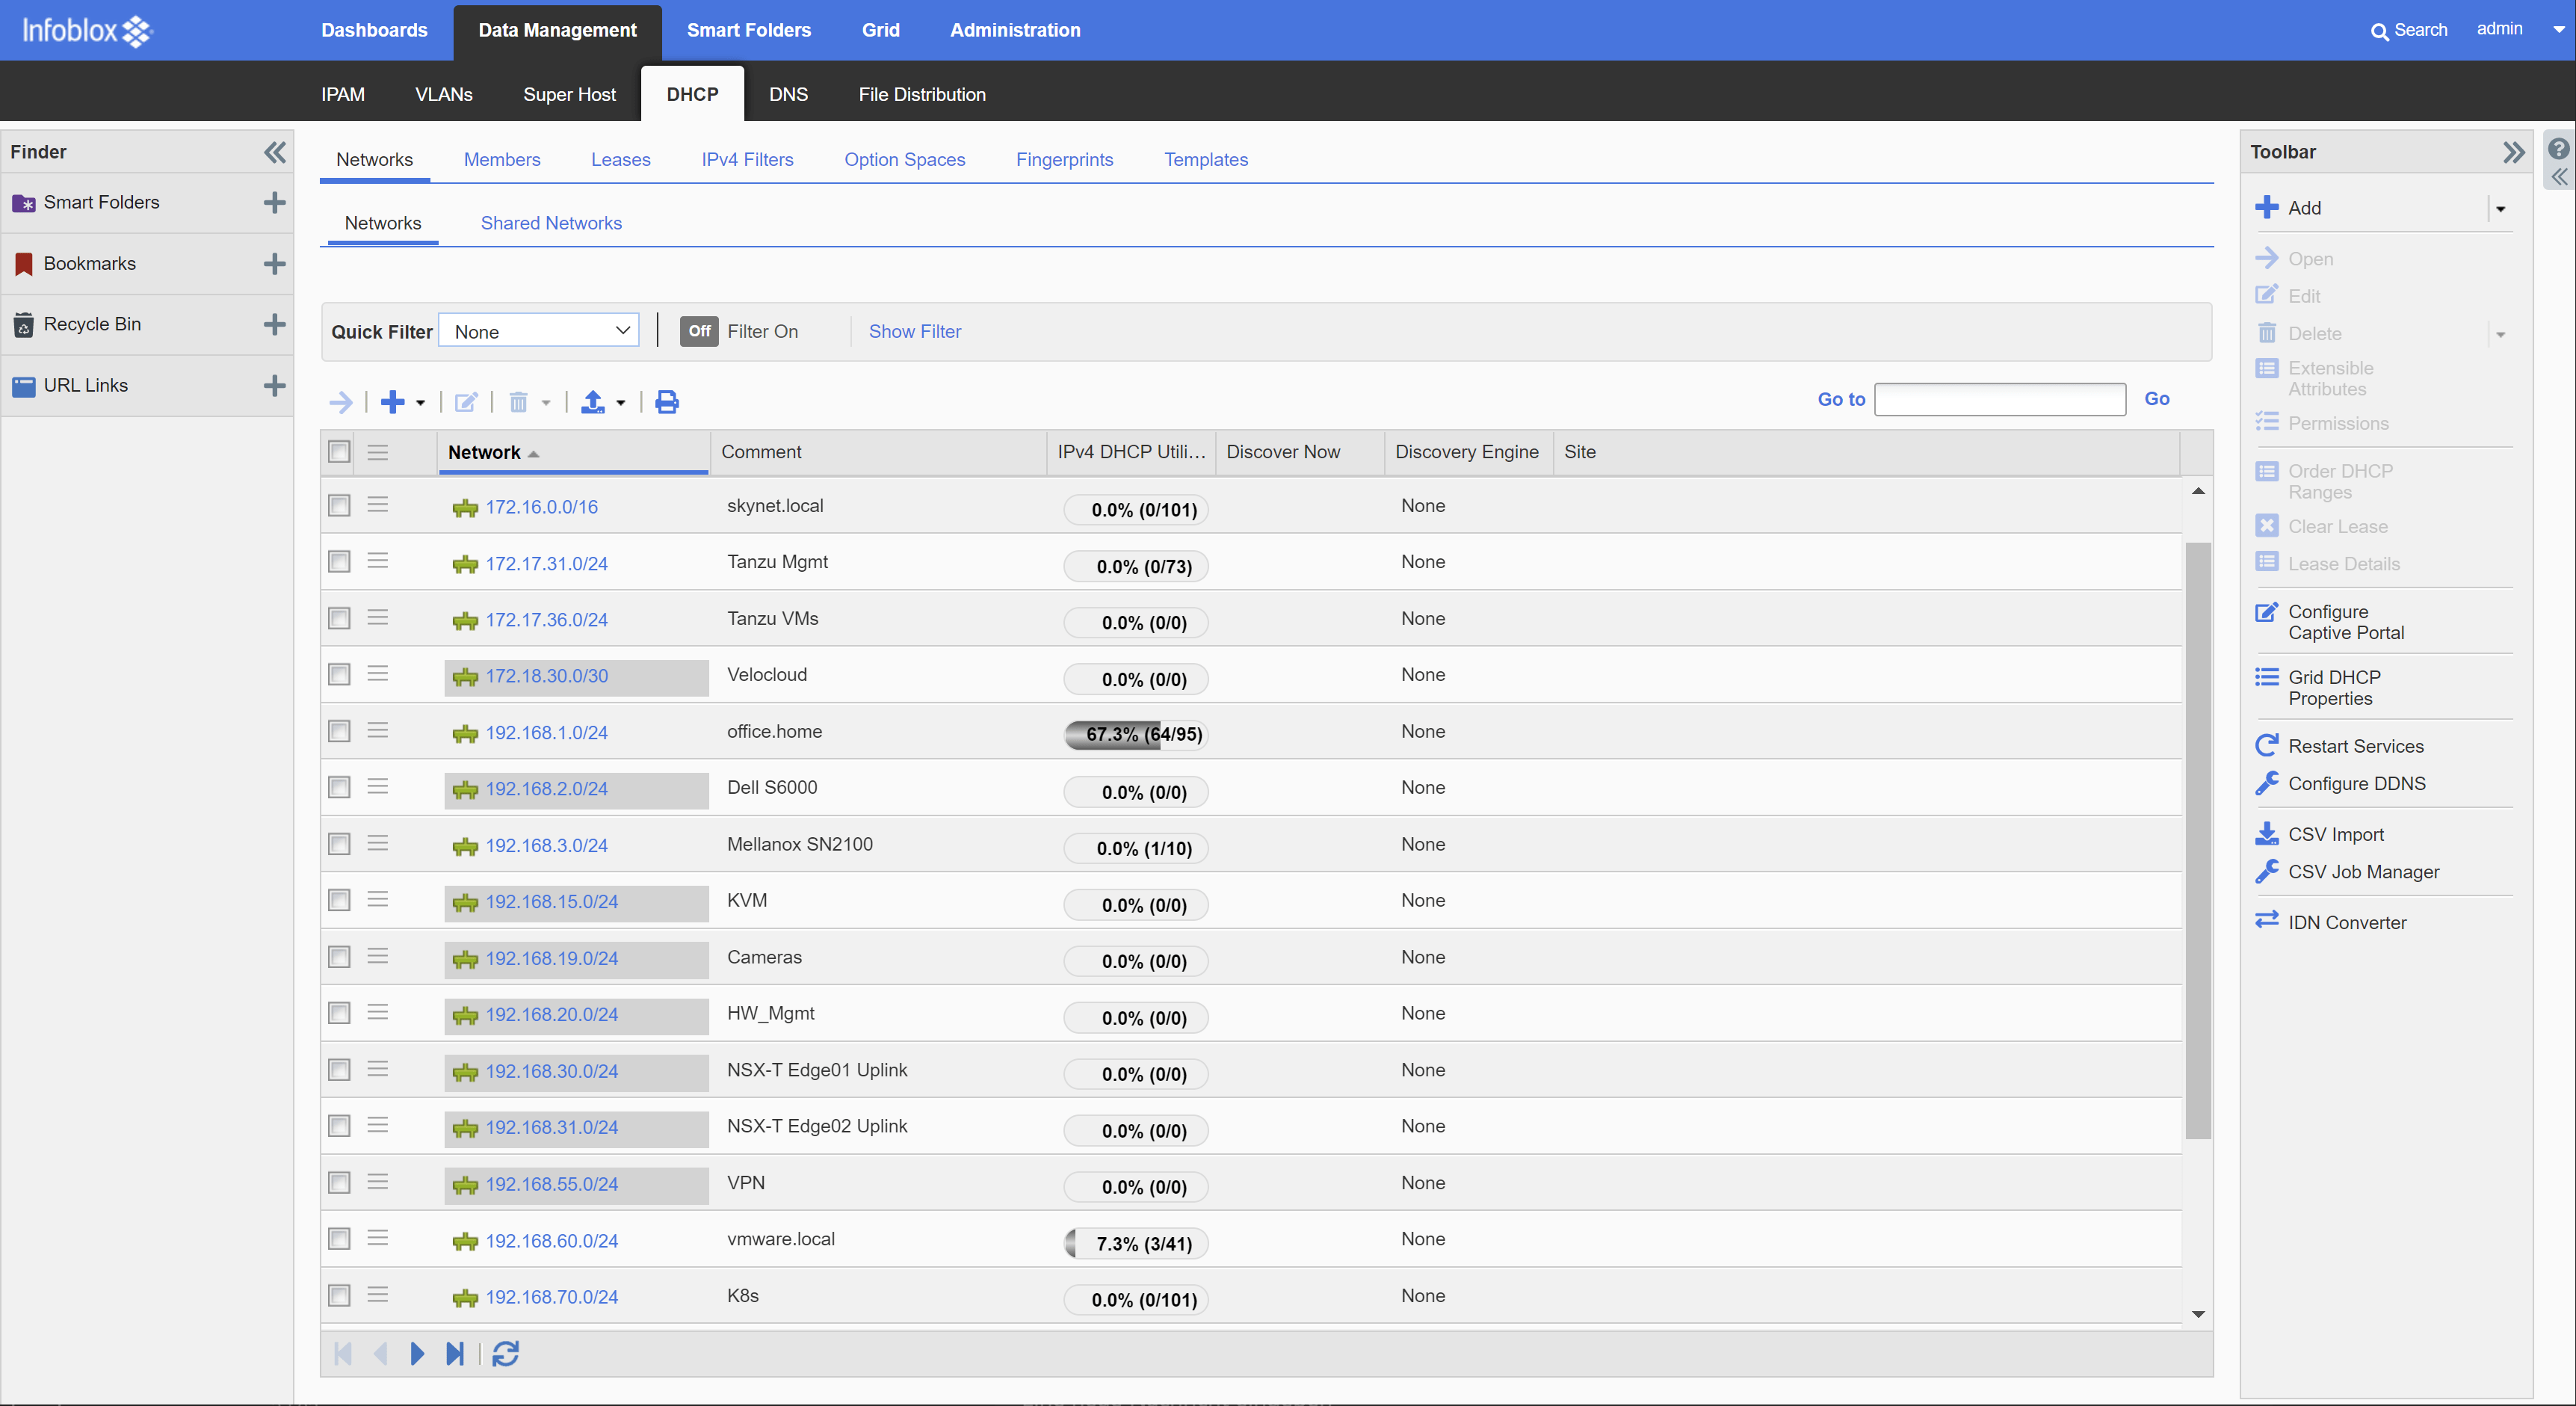
IPAM:
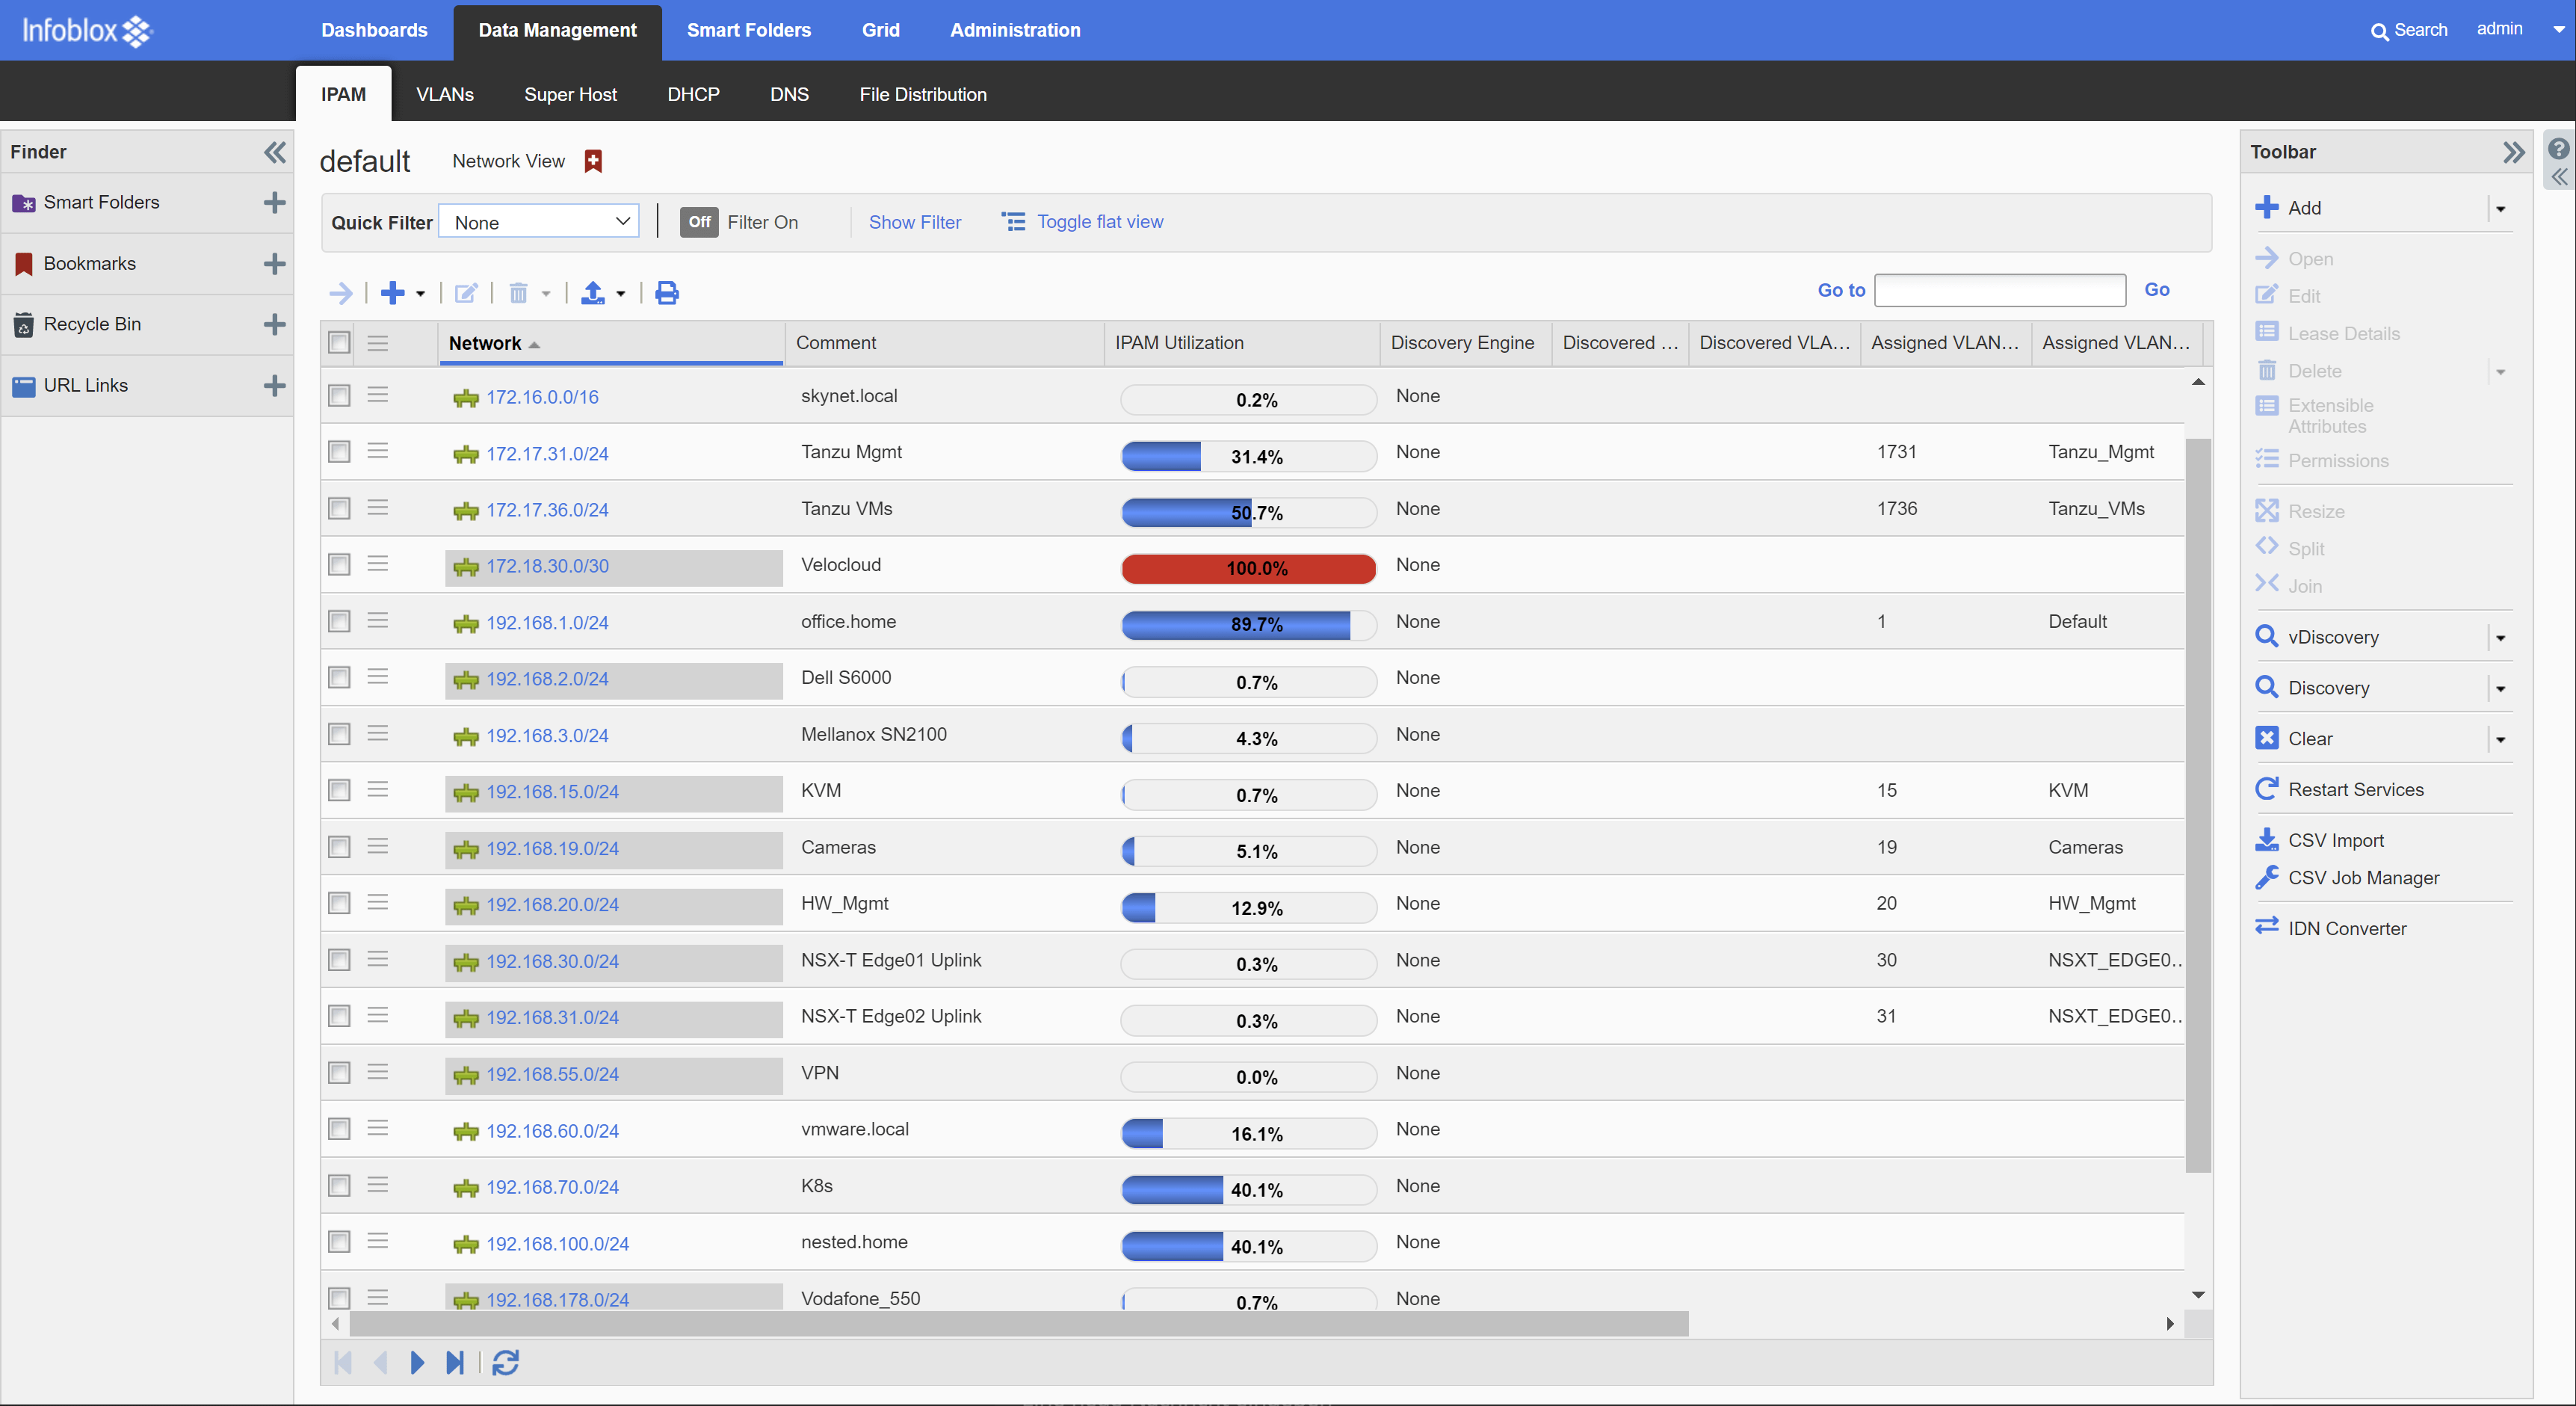
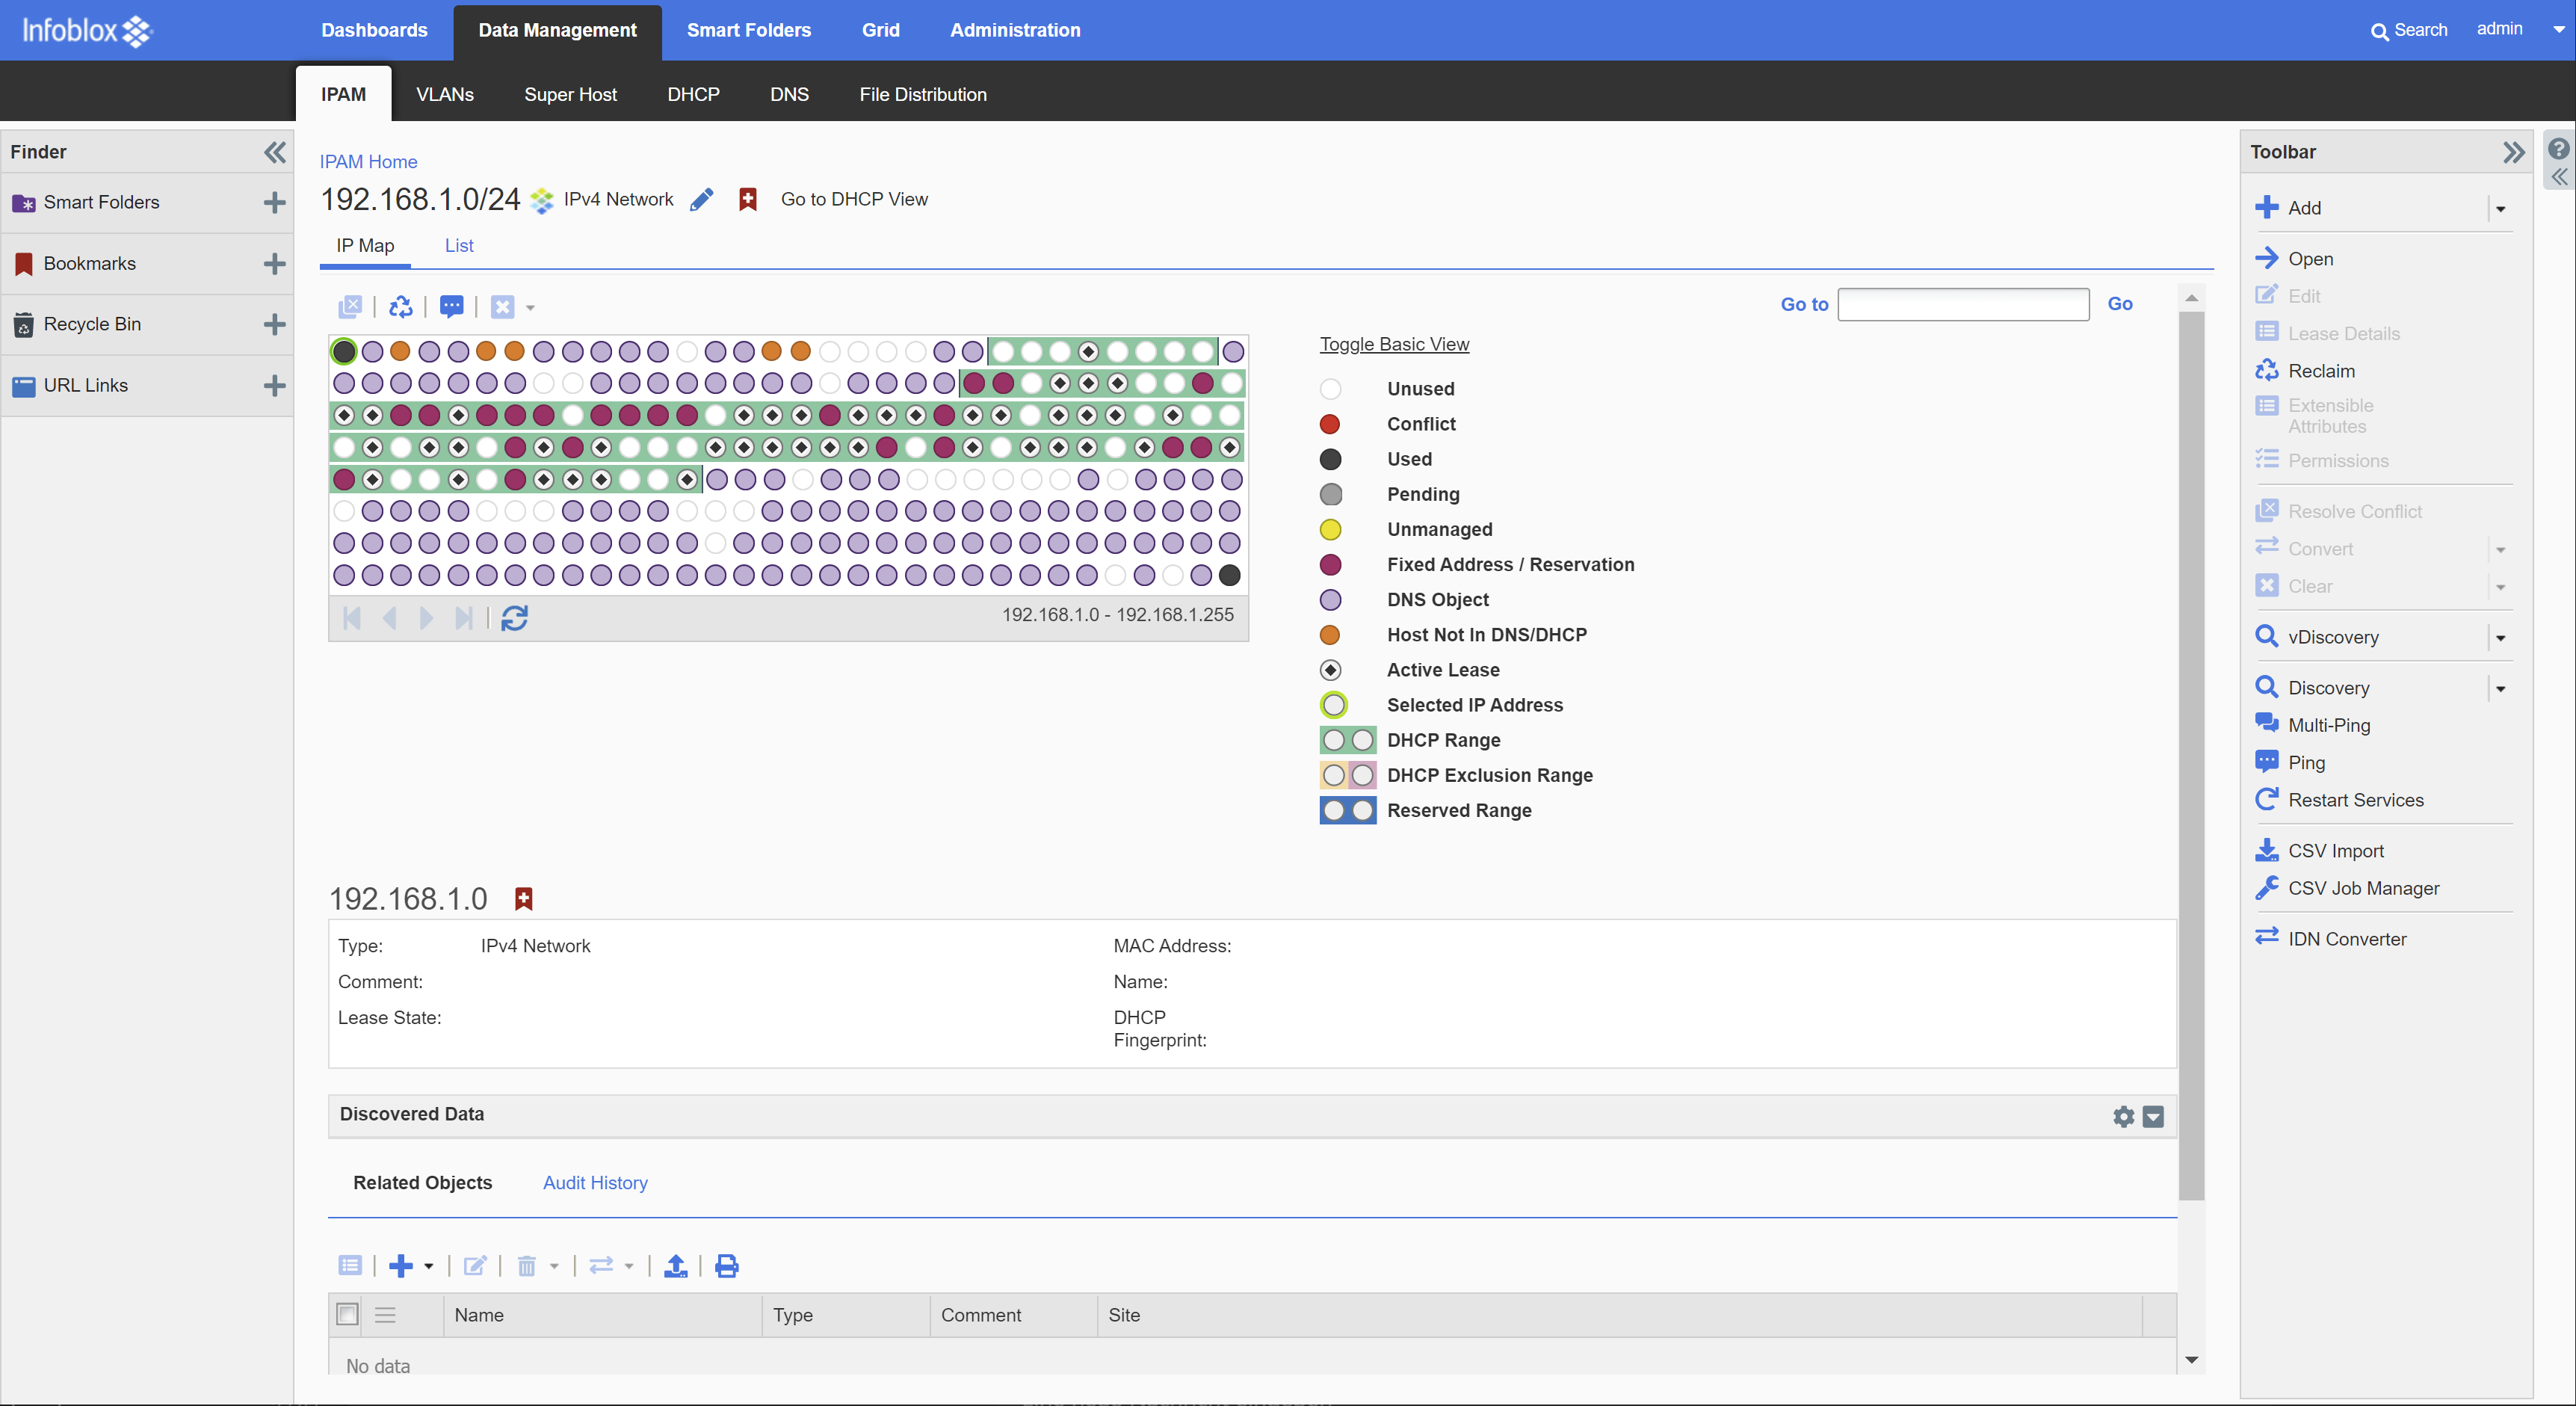
The hardest part was to configure all my networks for the IPAM stuff. I wanted each of my networks centrally managed inside the infoblox. The network in CIDR format including a comment for faster finding. The utilization shows a 100% in red for my velocloud network, because it has only 2 IPs inside /30 mask.
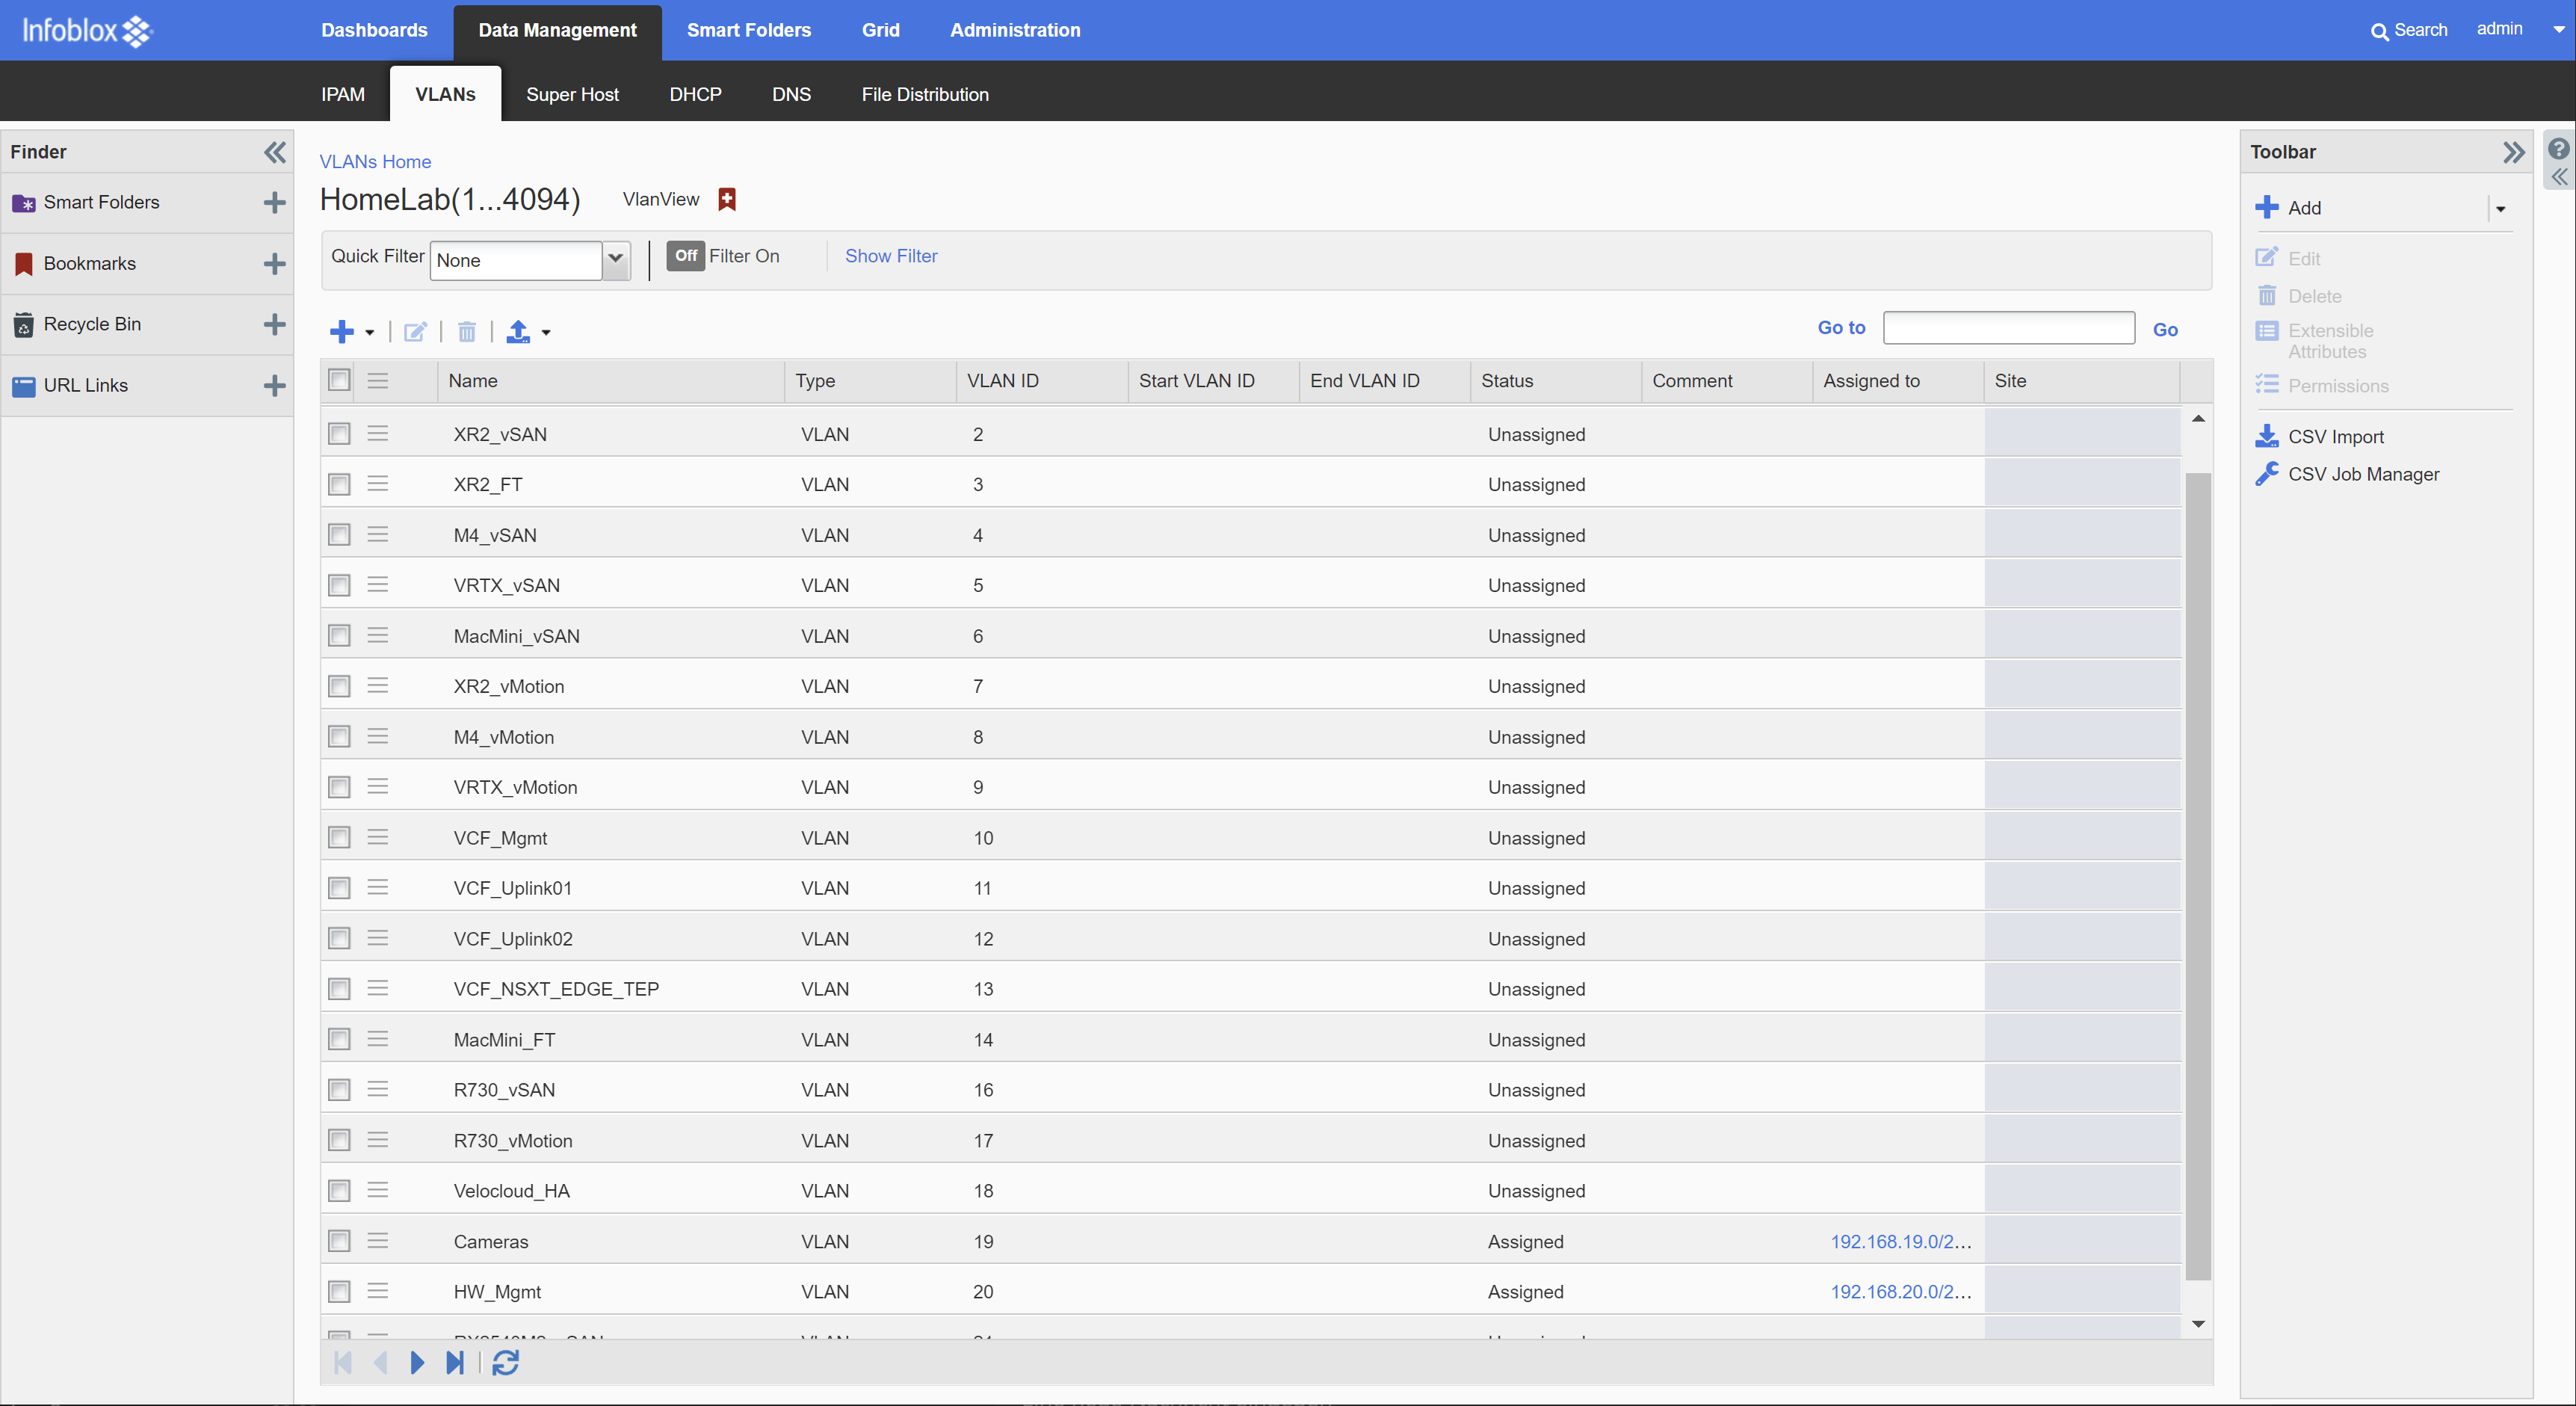
I added all my existing VLANs as well: (this feature is just for documentation purposes). You can assign VLANs to networks later.
Next step: creating DHCP ranges for the specific networks including the configured ranges.
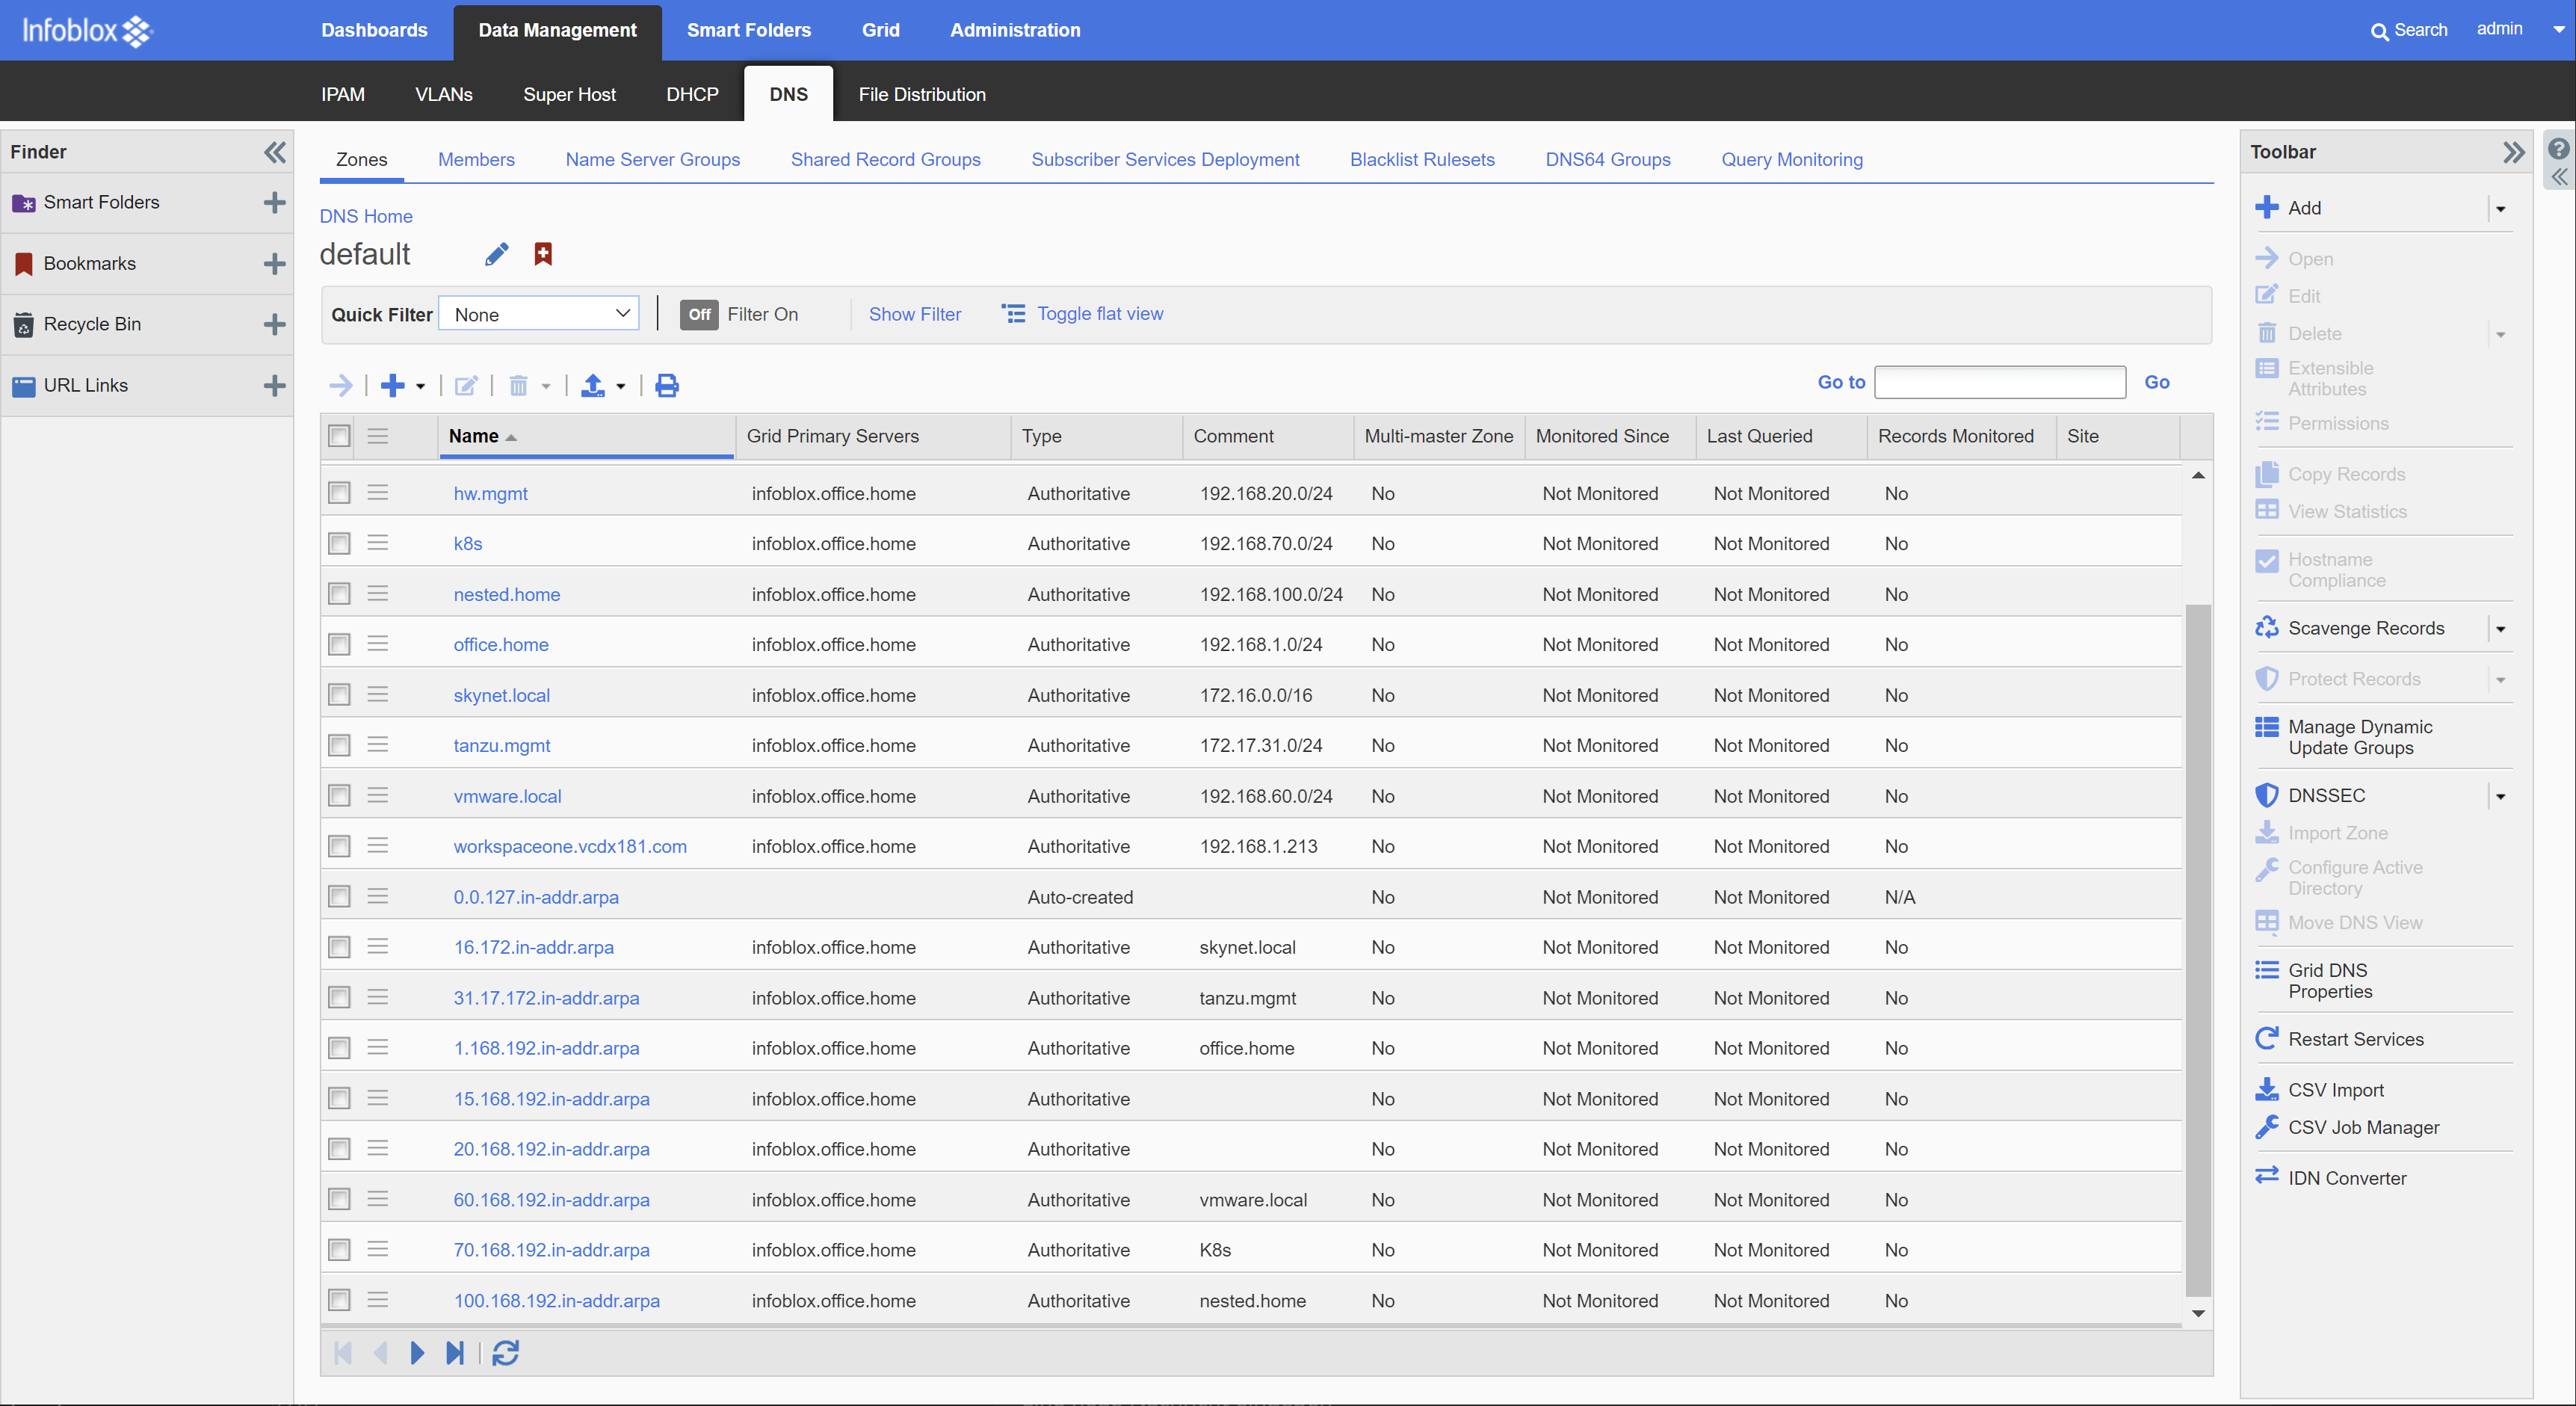
Last step for the data management part: DNS zones (forward and reverse zones, of course)
Daily Operations:
I really like the solution, simple UI, very intuitive and easy to operate. You can find every information you are looking for within seconds.
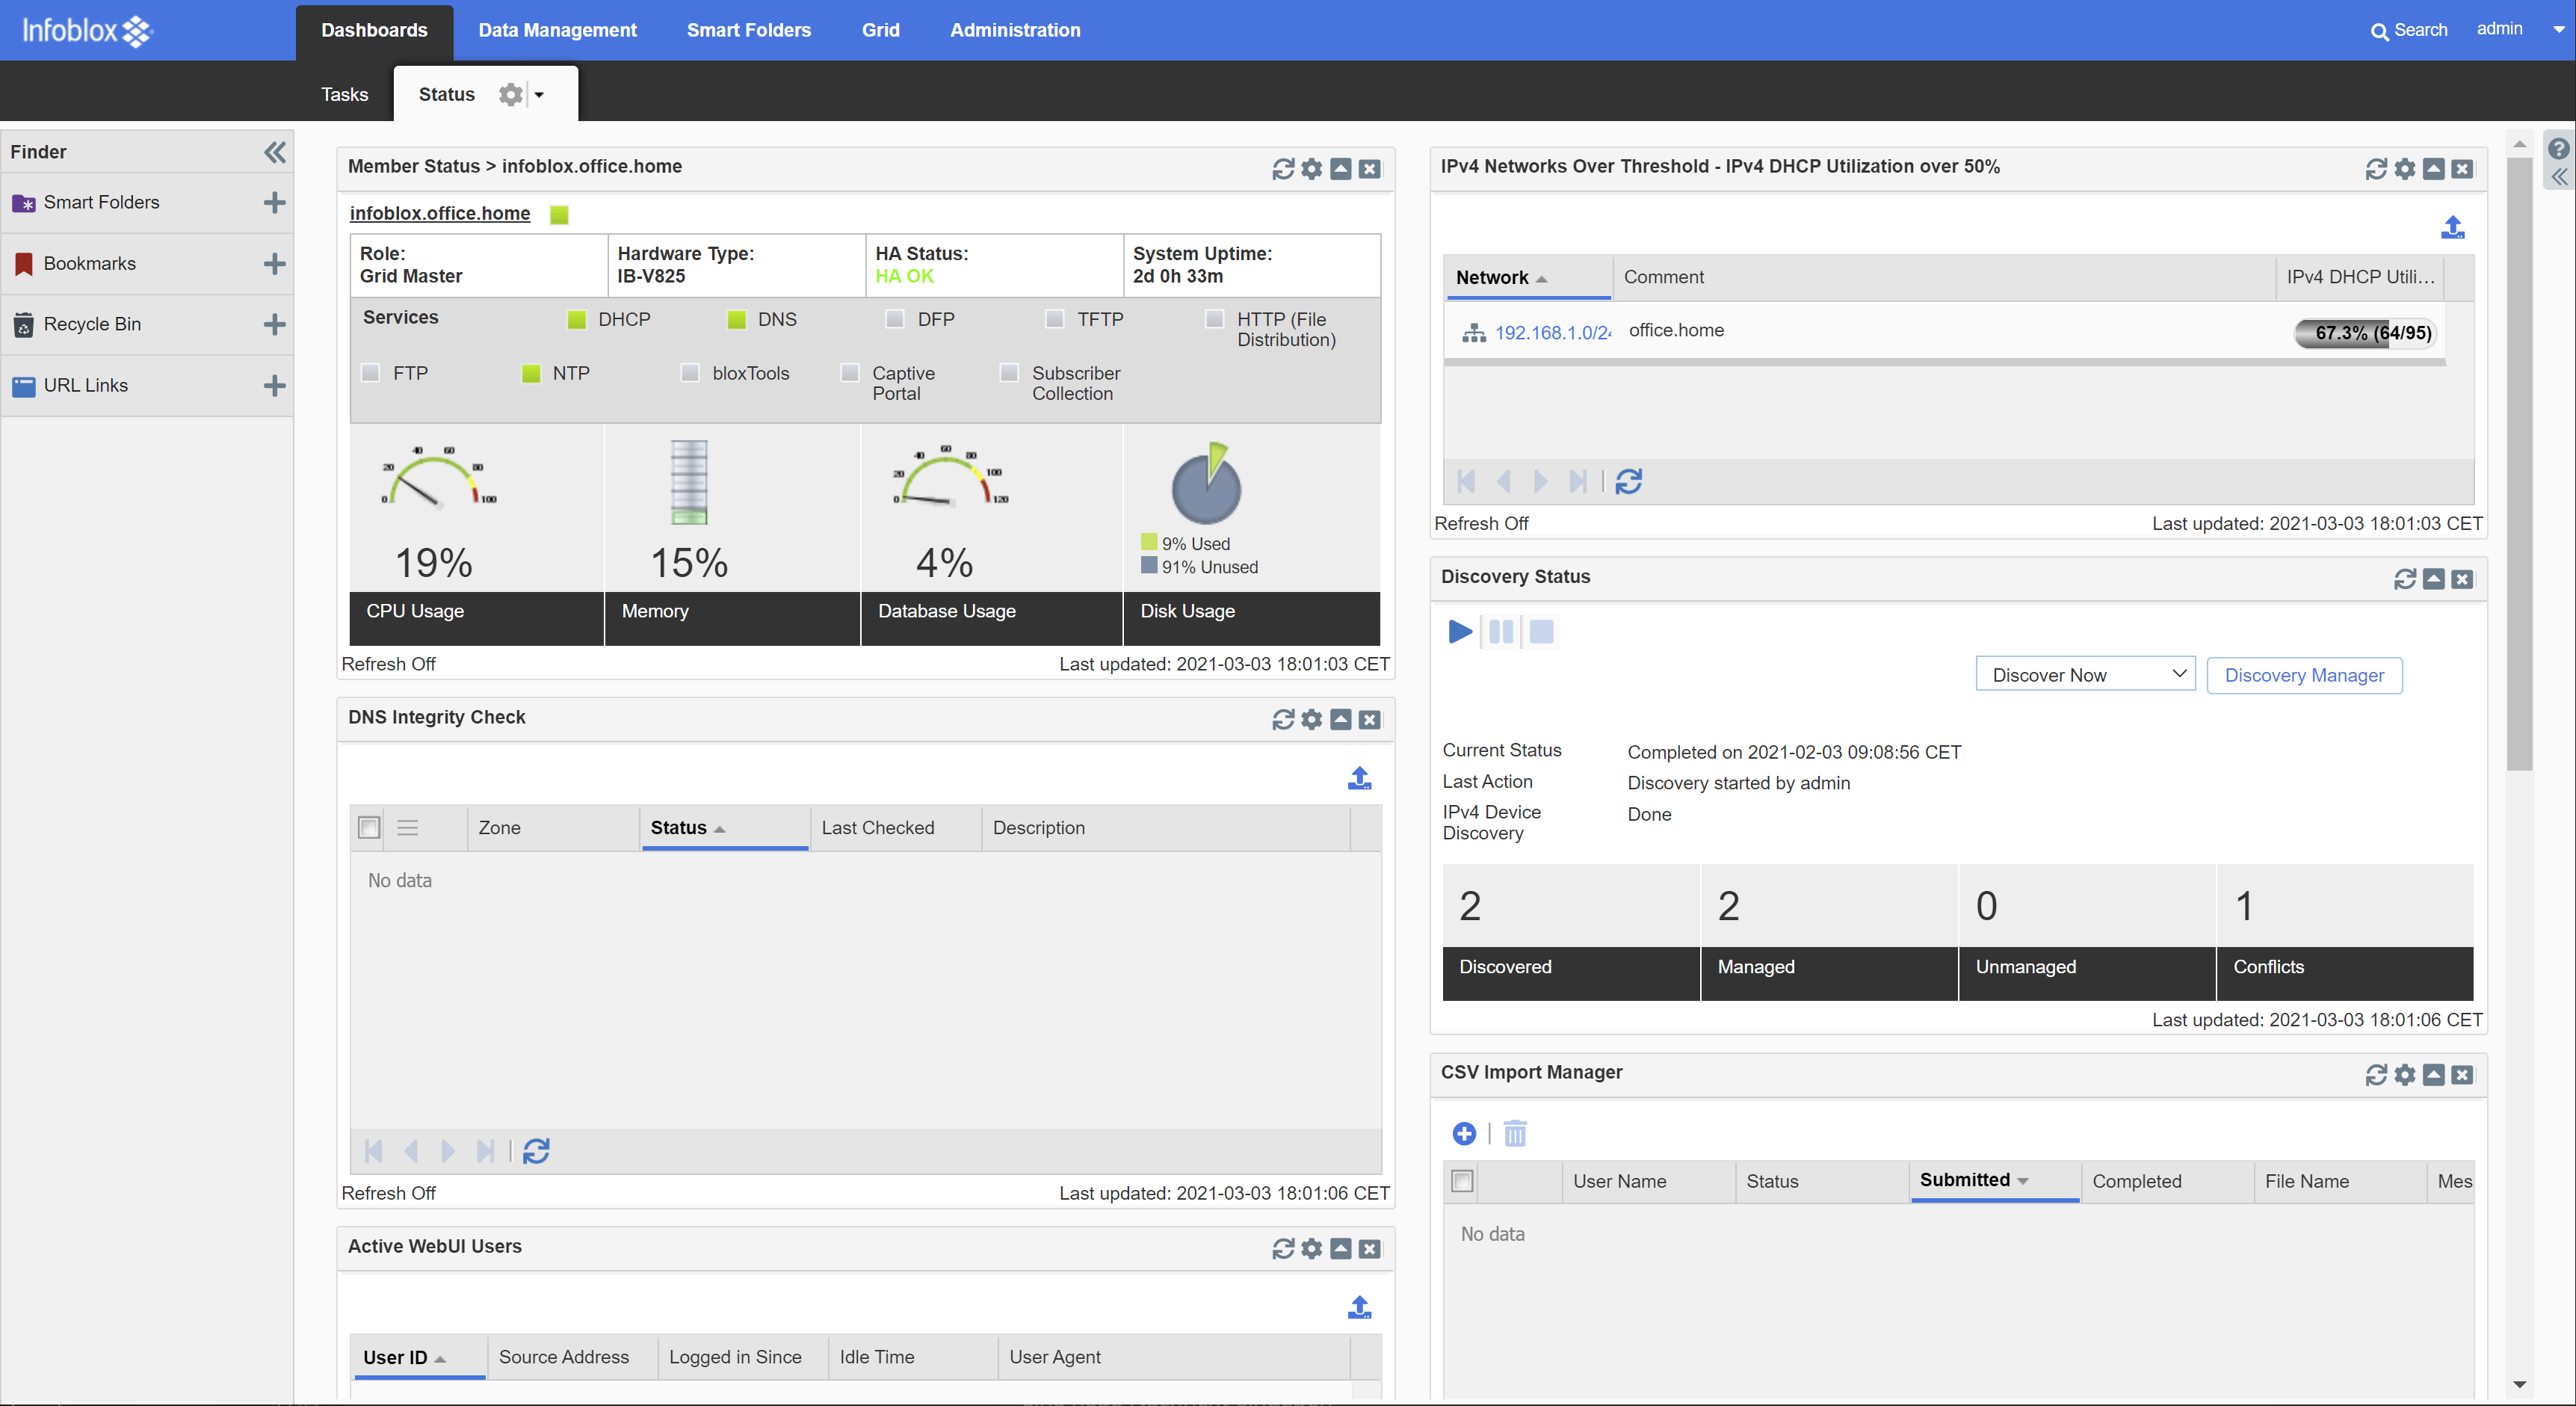
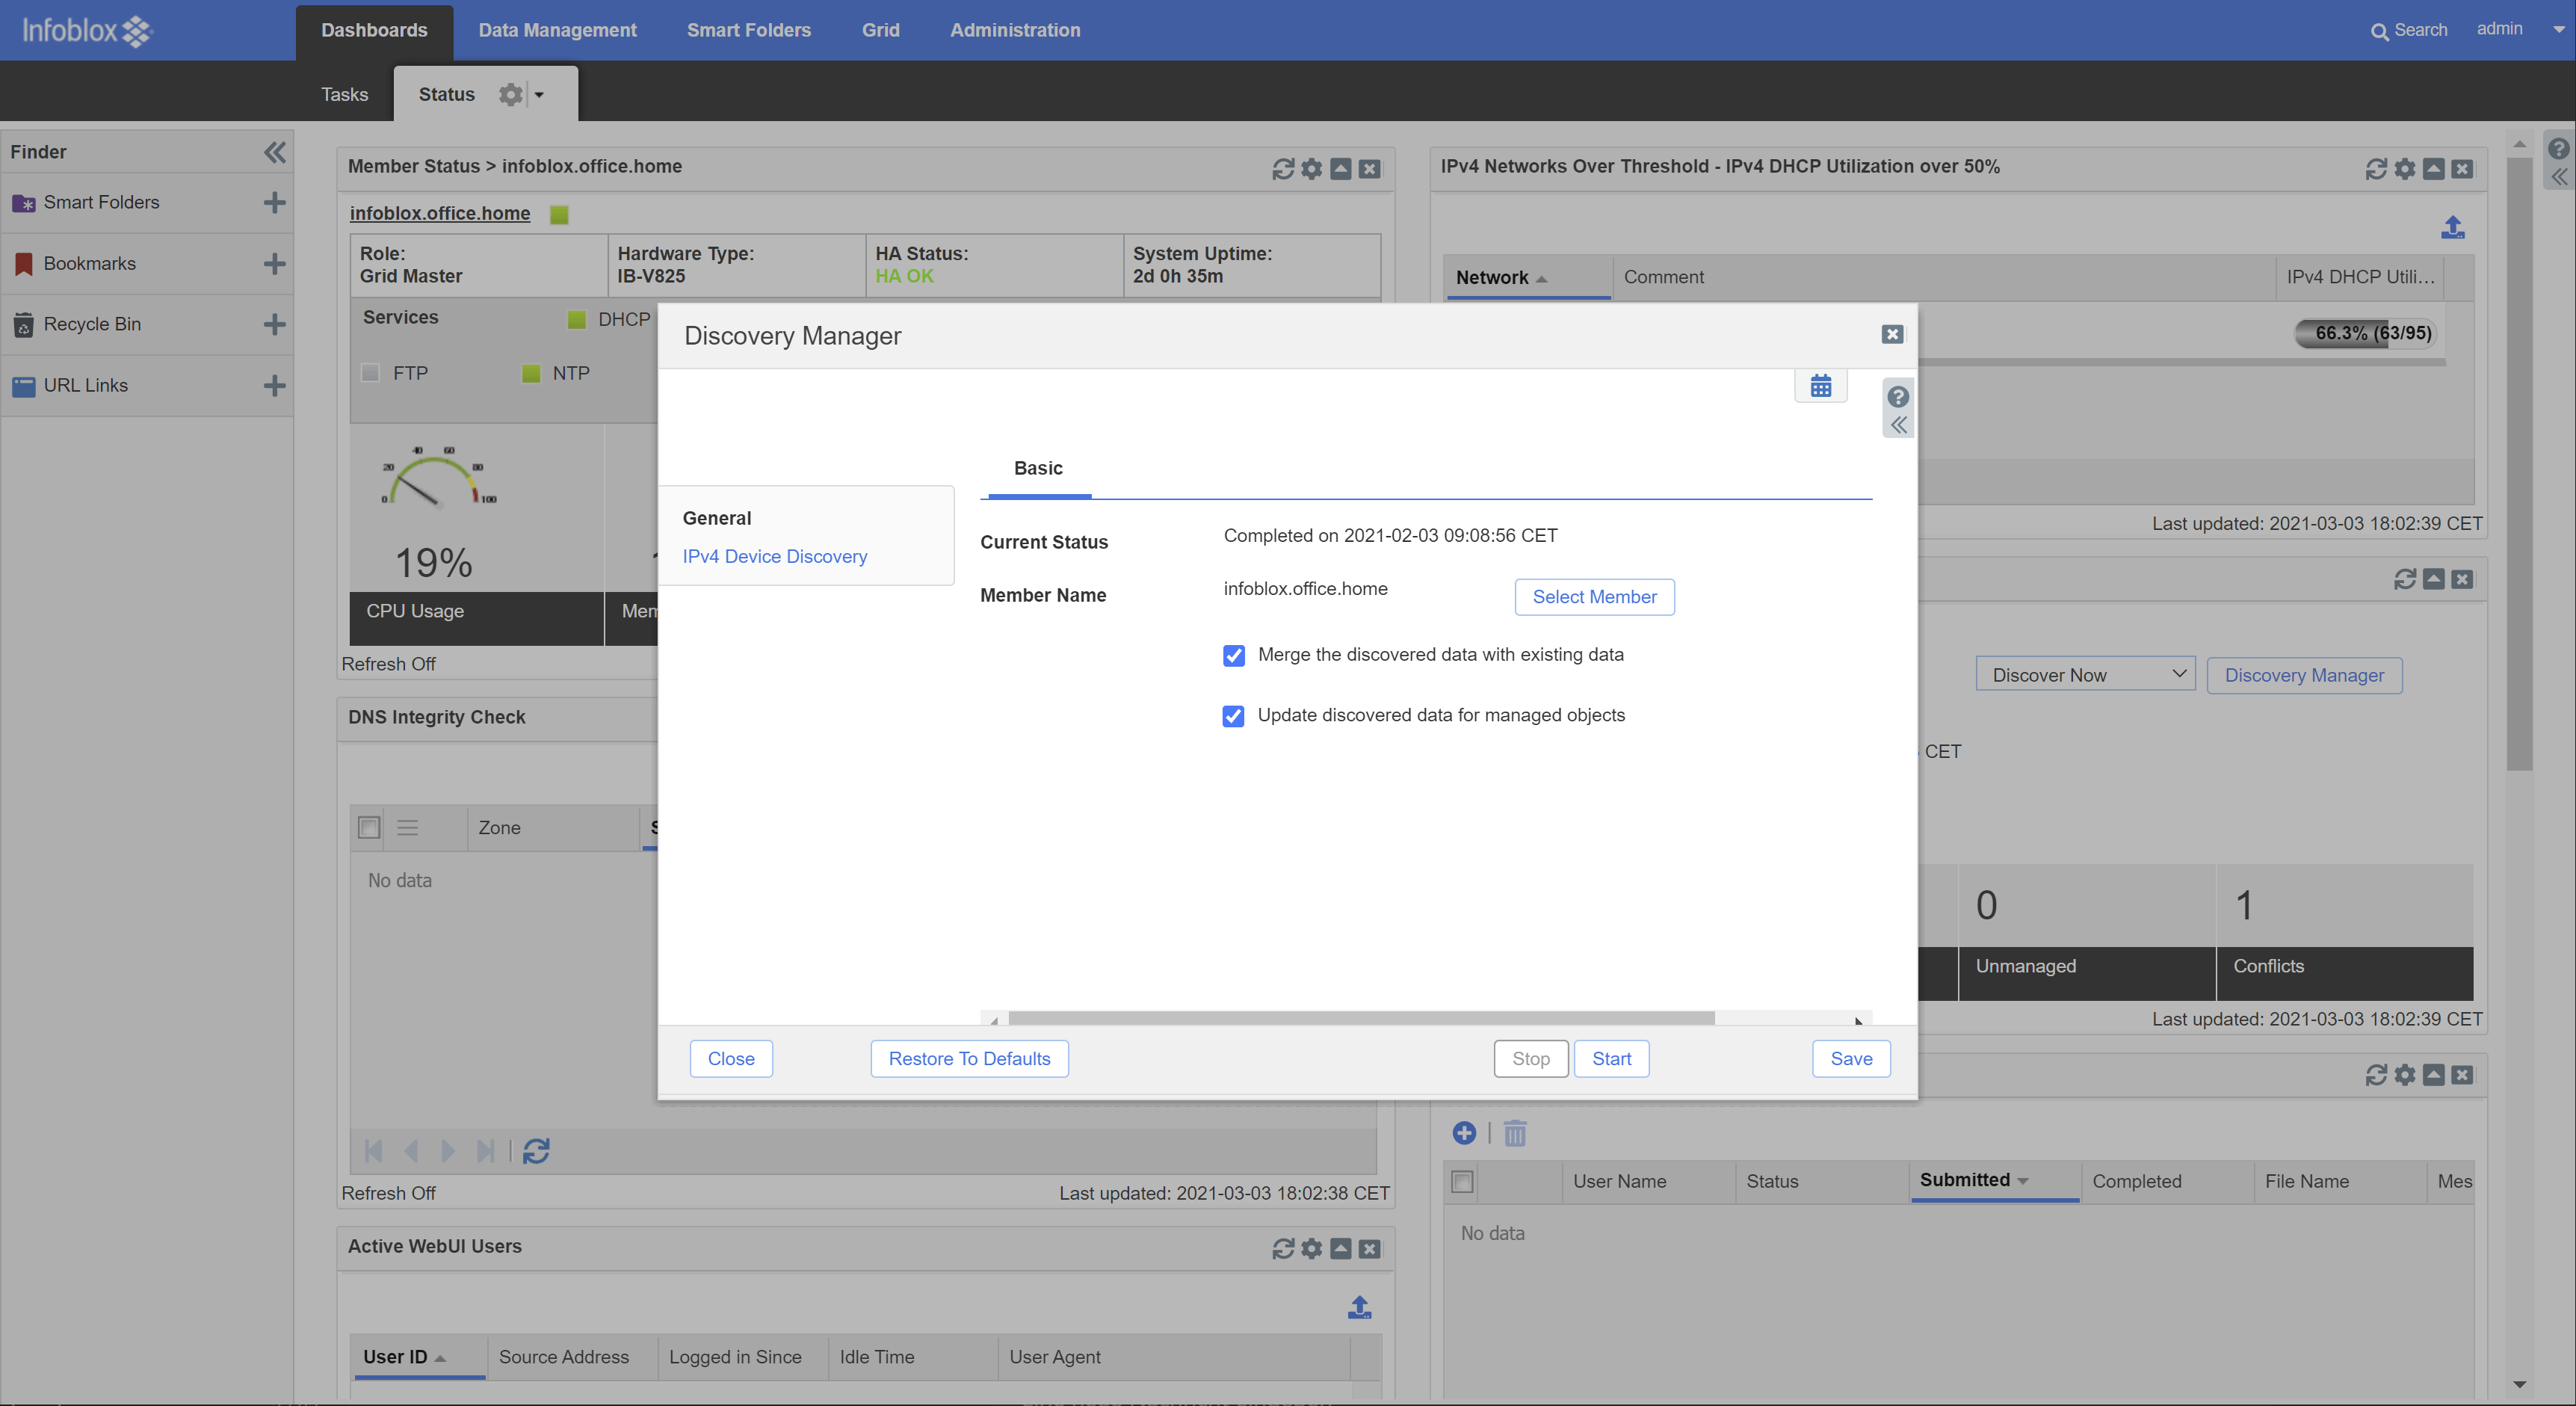
One very nice feature is the discovery wizard, whichs detects systems inside the different networks:
After completing all the management stuff I started with the IPAM side: You can ping a listed “free” area within the UI. Very useful!
VMware Integration:
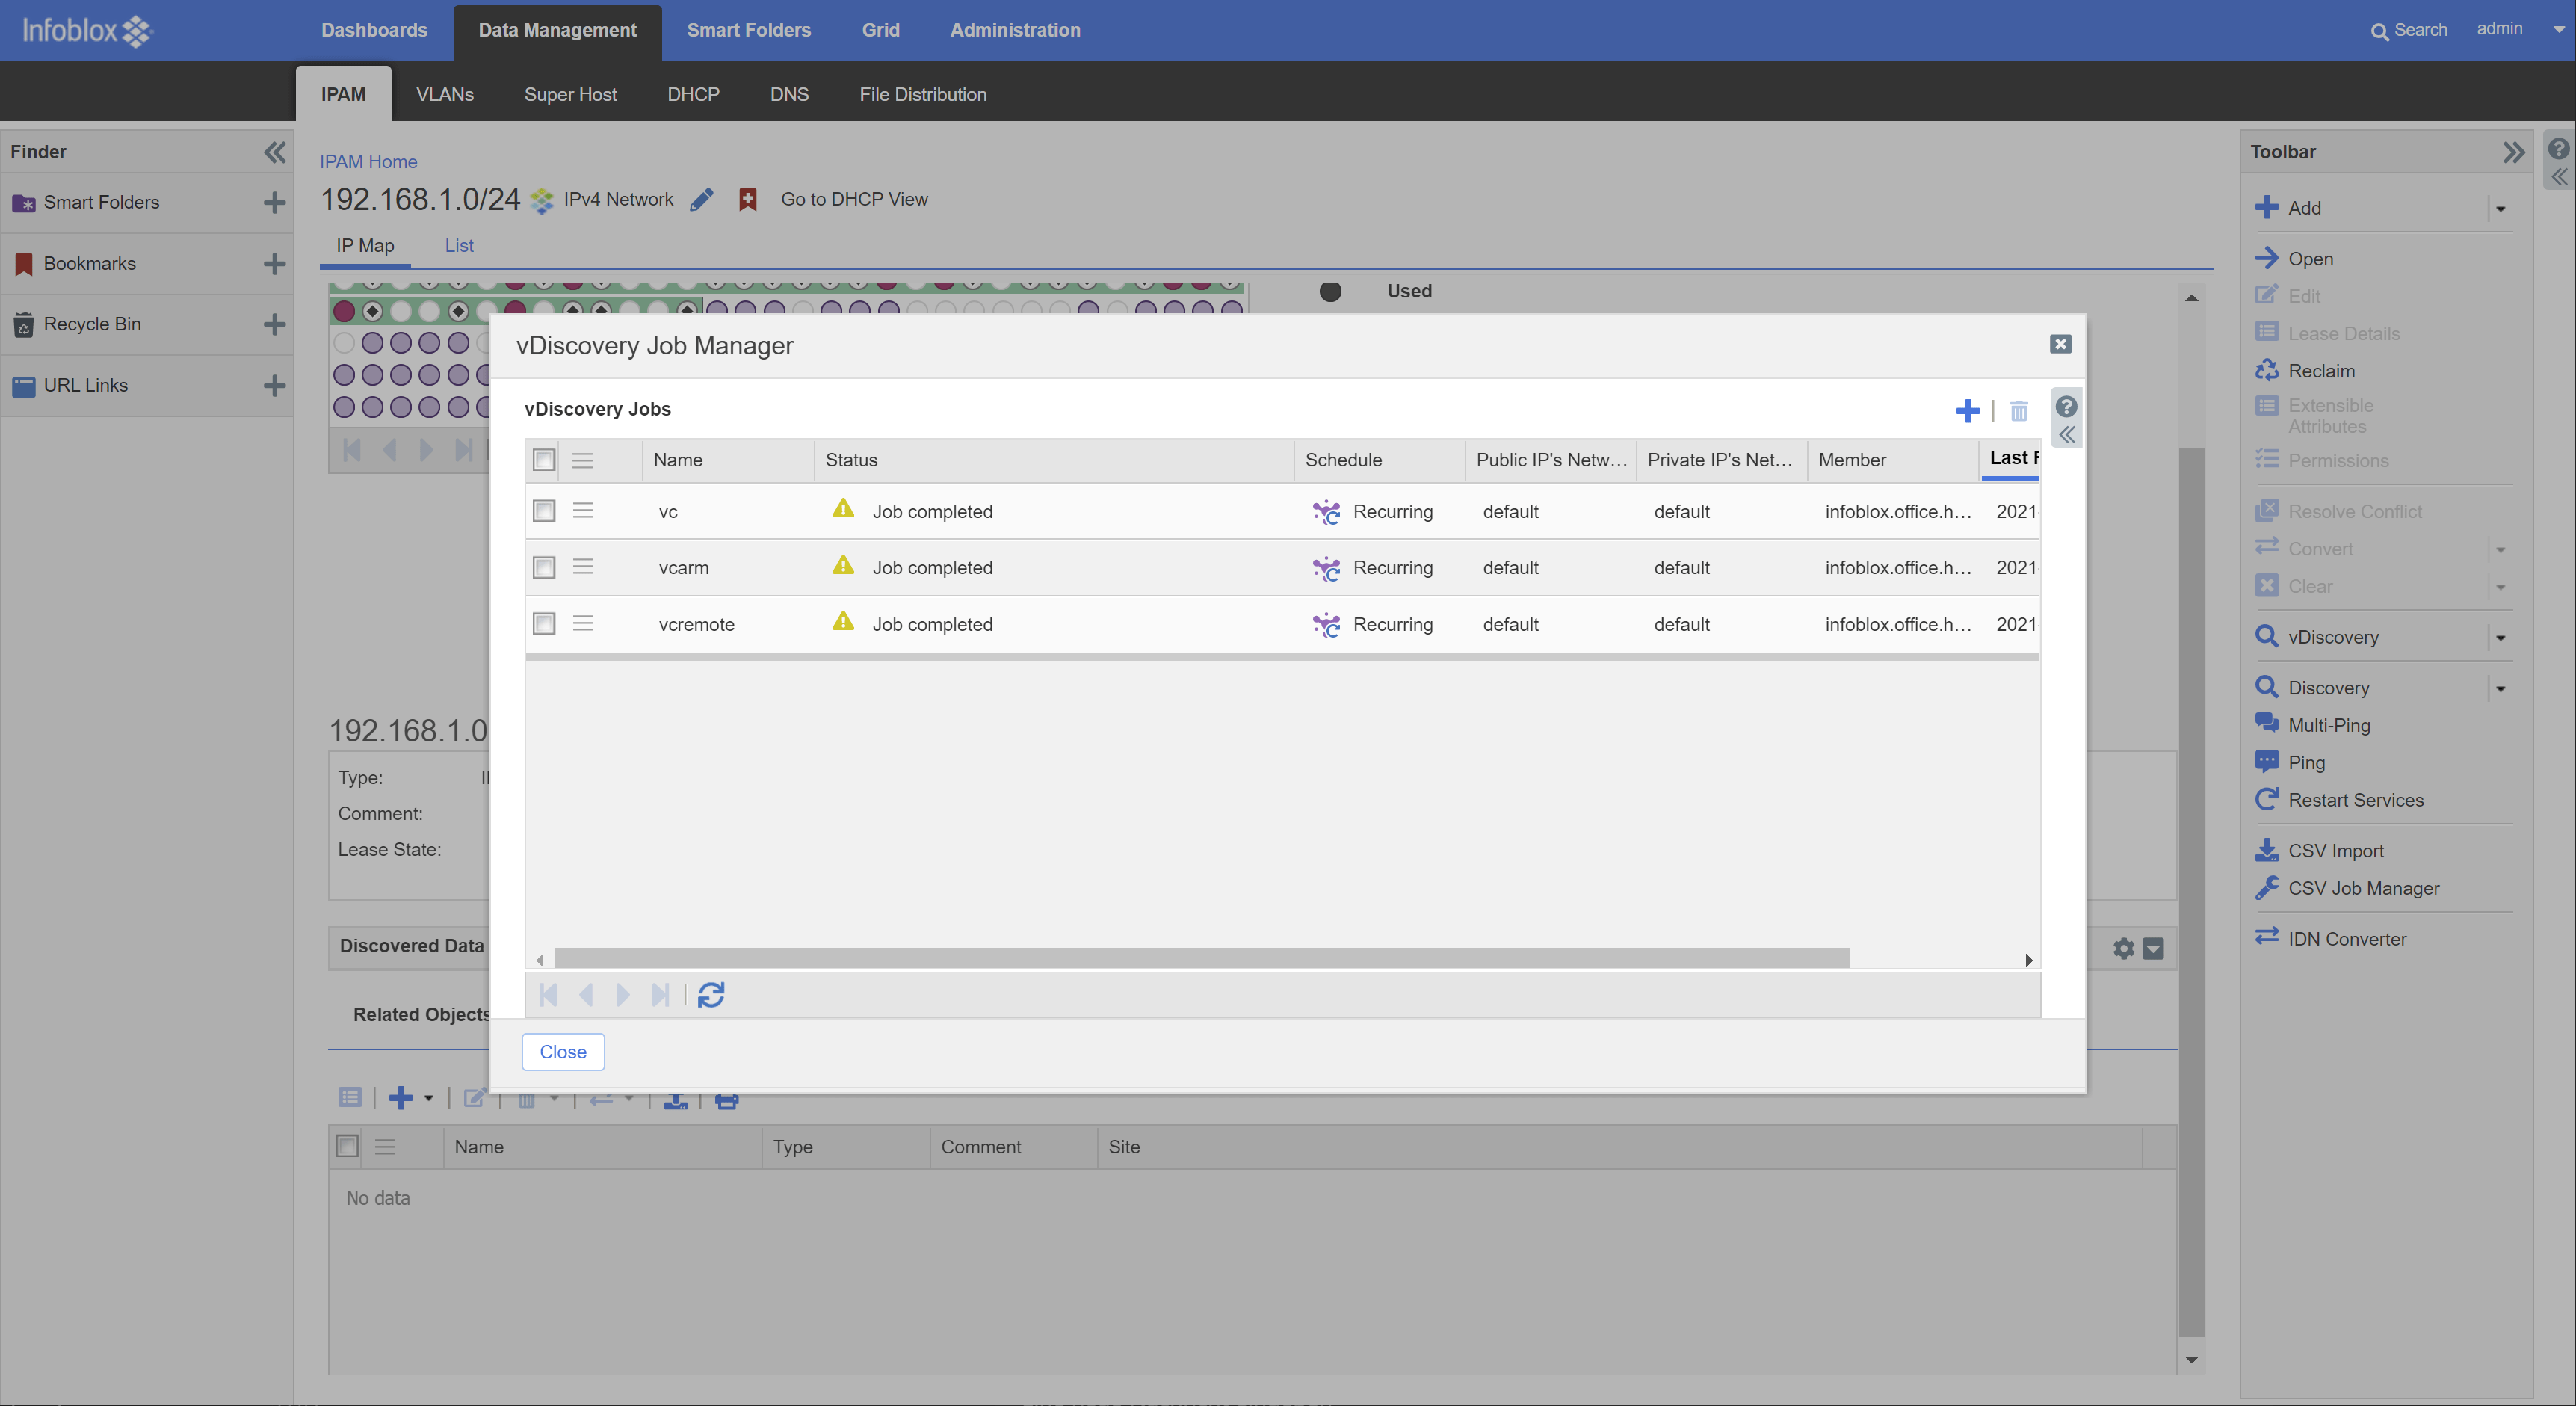
The infoblox is able to get information from all my vCenter systems via vDiscovery. Very cool. This can be done using the vDiscovery Wizard. You simply need to enter all vCenters with the credentials.
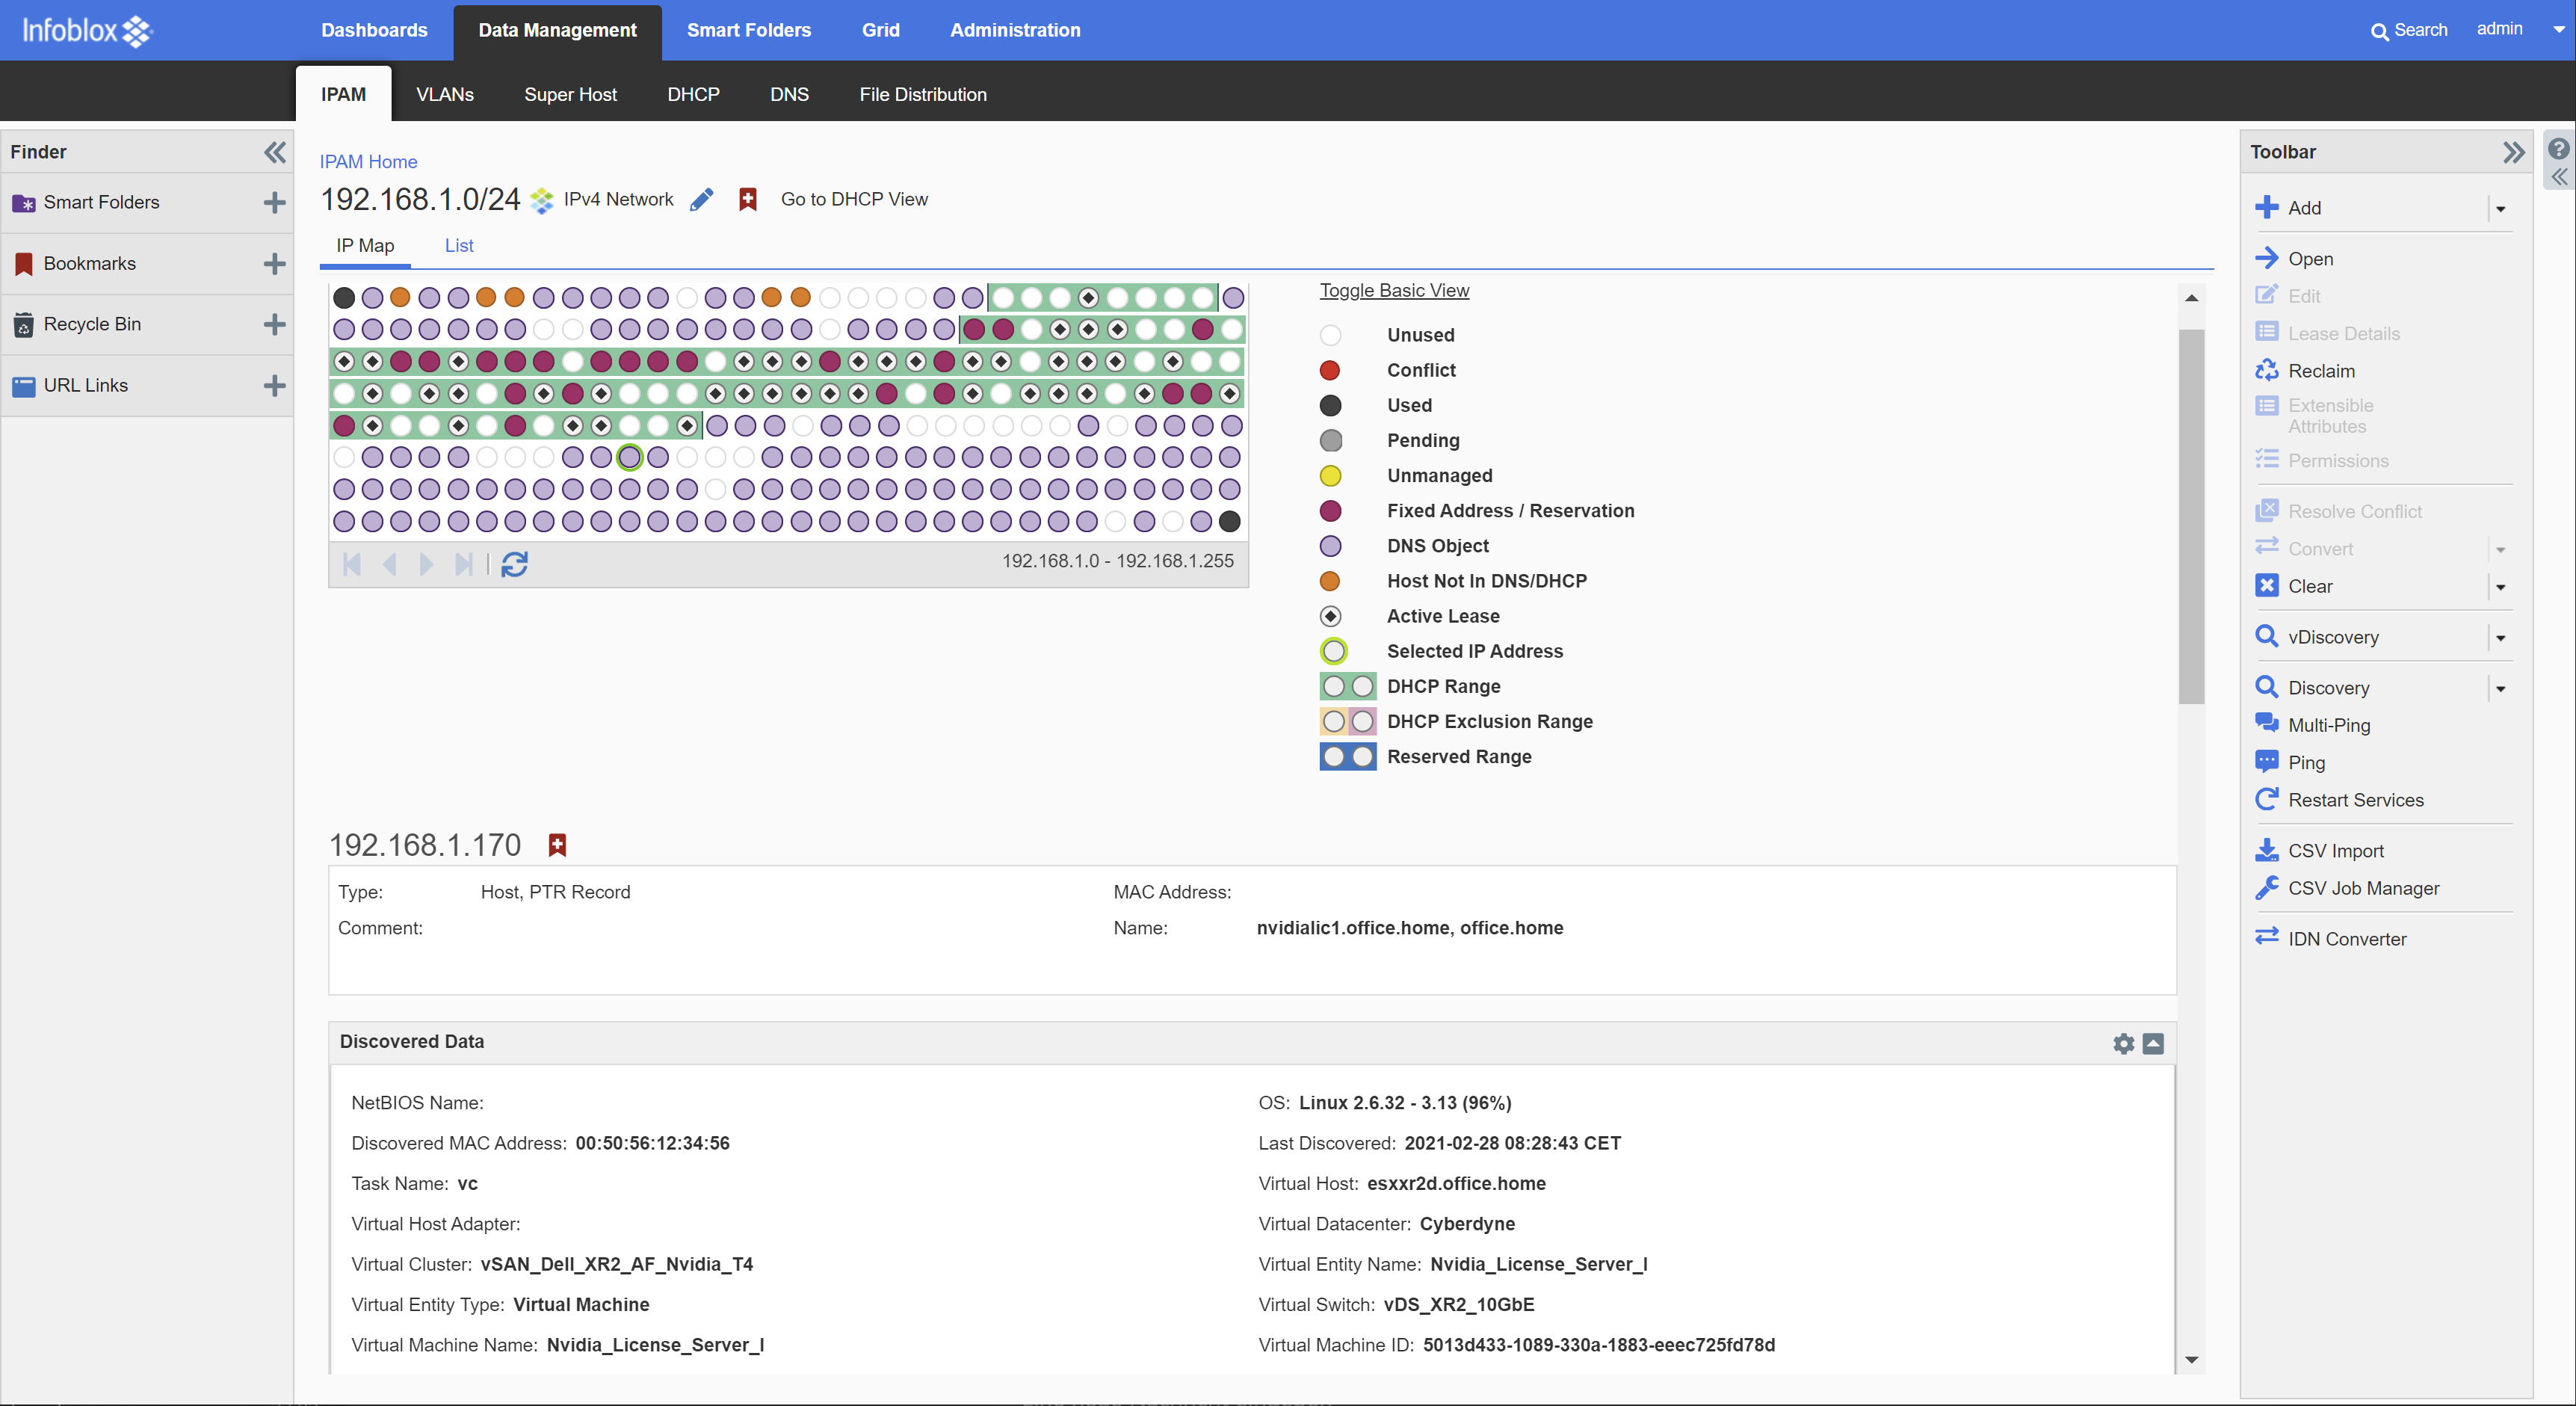
Those discovered information are visible to each IP address under “Discovered Data” (view can be modfied)

SSL:
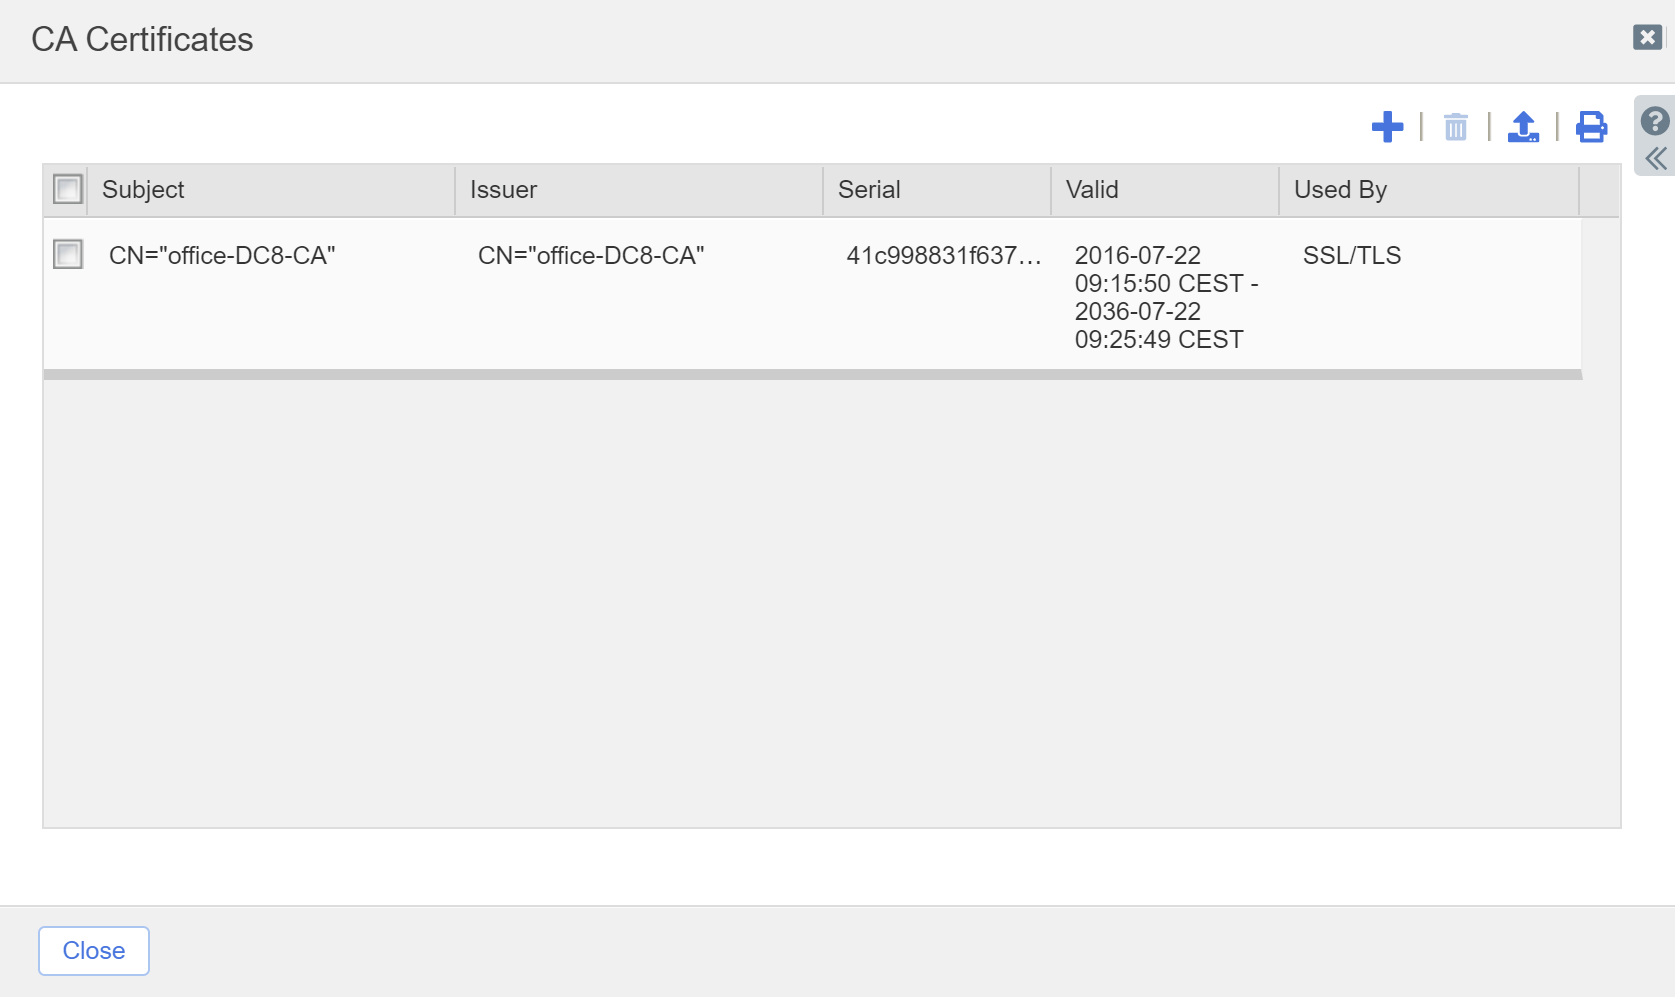
I wanted to replace the self signed certificate with my own CA based. First you need to upload the CA root certificate into the infoblox:
Next step: You need to create a certificate signing request. Fill out the form an save the csr.


I really like the Infoblox solution at my HomeLab! Next step: Professional documentation about all my HomeDCs….
Check out my next post: HomeLab Stage LIV: Datacenter Documentation