In the last episode I have written about my IPAM solution HomeLab Stage LIII: Infoblox, now I want to talk about my documentation. Yes, a Principal Architect is talking about datacenter documentation…. 🙂
Over the last years I have created my ultimate dream homelab. It has evolved from 1GbE up to now 100GbE with nearly 80 ESXi hosts and up to 800 VMs. Three datacenters around my house several racks and hundreds of connections. How to document it properly?
I am using the Netbox solution running as a SaaS service provided from my colleague and friend Lukasz. He is replicating the data around germany, so why not using it?
What is NetBox?
NetBox is an open source web application designed to help manage and document computer networks. NetBox was developed specifically to address the needs of network and infrastructure engineers. It encompasses the following aspects of network management:
- IP address management (IPAM) – IP networks and addresses, VRFs, and VLANs (I am using Infoblox for IPAM inside my HomeLab)
- Equipment racks – Organized by group and site
- Devices – Types of devices and where they are installed
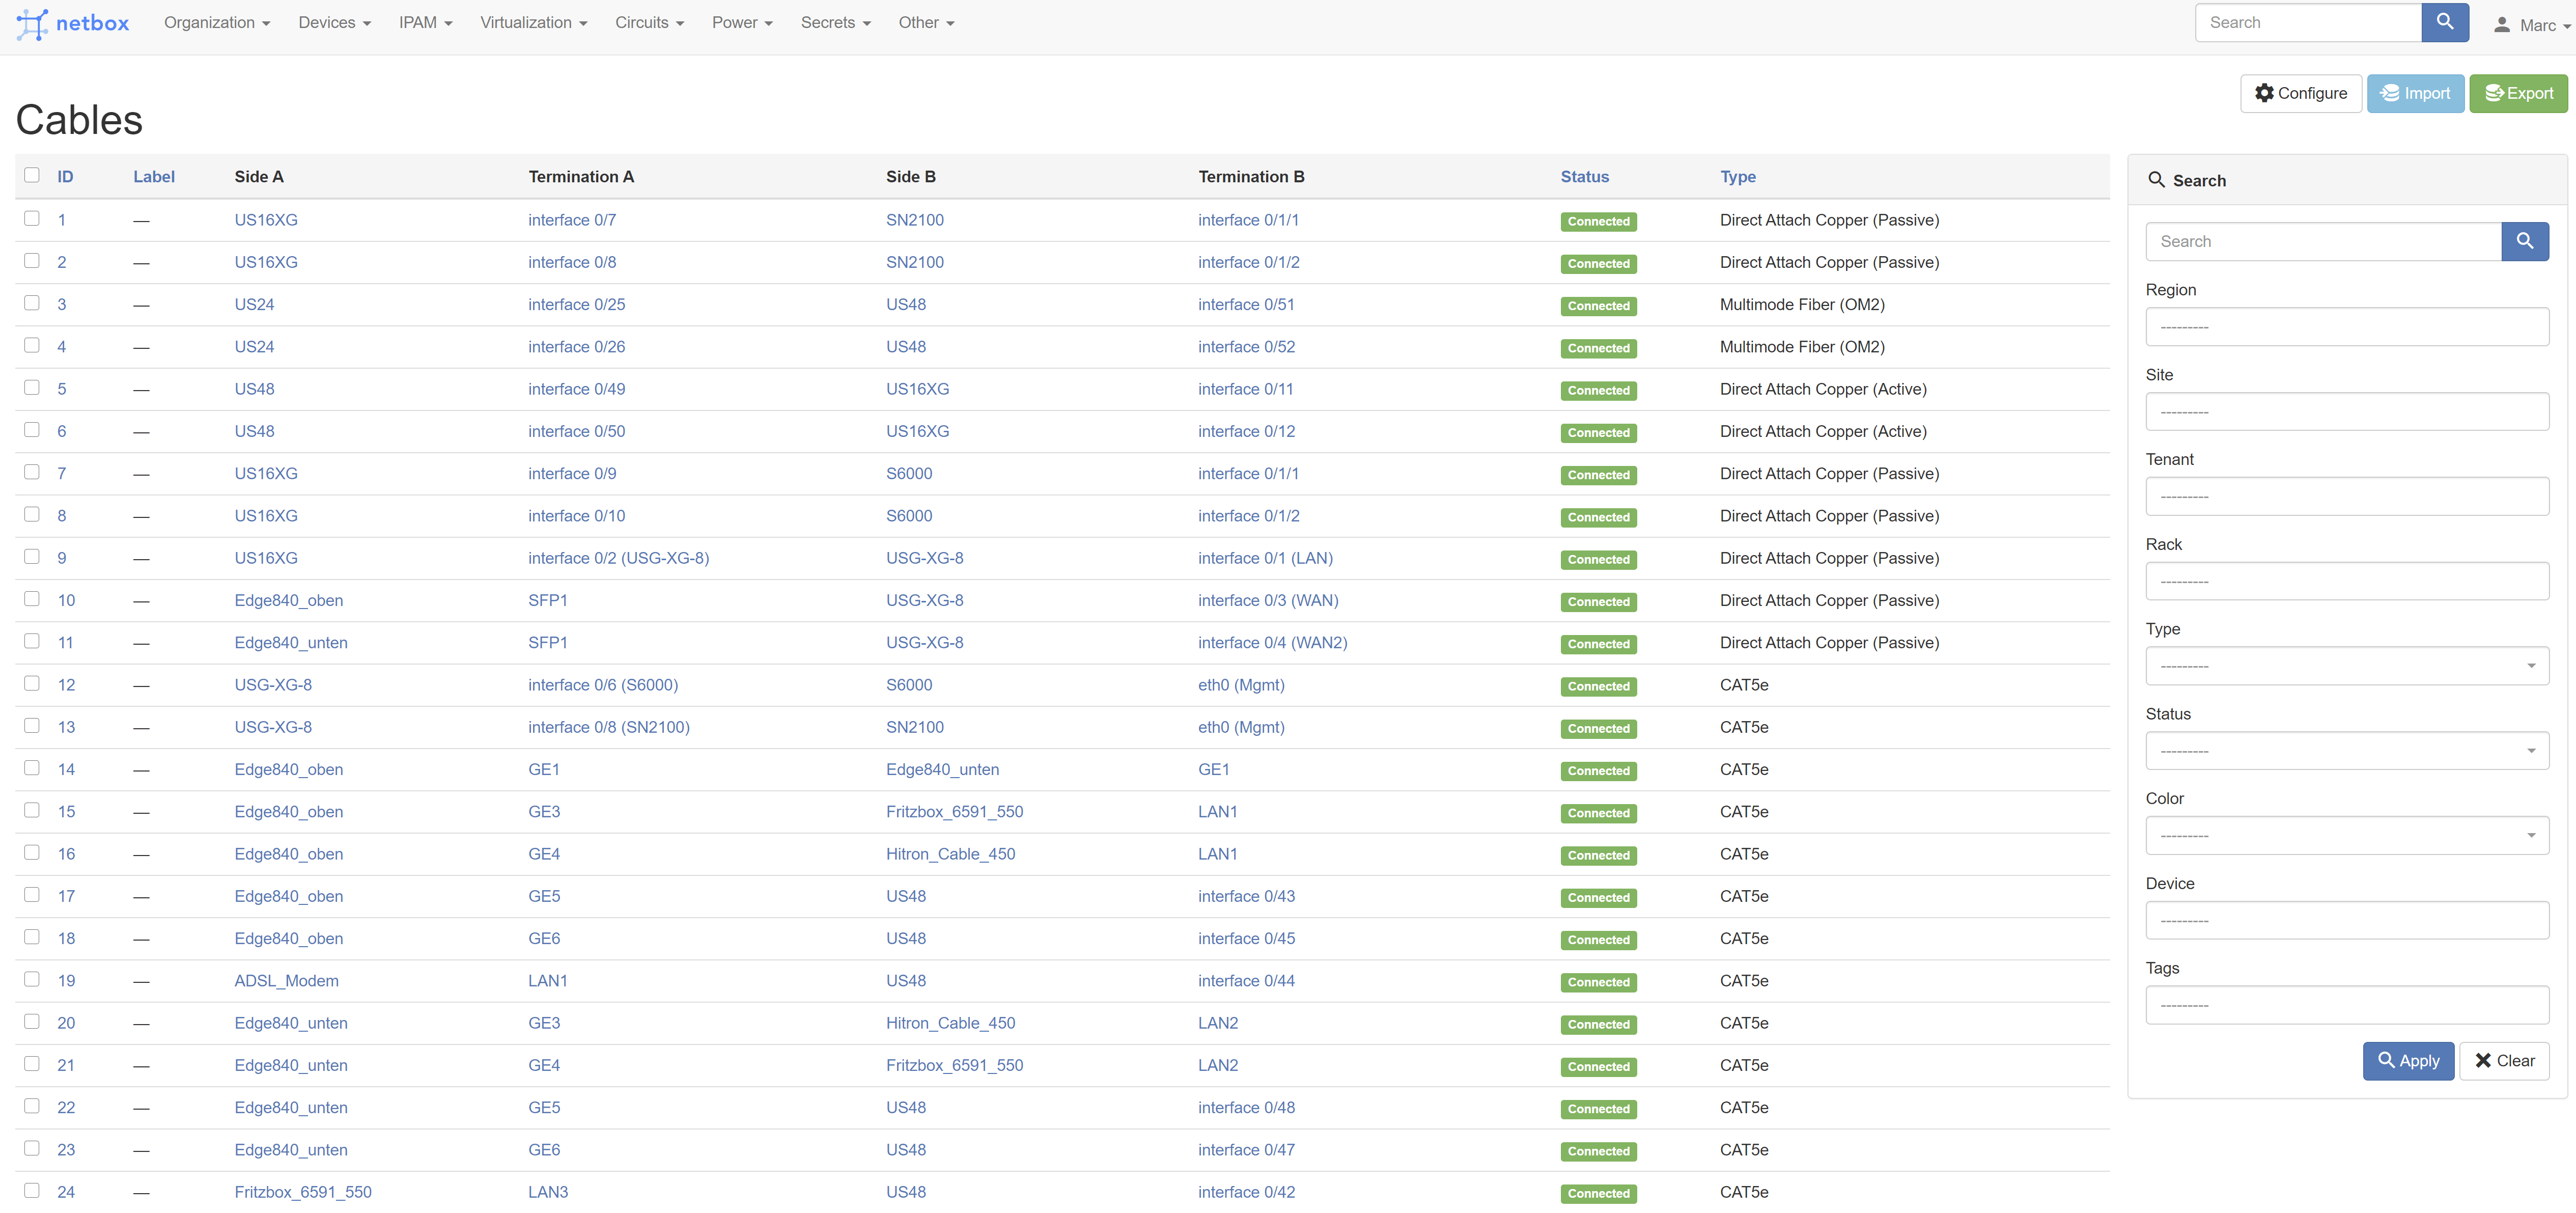
- Connections – Network, console, and power connections among devices
- Virtualization – Virtual machines and clusters
- Data circuits – Long-haul communications circuits and providers
- Secrets – Encrypted storage of sensitive credentials
What NetBox Is Not?
While NetBox strives to cover many areas of network management, the scope of its feature set is necessarily limited. This ensures that development focuses on core functionality and that scope creep is reasonably contained. To that end, it might help to provide some examples of functionality that NetBox does not provide:
- Network monitoring (I am using the VMware vRealize Familiy)
- DNS server (I am also using my Infoblox)
- RADIUS server (I am using my Ubiquiti environment)
Sites, Regions and Racks
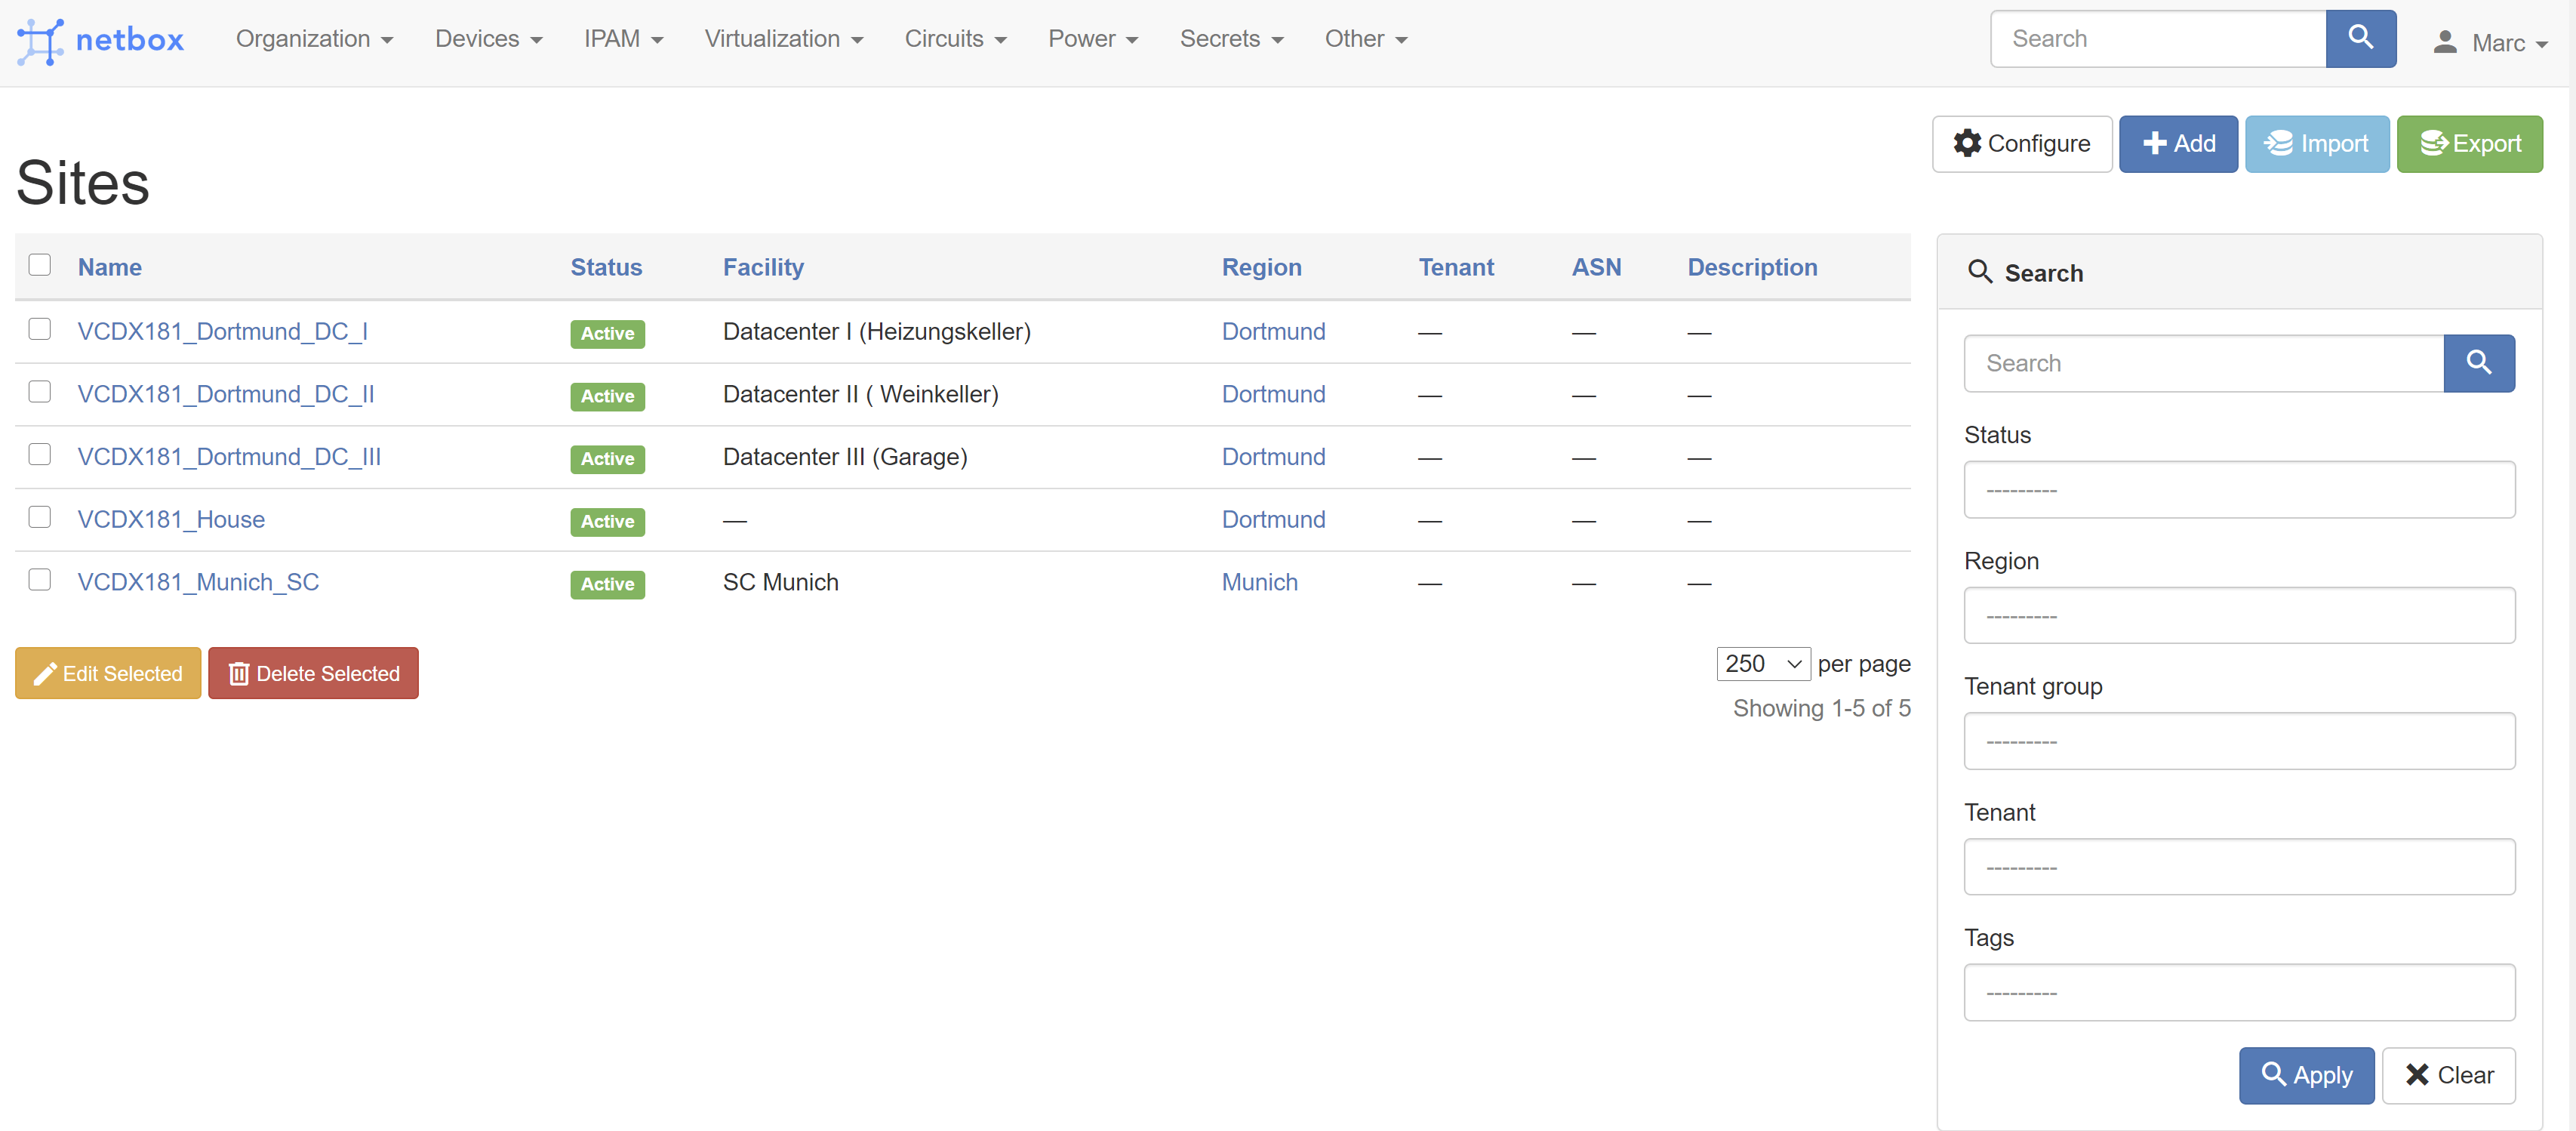
The first thing I have created inside my netbox instance are my different sites:
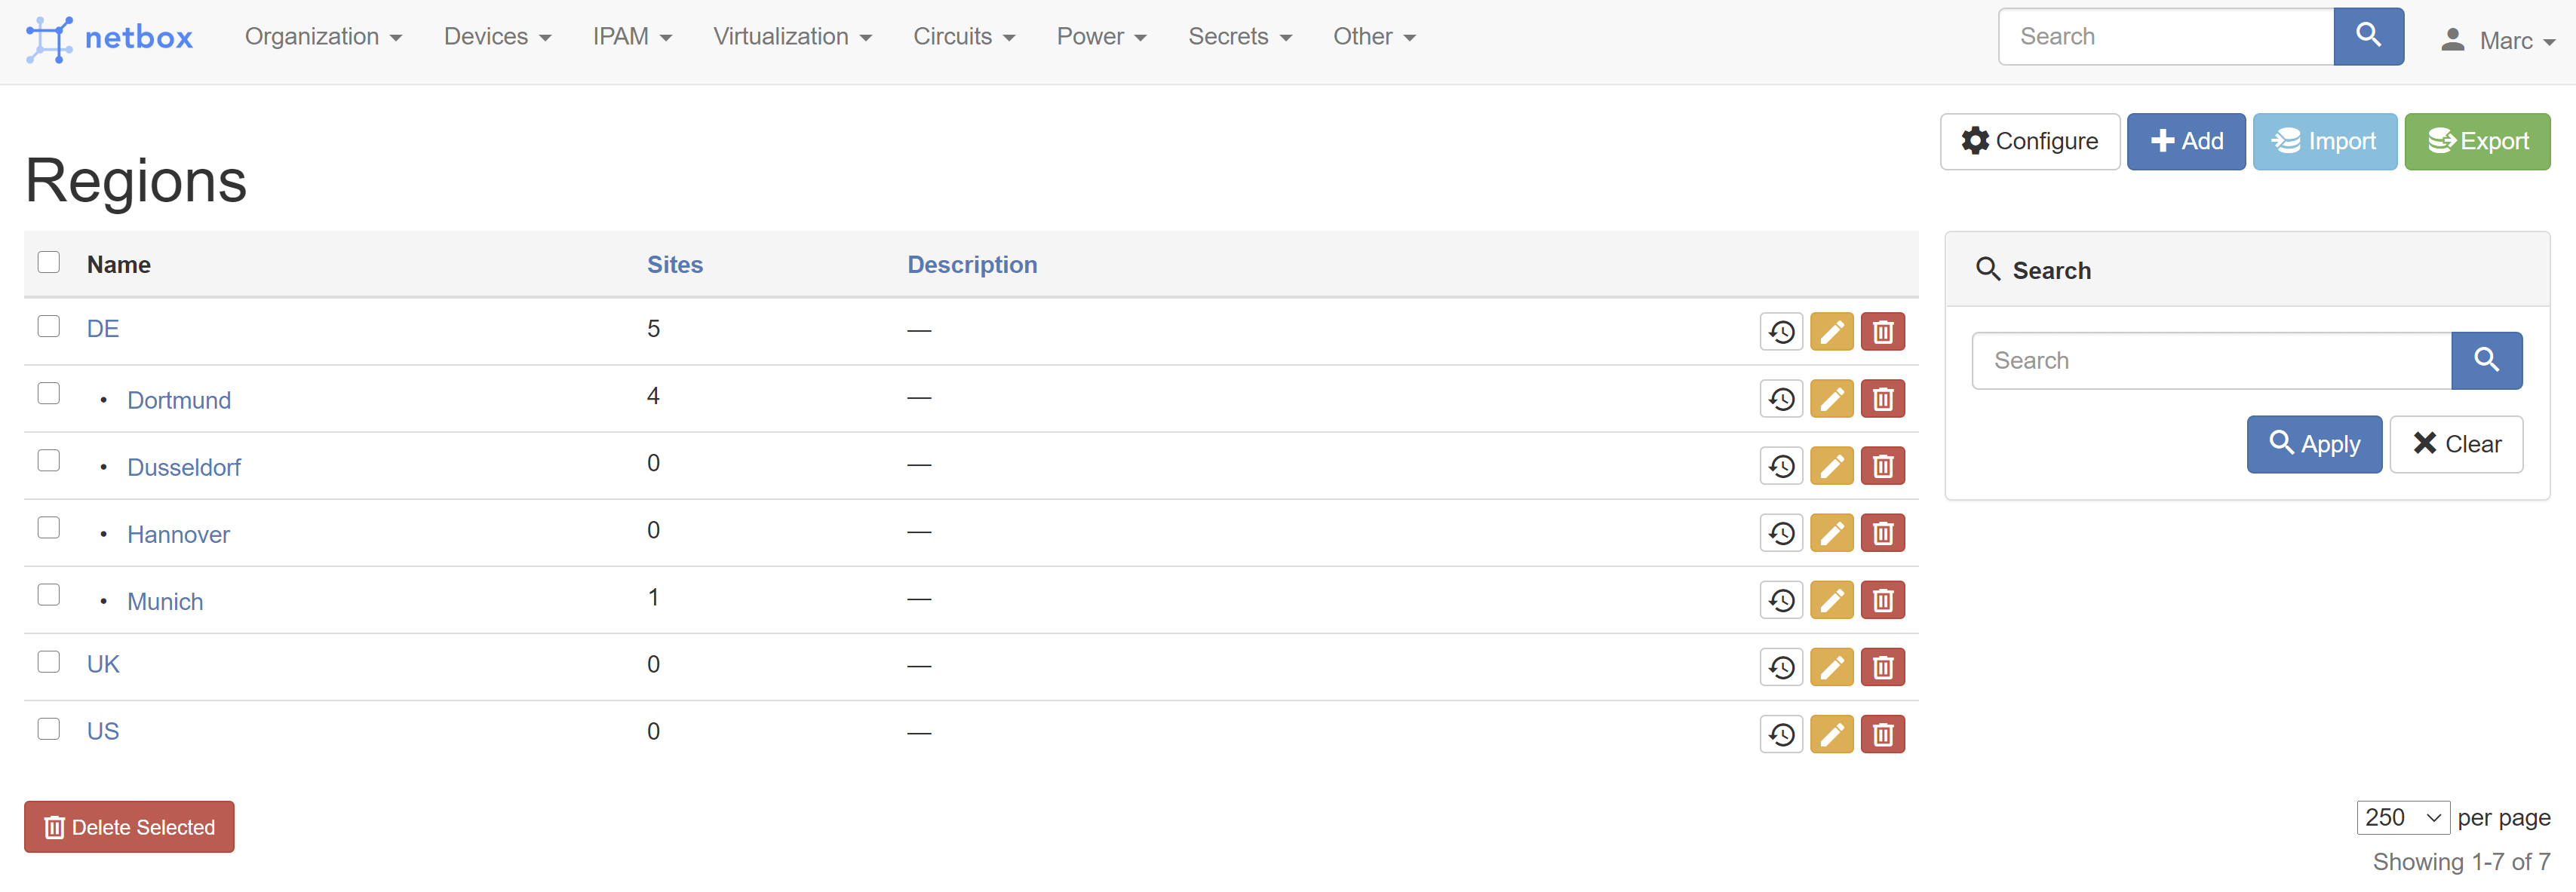
Next step: Creating regions, where you have hardware equipment or you have planned stuff:
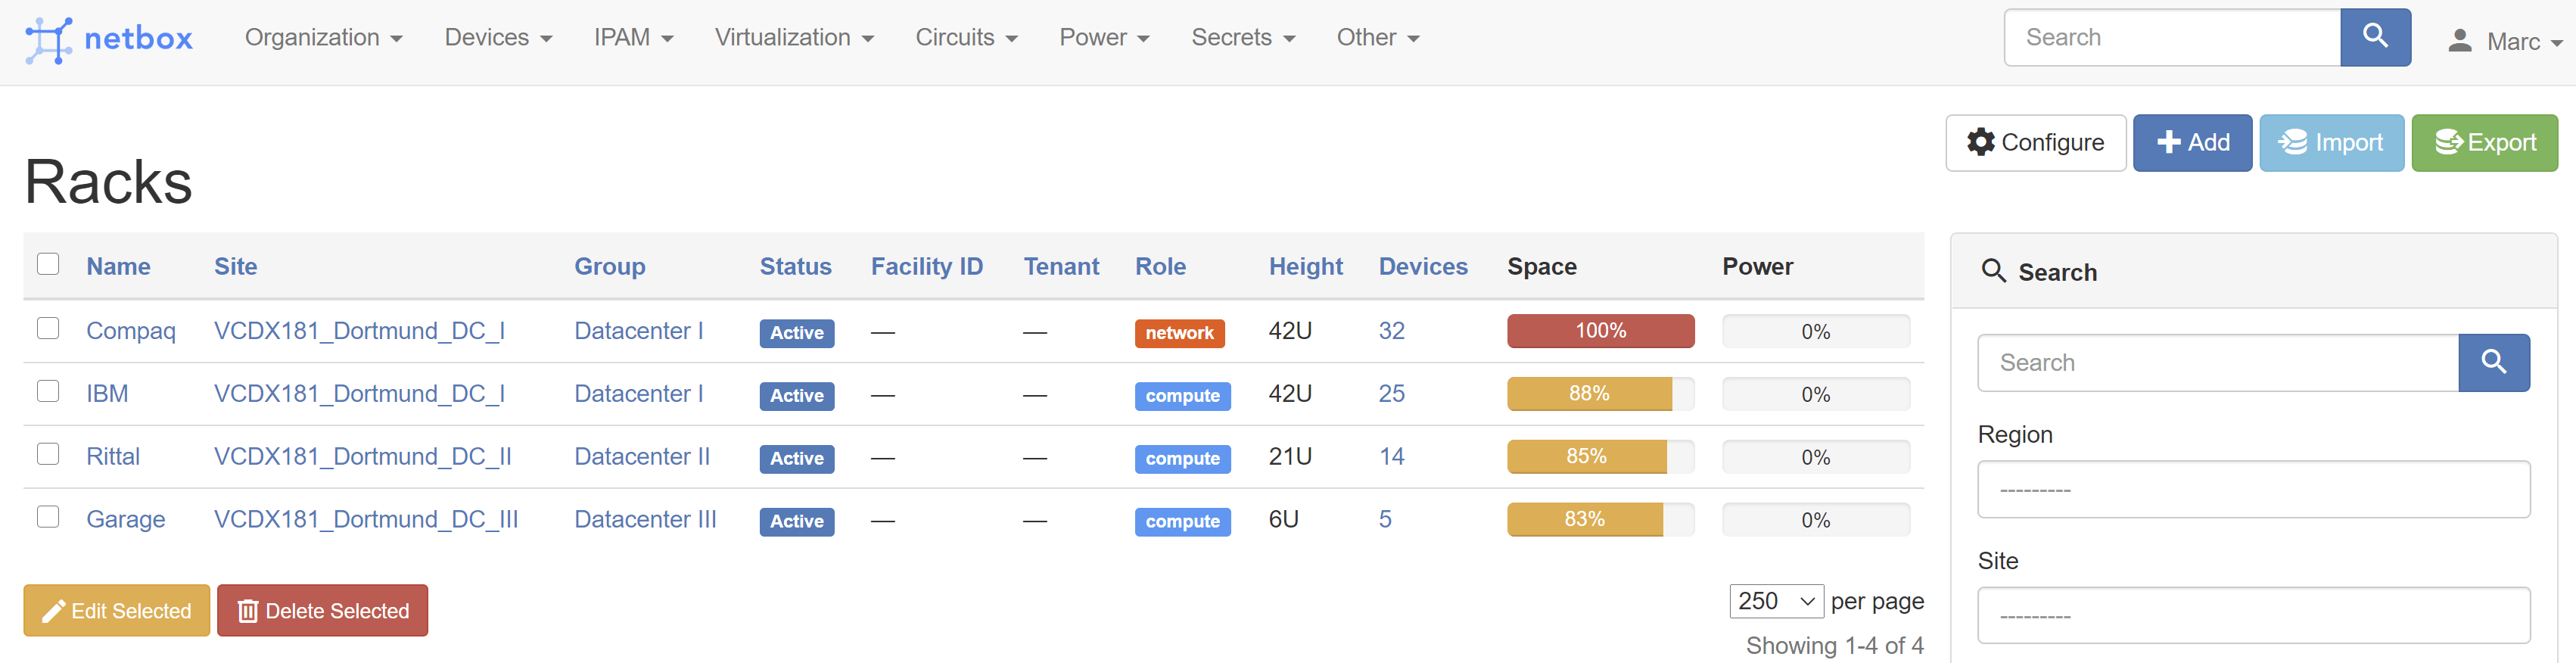
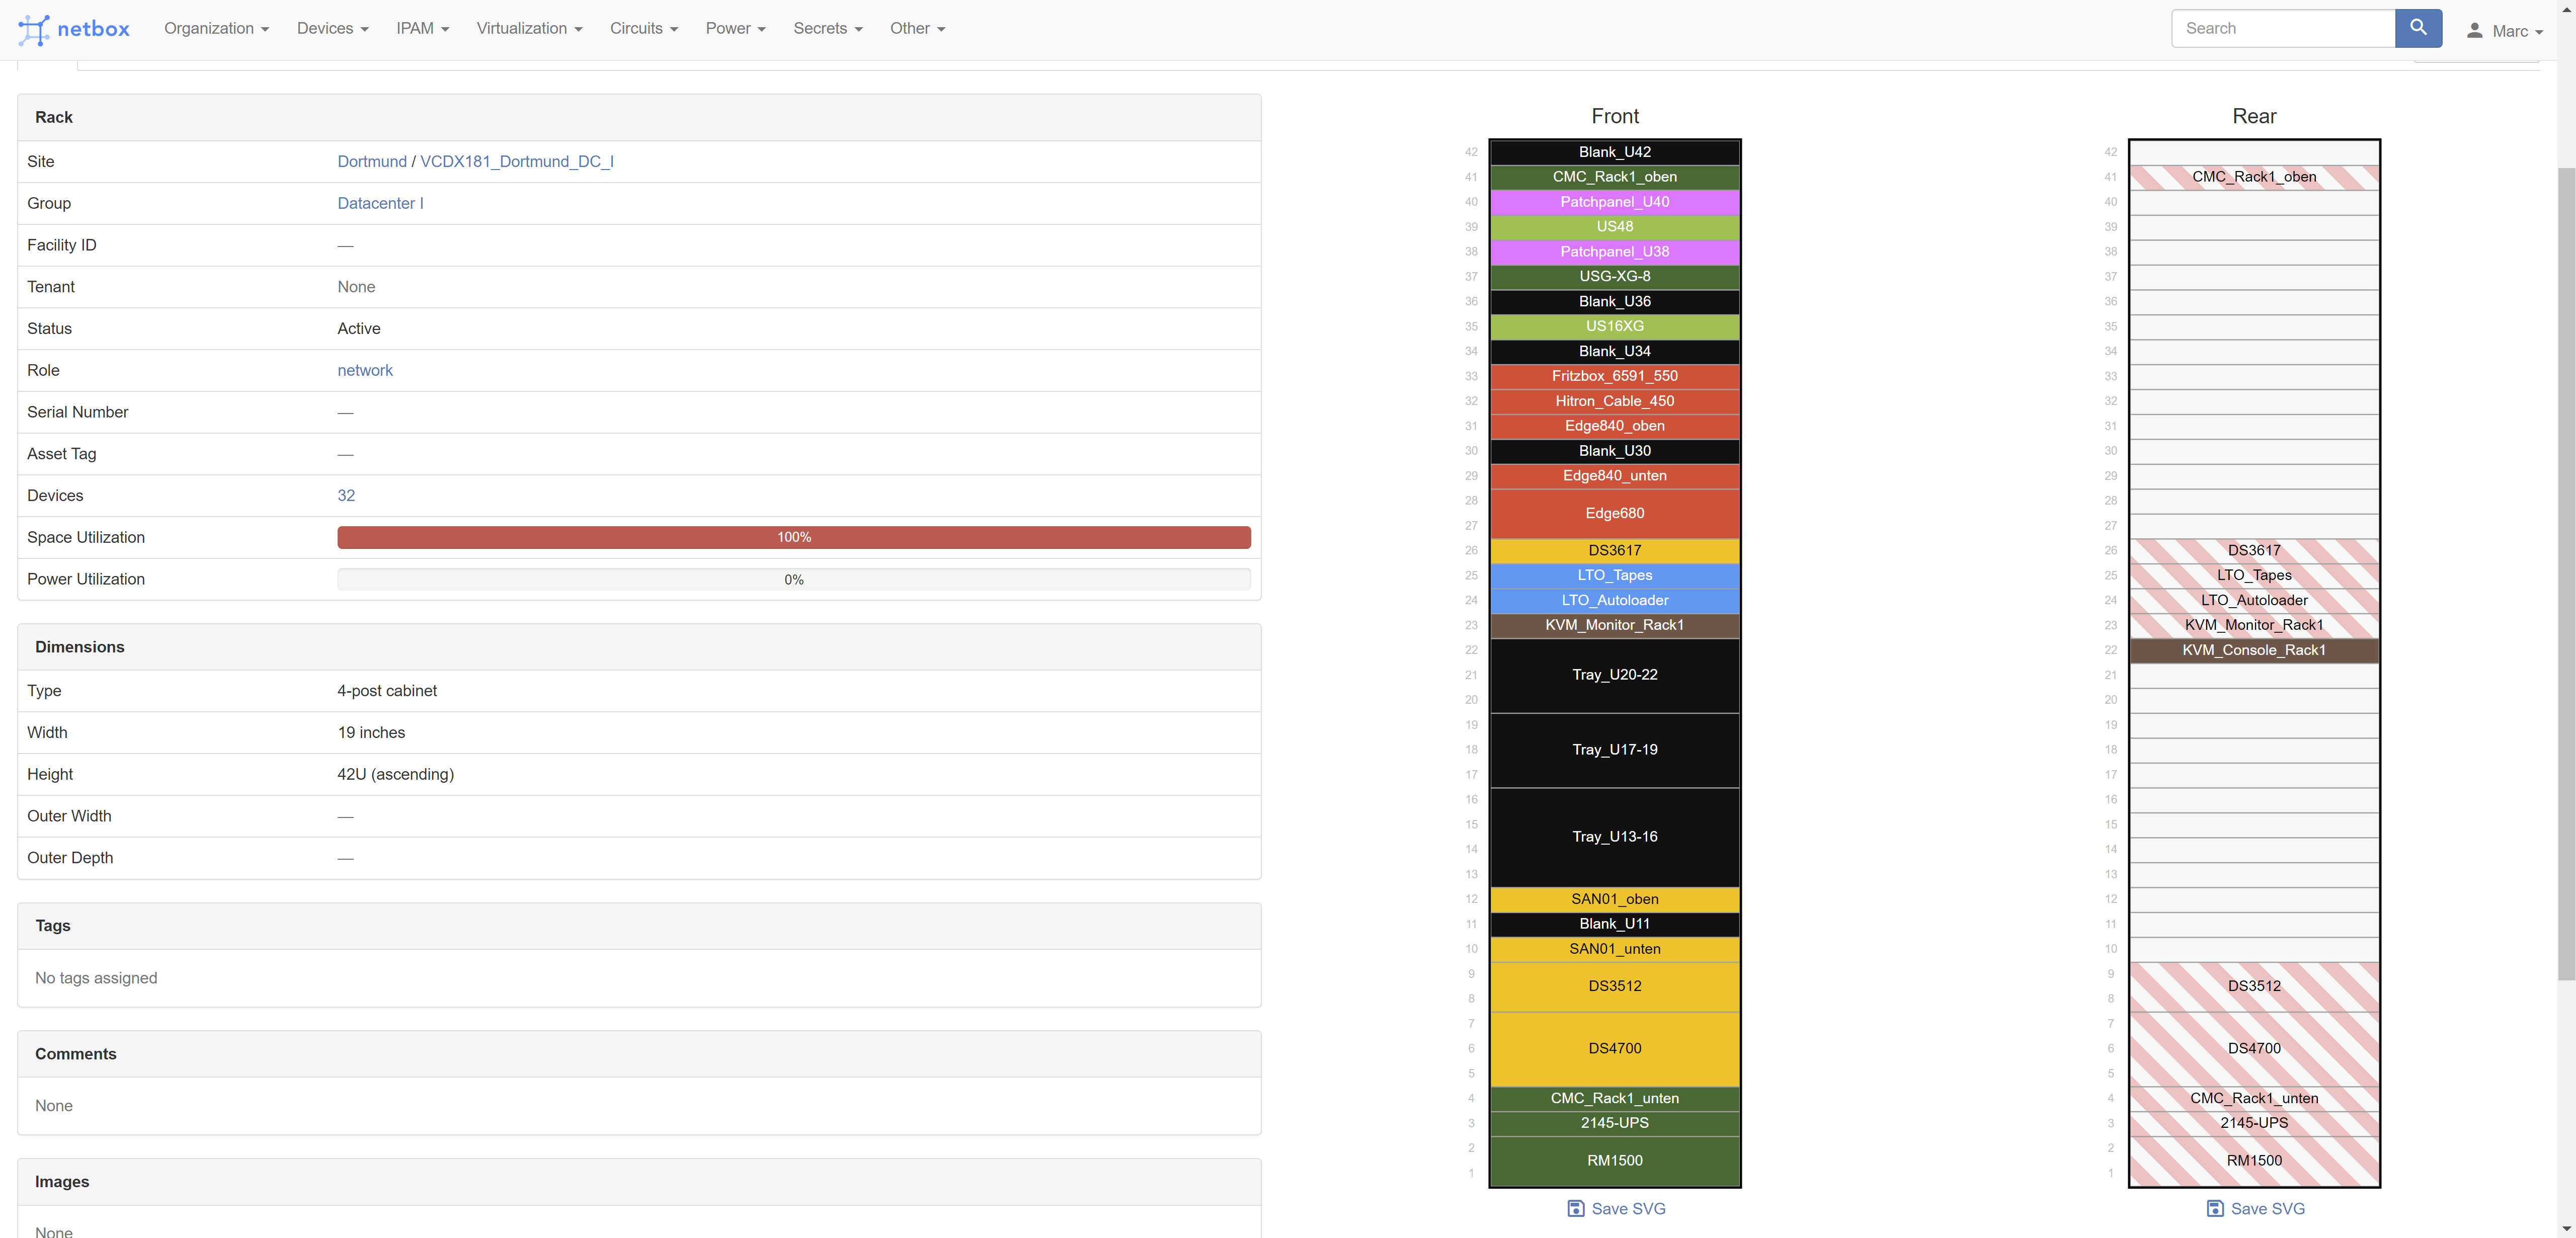
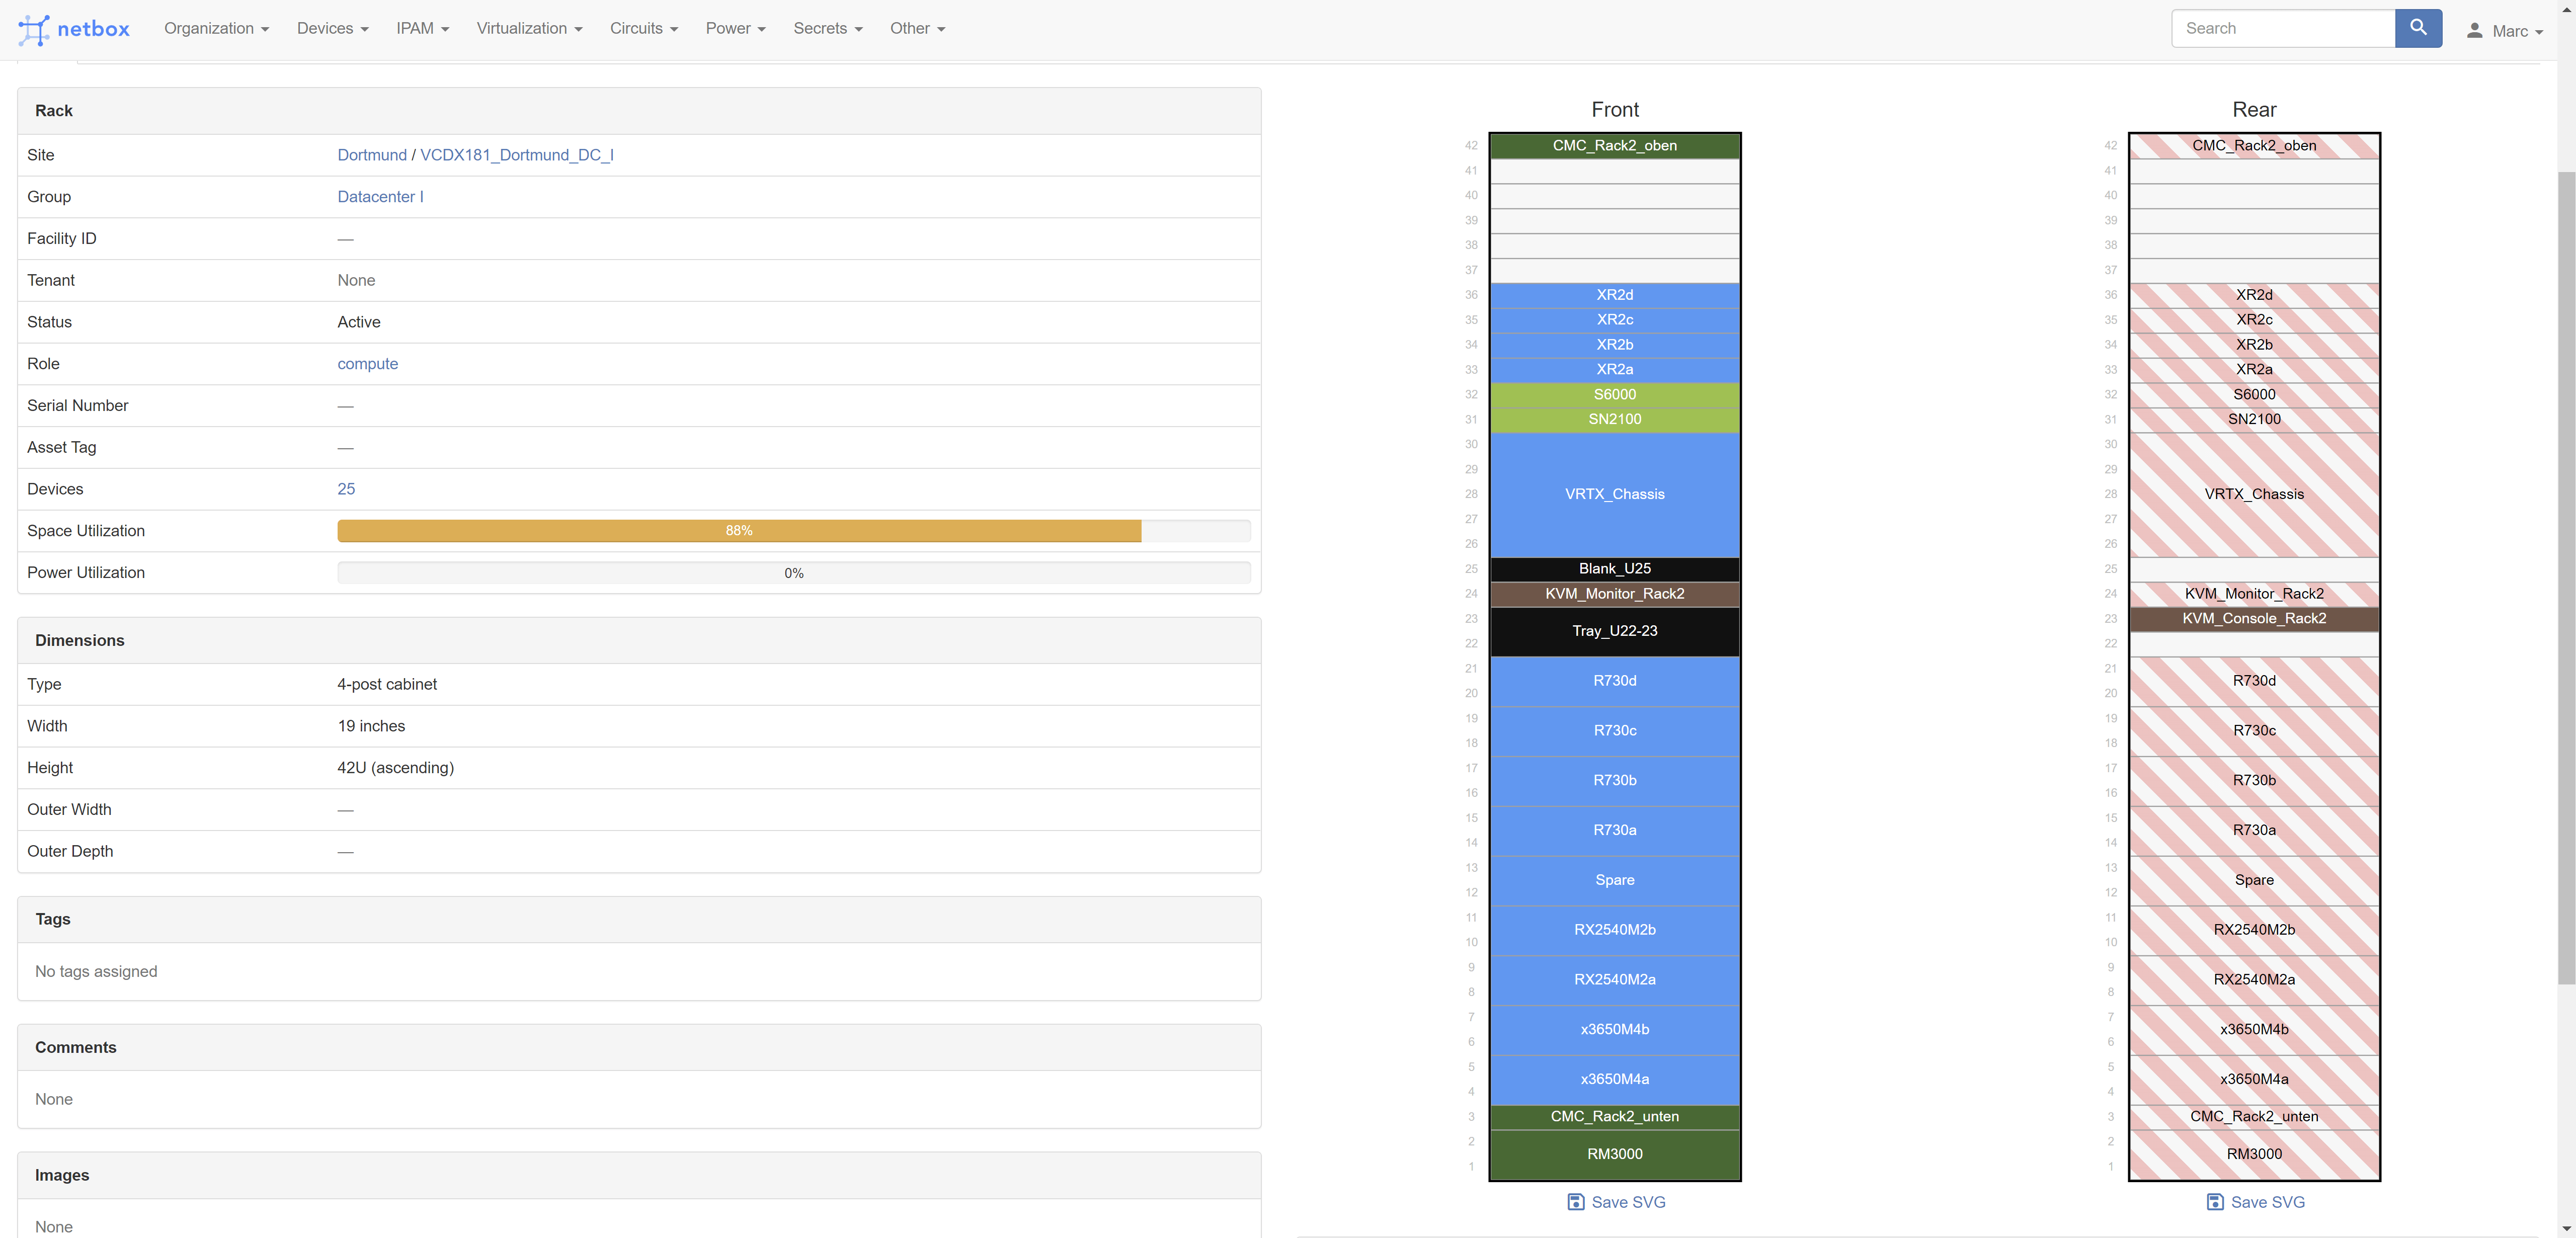
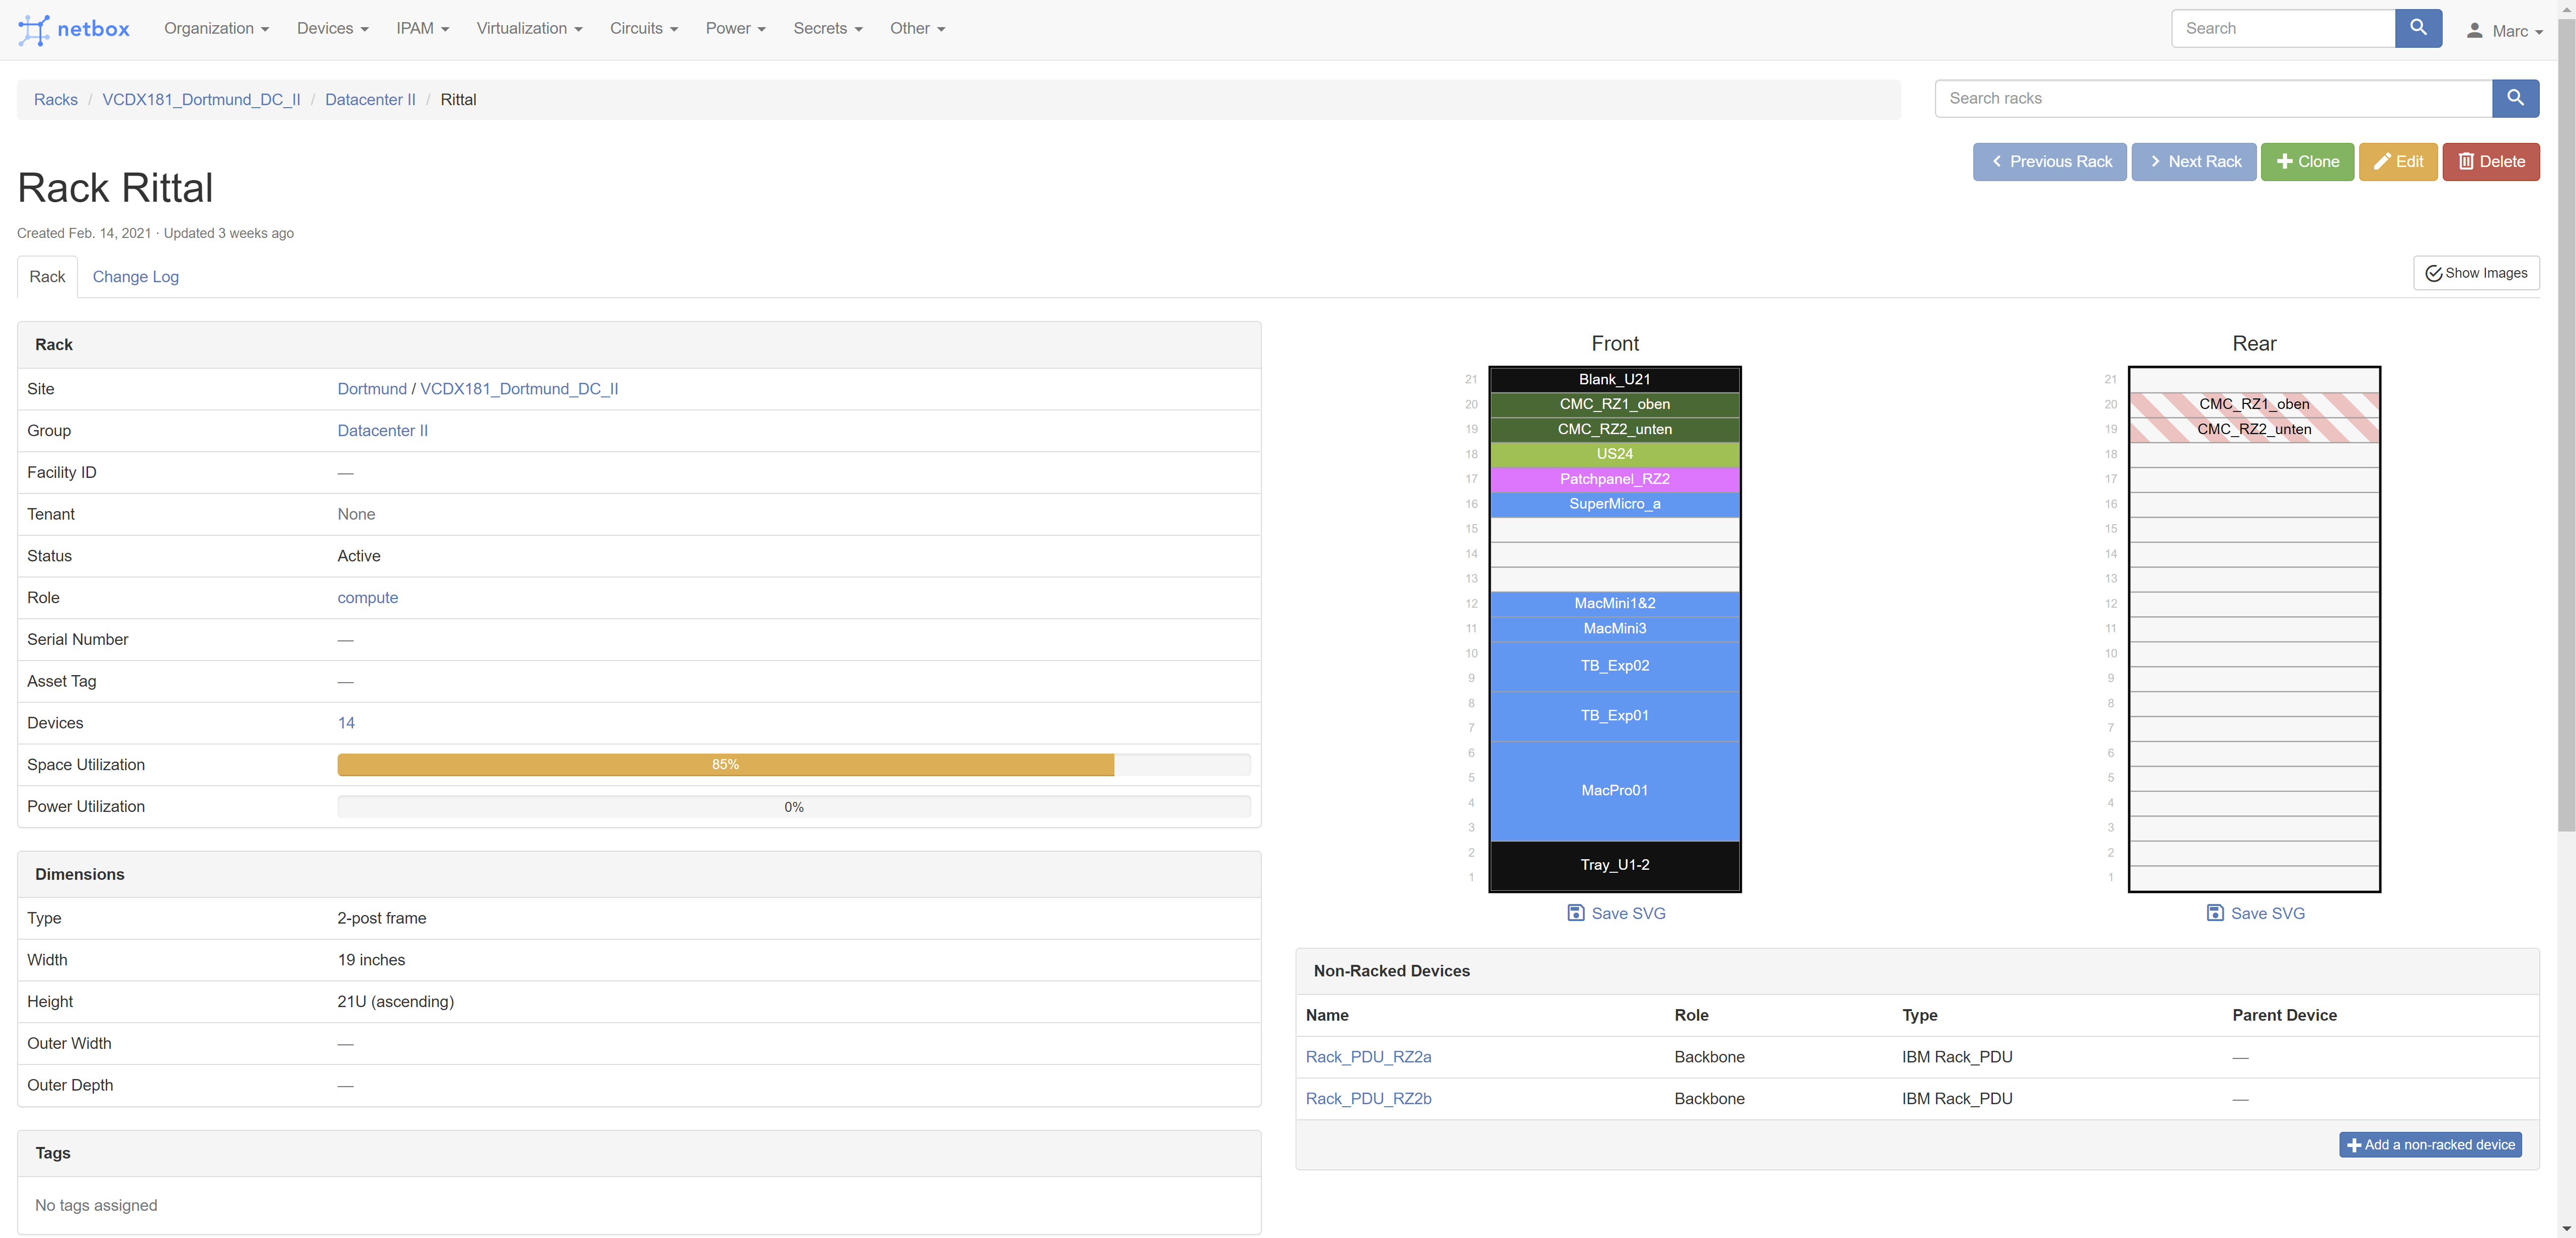
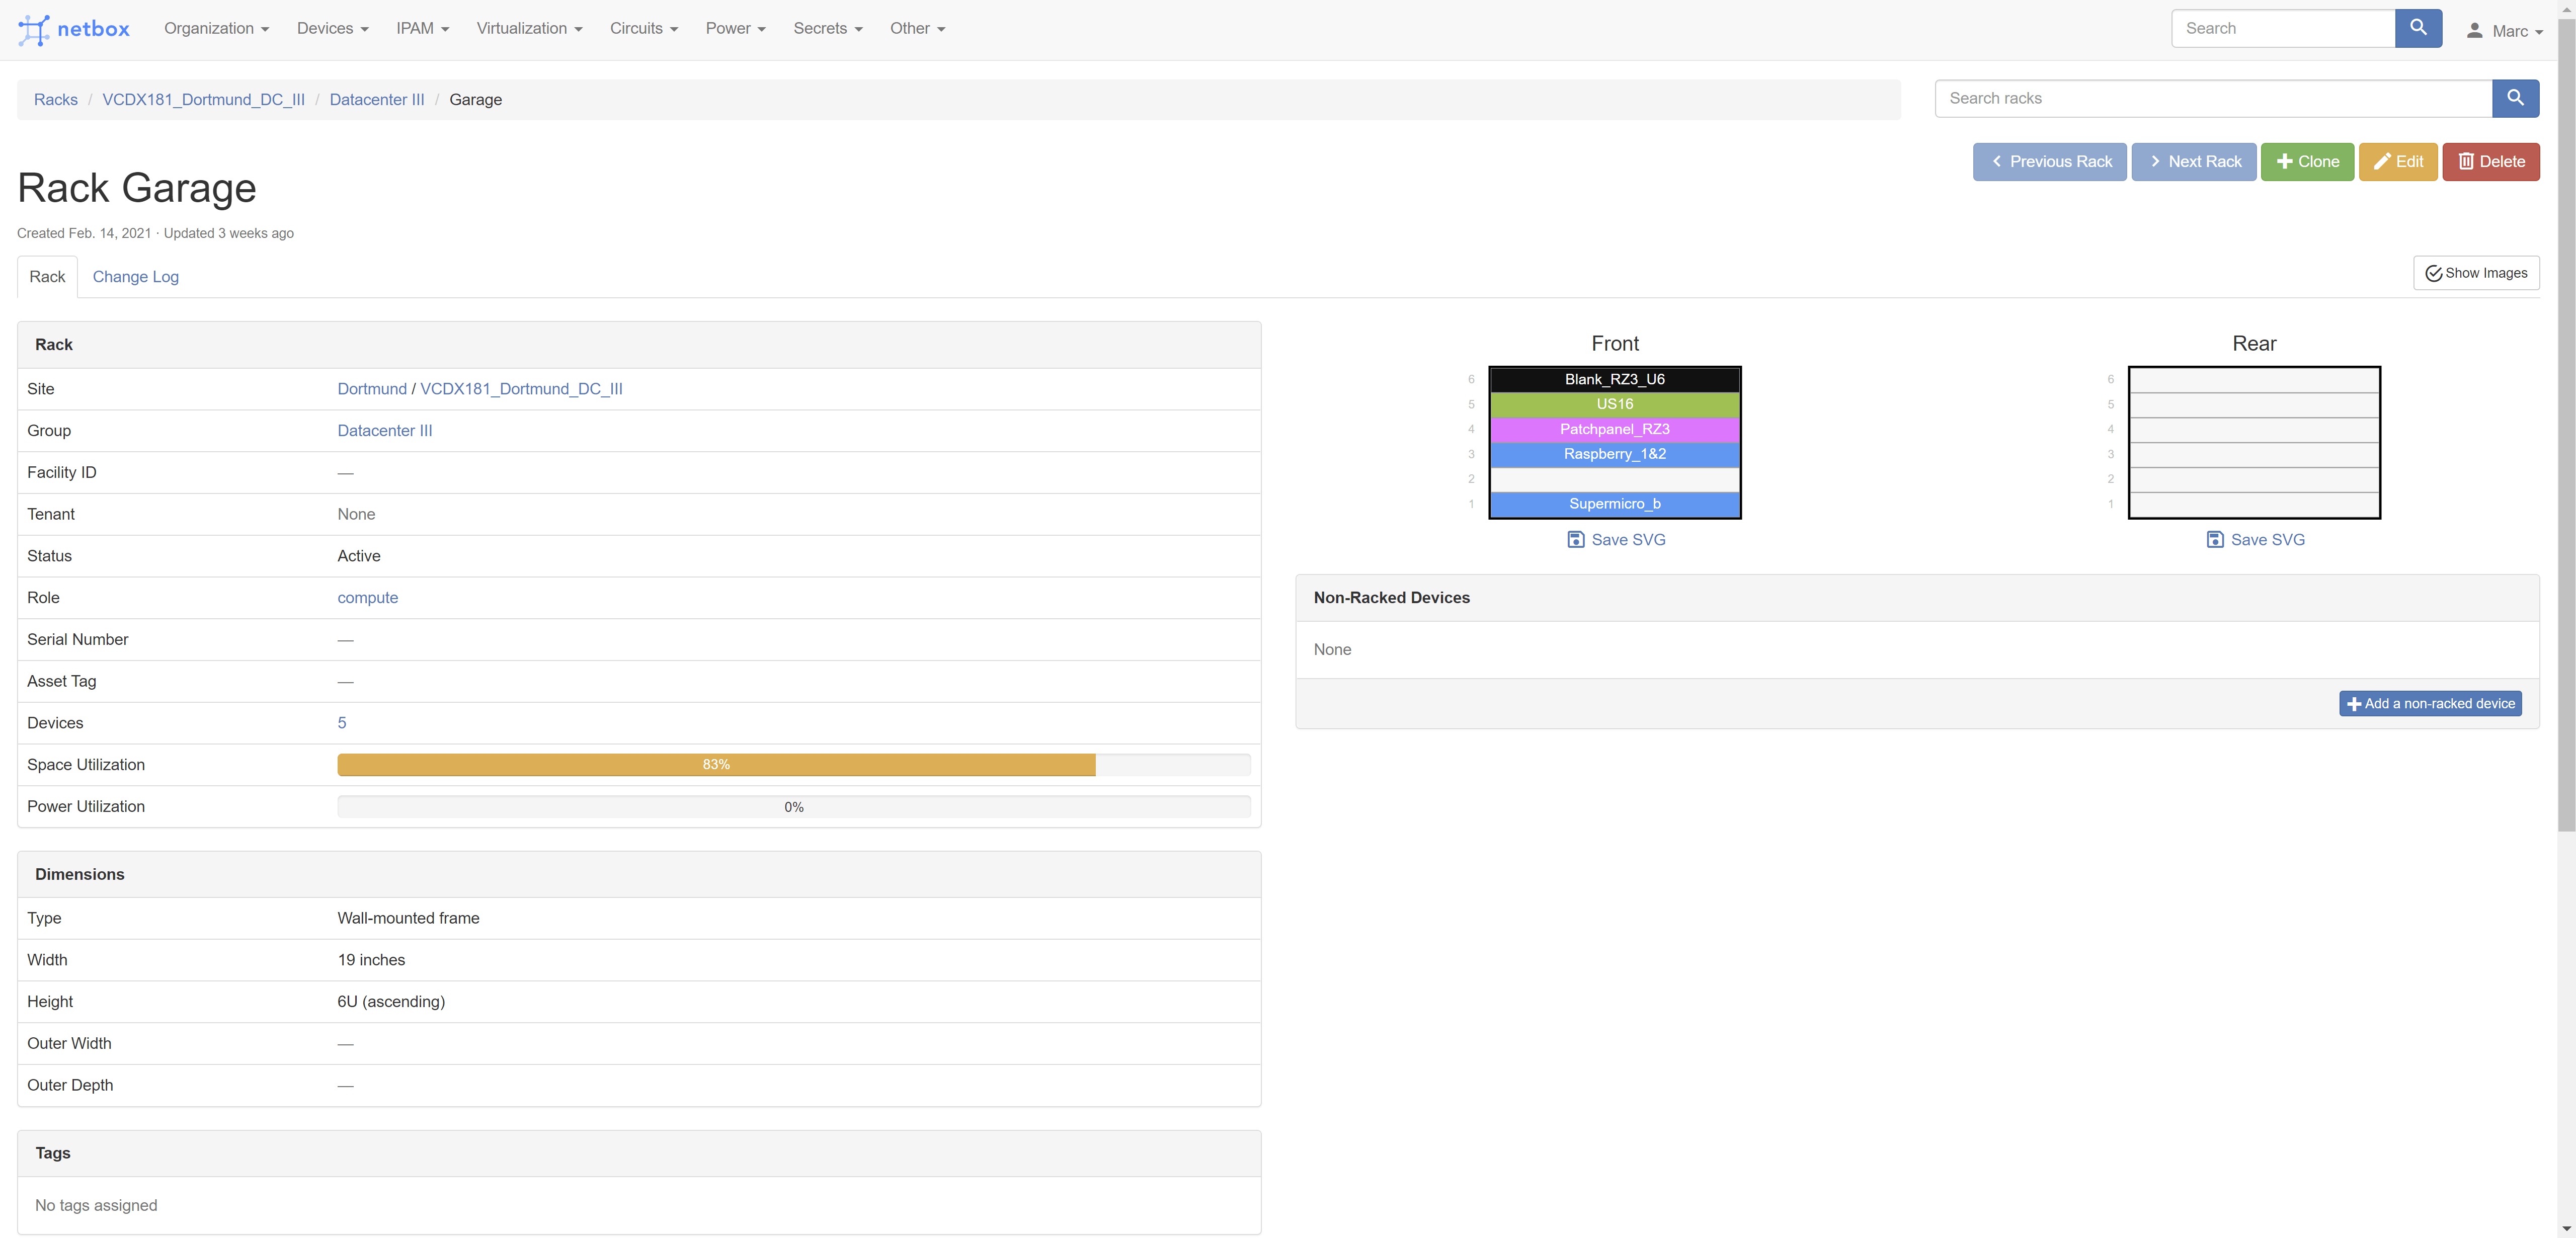
After that I was able to create the different racks at my locations, including the rack roles (network & compute)
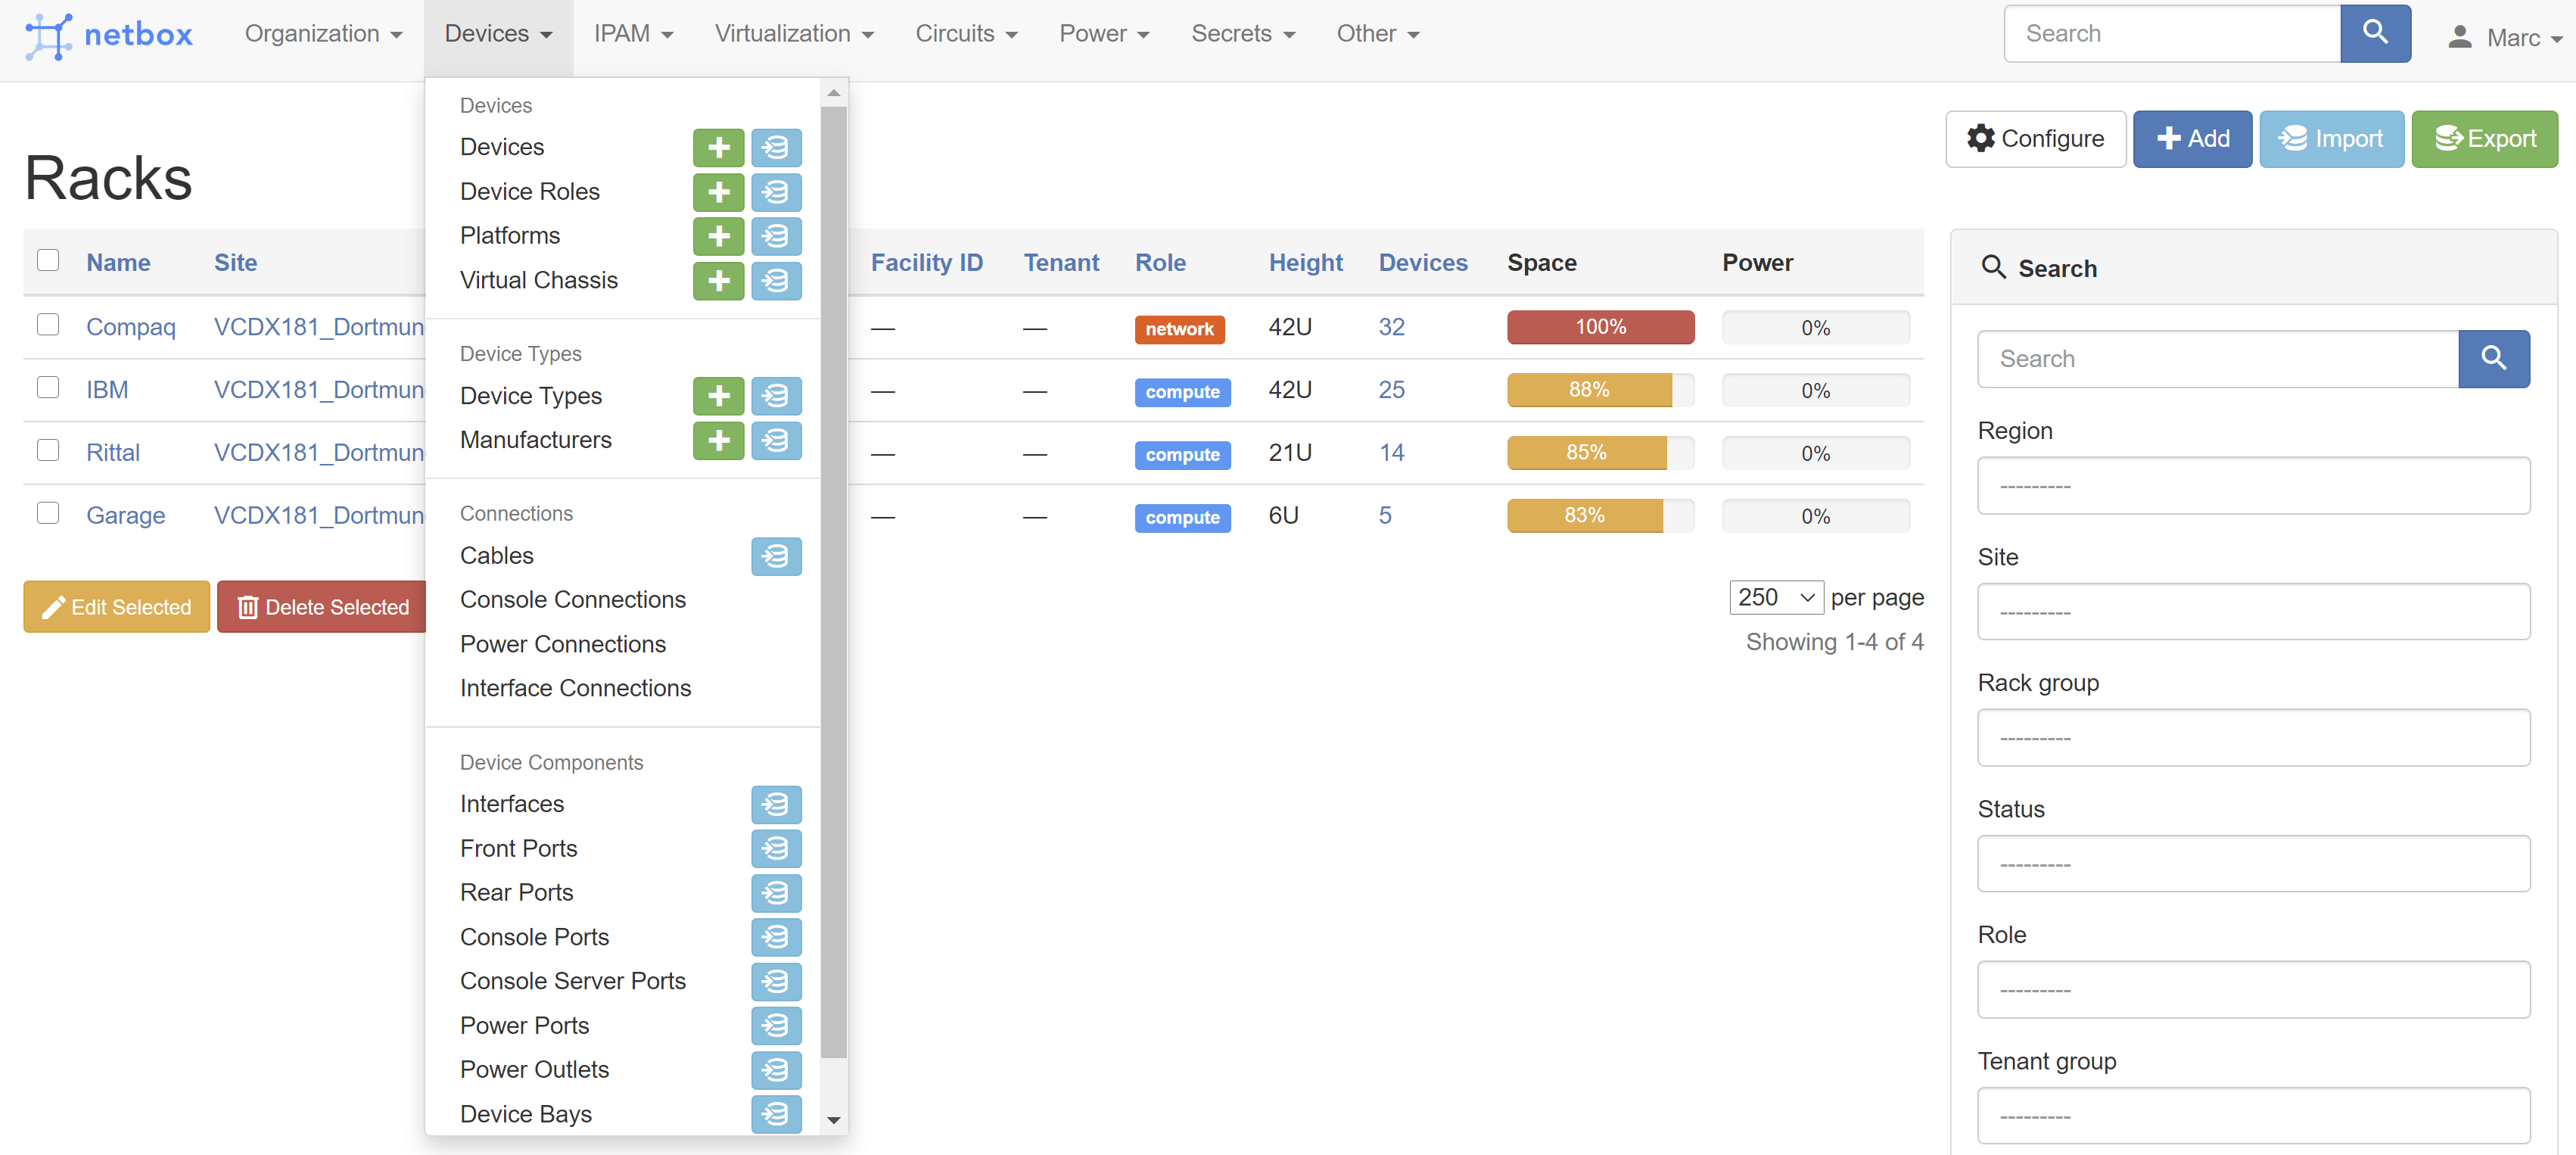
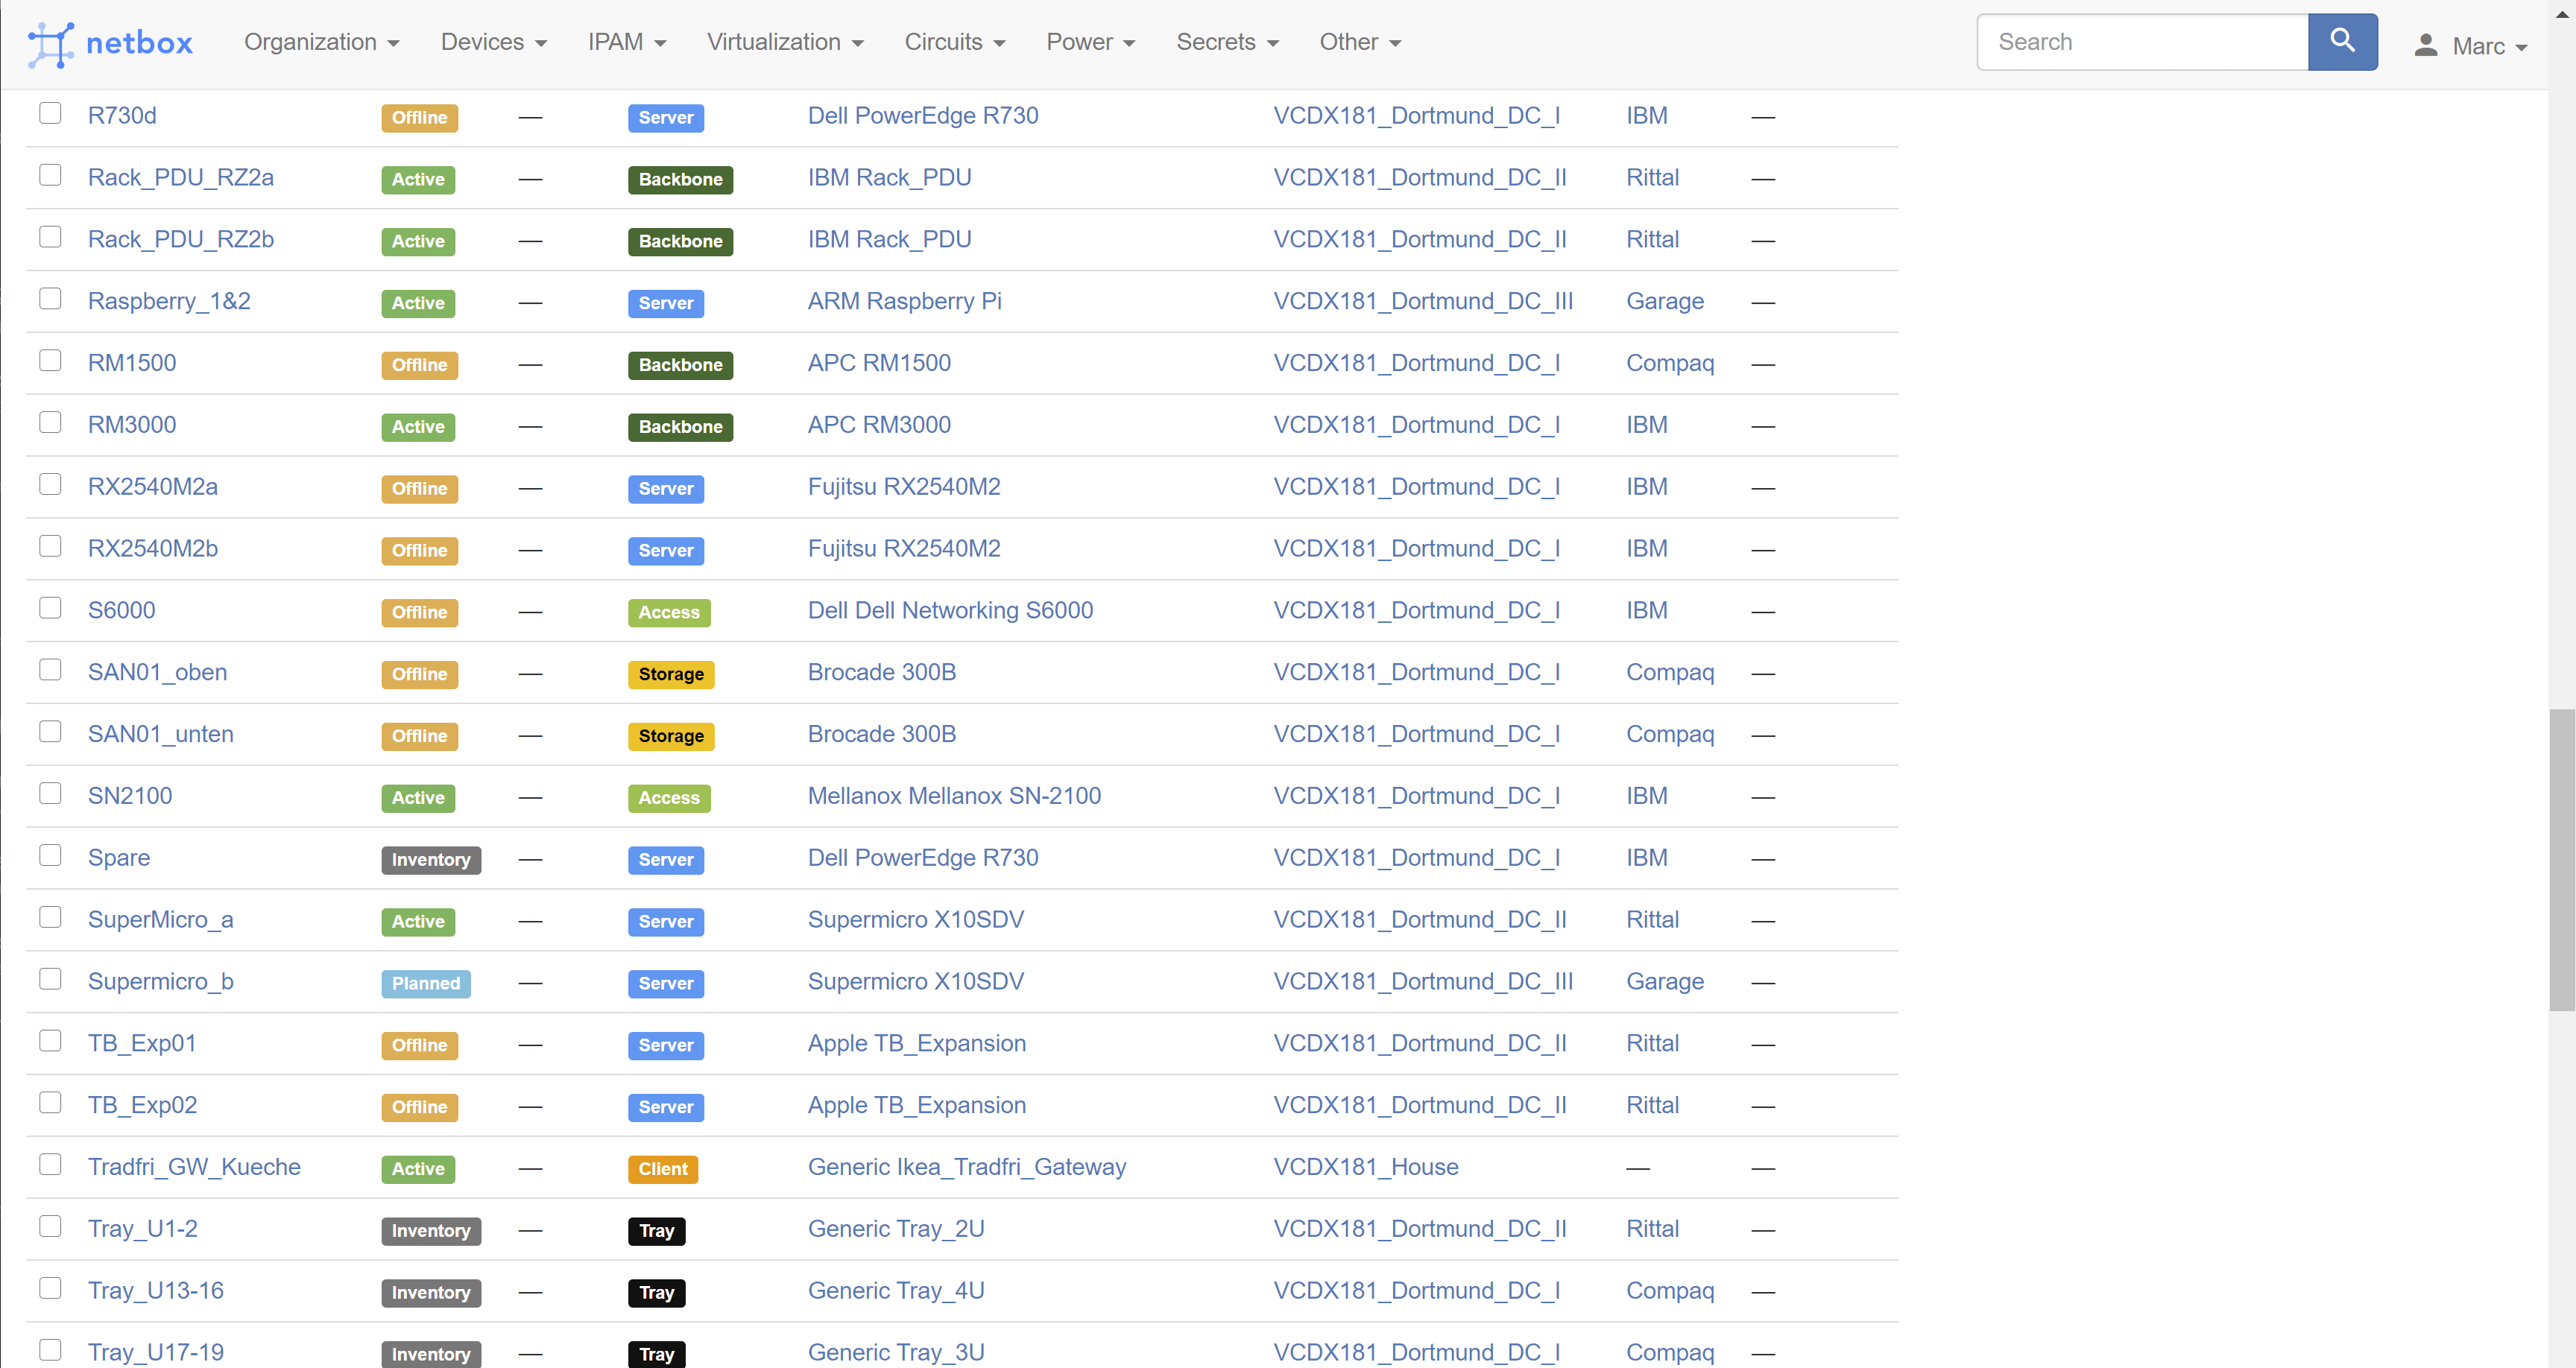
The most time consuming area is the device tab, where you can add all your gear to your racks:
I really like the rack view (front and back) You can setup each device with U details:
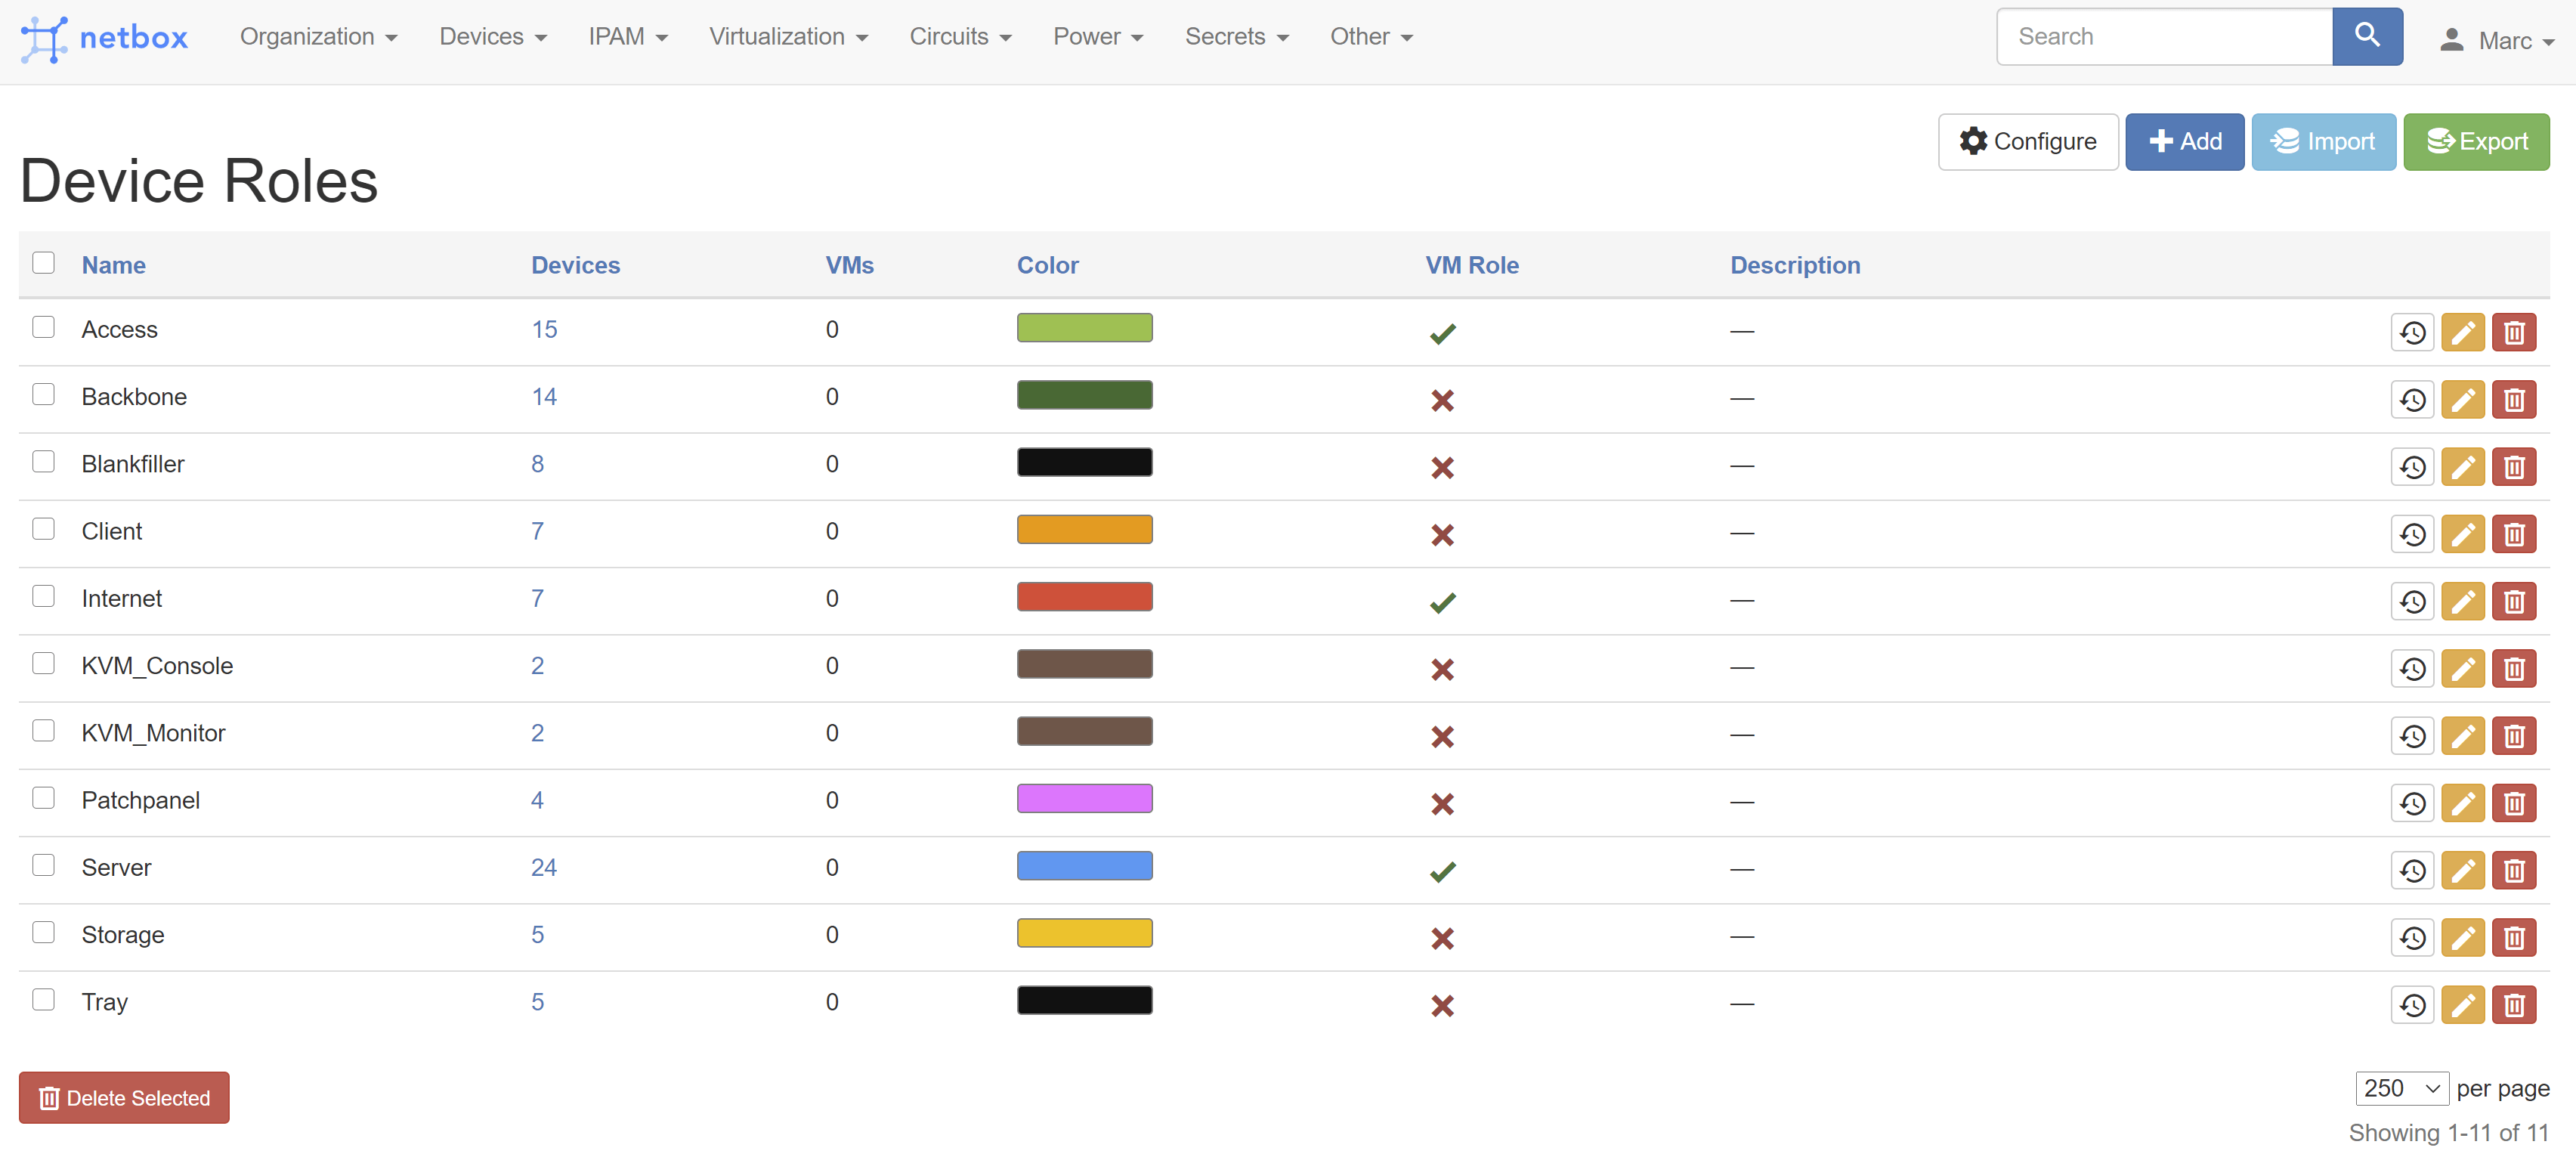
Manufactors, Device Roles and Devices
I have created entries for all my vendors:

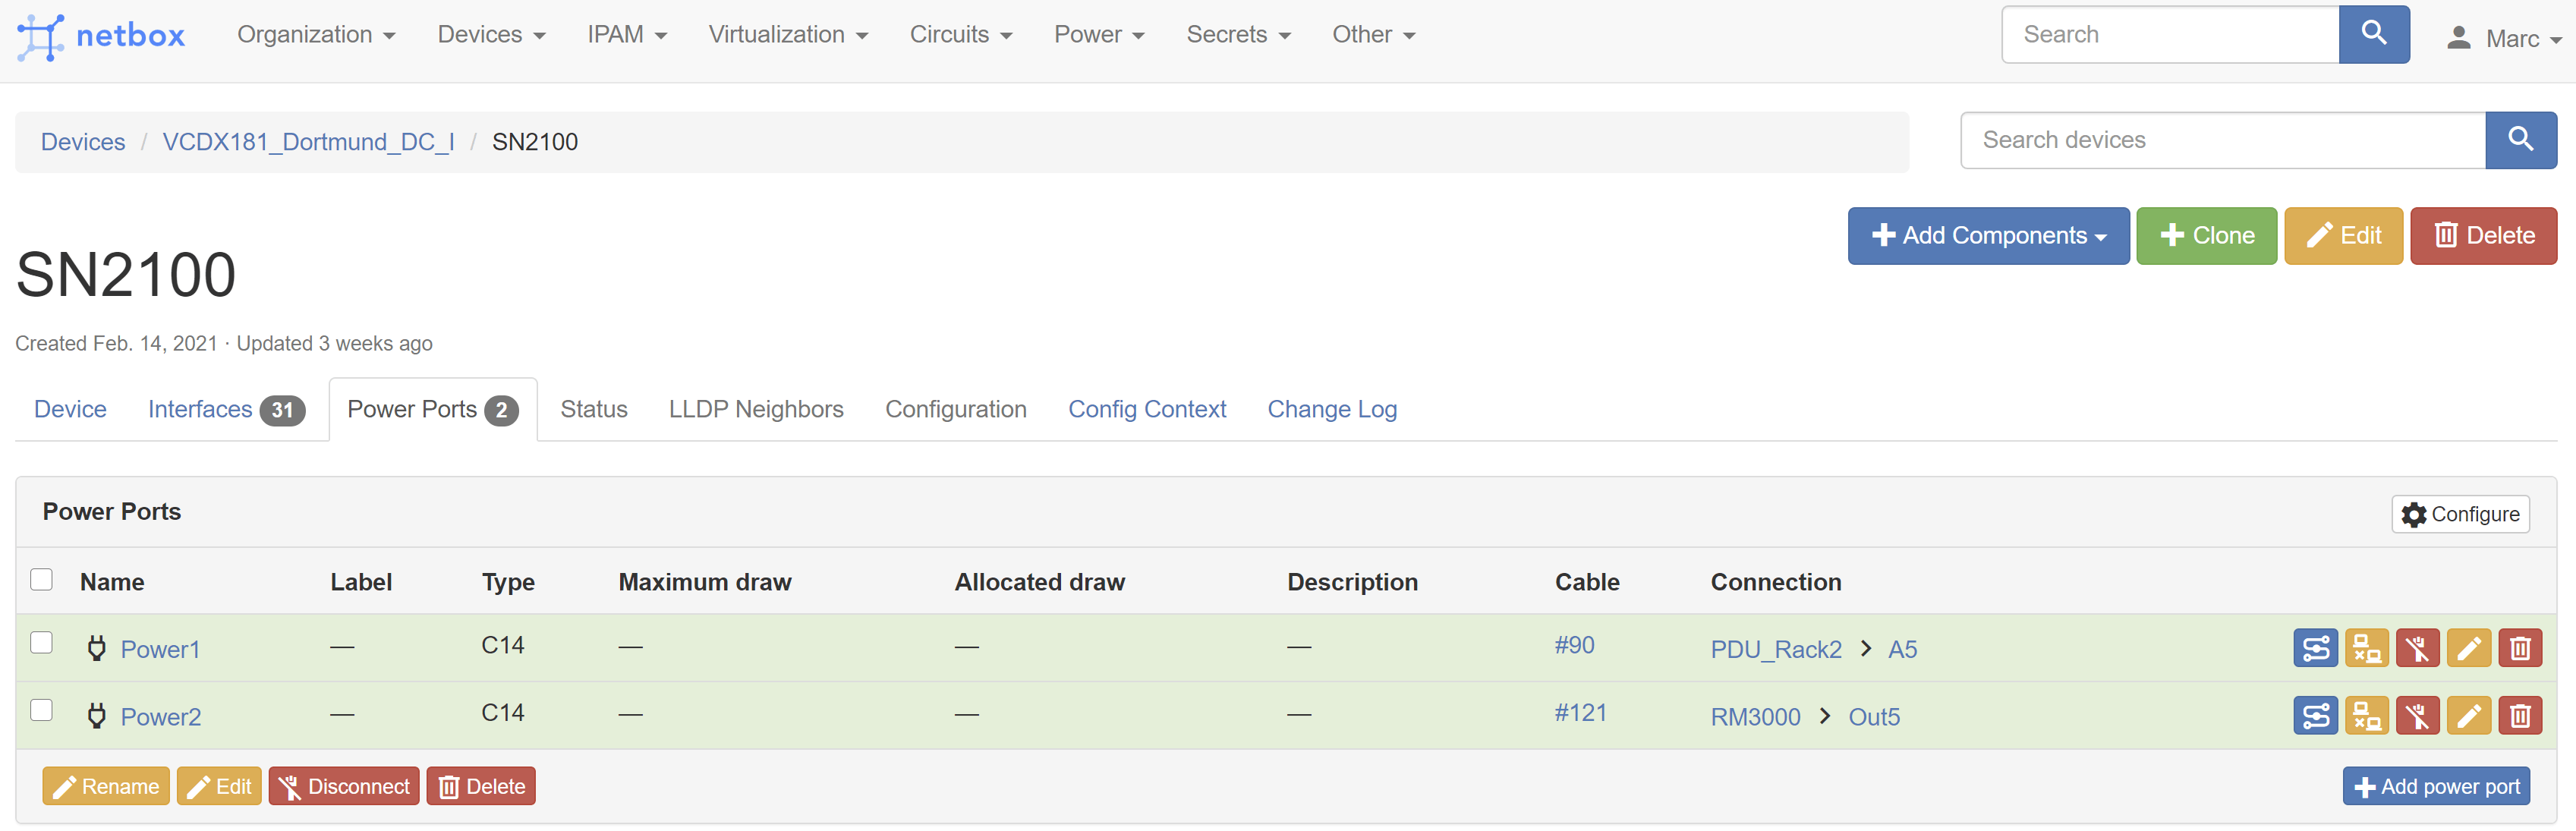
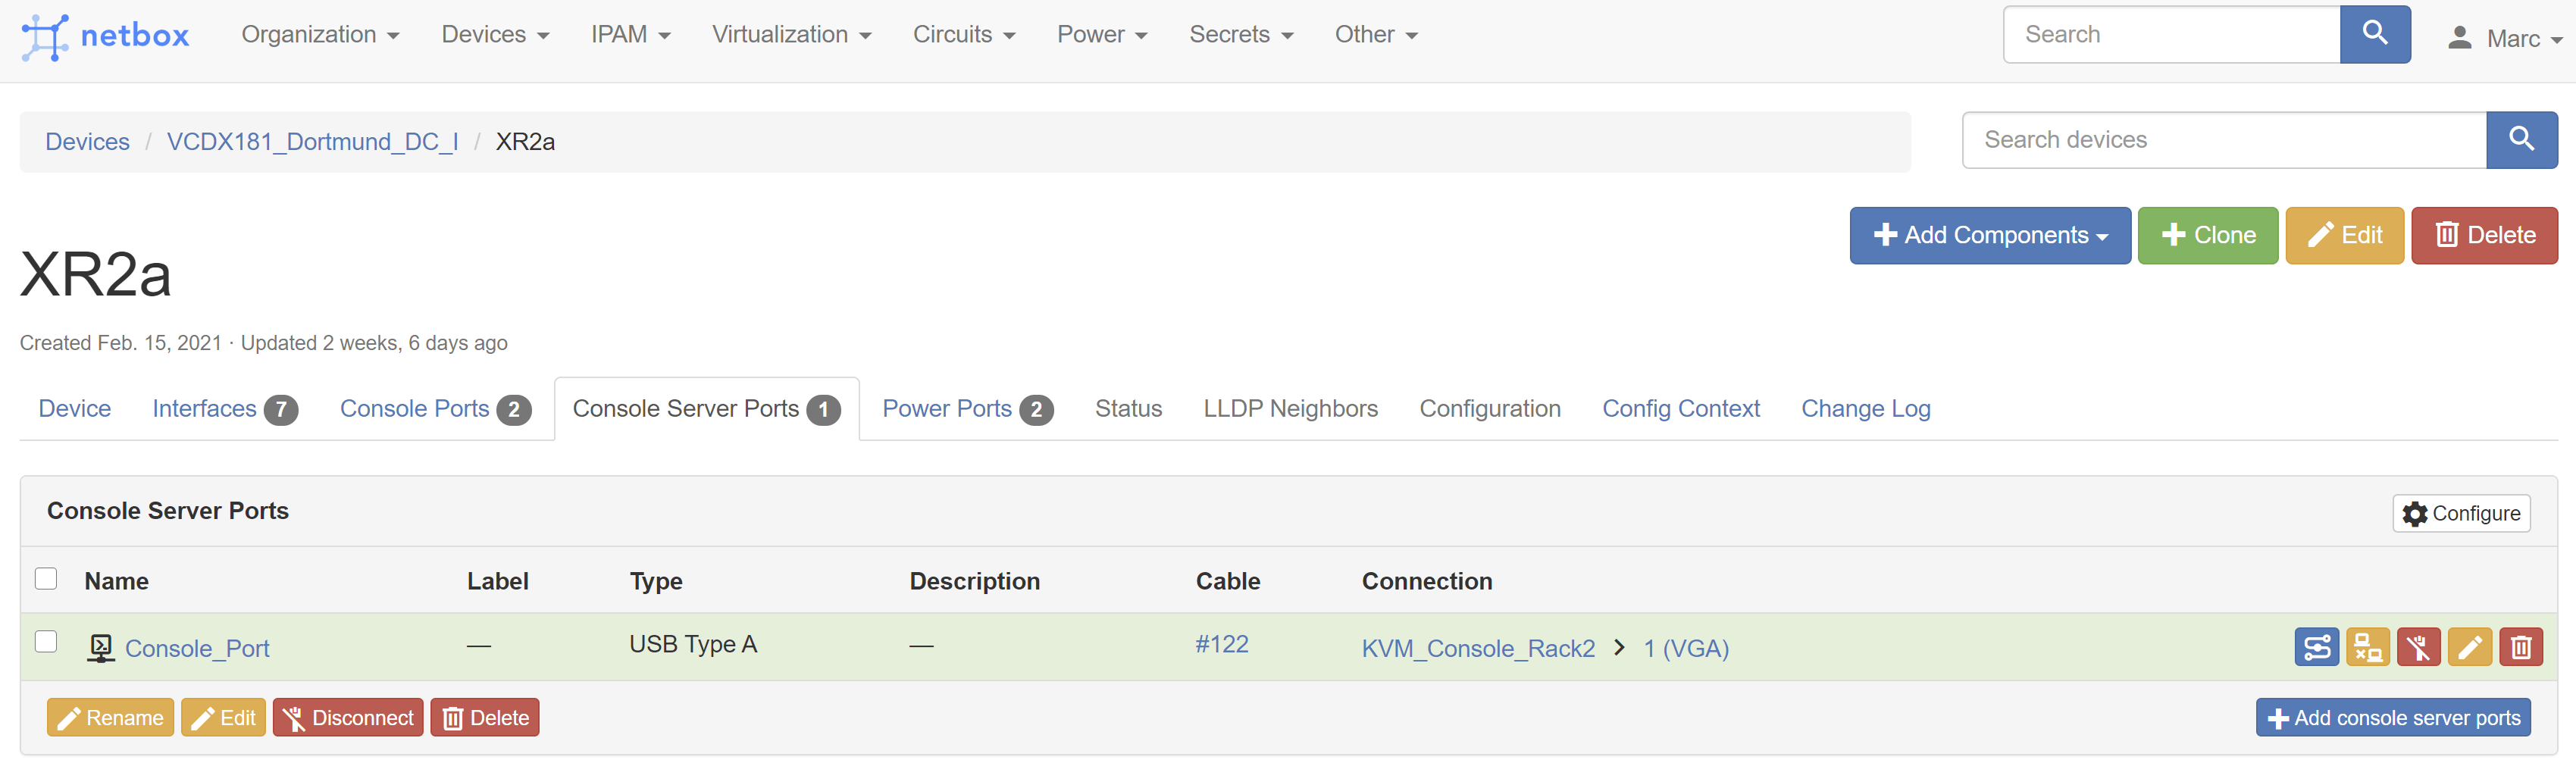
Network Ports, Console Ports and Power Ports
You can easily configure all your different ports for each device:
- Power ports (in- and out for PDUs for example)
- Console ports (on the server and KVM site)
- FC ports (including speed)
- Network ports (all flavours are available, 1GbE, 10GbE, 40 GbE and 100GbE)

With this solution, I finally have a really nice documentation about my entire HomeDC with all components, which helps a lot when something went wrong and you must quickly perform a troubleshooting. I am showing this at customer engangements, to talk a little bit about their datacenter documentation concepts…..
Stay tuned for the next steps: HomeLab Stage LV: KVM Solution
#HomeLabKing