After the upgrades of my Workstation, MacBooks, Central storage and my SAN Switch in Stage IX: FibreChannel for all, it was time for another step -> HomeLab Expansion
HomeLab Expansion Part I
The Thunderbolt PCIe Expansions are great, but they are limited to 2 PCIe slots and they are not made for rack mounting.
My two Apple Mac Minis inside Datacenter I are placed on top of the Thunderbolt Expansion units. This is not optimal from a temperature perspective. Both units are made of aluminium.
I visited the Sonnet webpage again and found their newest creation: The Thunderbolt 2 PCIe (3 Slot) Expansion unit. Wow, exactly what I wanted and needed…..


It is the same unit, that is used for the desktop version + extra room for 2 x 5,25″ devices.
So I got two of these units together with a Mac Mini Rackmount Kit (fits two Apple Mac Minis).

My 42HE rack inside datacenter I looks really great after this upgrade. I got a nicer look and an additional PCIe slot at two of my servers. I did not replace the Thunderbolt Expansion unit inside datacenter II.
HomeLab Expansion Part II:
After replacing my “old” Brocade SAN switch in Stage IX: FibreChannel for all, I got 8 more FC ports available. I could connect more servers or connect my existing servers with more ports…..
I ordered several QLogic 4Gbit Dual Port FibreChannel HBAs from eBay (12€ each) together with additional SAN cables and replaced it with the existing HBAs.

So I got 8 paths per LUN at every ESXi host at my HomeLab. In conjunction with the VMW_SATP_RR makes it really sense…
HomeLab Expansion Part III:
After a few weeks with this configuration my whole HomeLab was down on sunday morning. What happened? Power Outtake? Any other disaster? No, my existing APC UPS was beeping and the overload protection LED was on….
My HomeLab took more power than the APC could deliver……
So another project was born: I need a bigger UPS system. I searched again on eBay and found a solution for my problem:
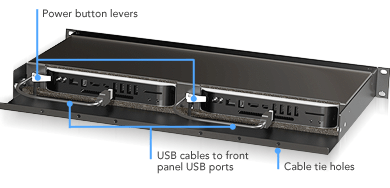
APC UPS 1500VA RM
Output Power Capacity

My first opinion was to buy and install an APC smartslot expansion card for LAN connectivity. I decided not to get one, instead I implemented a Raspberry Pi solution.
Raspberry Pi Model B:
- PSU: 5 V- (Micro-USB Buchse)
- CPU: ARM11, 700 MHz
- RAM: 512 MB
- Graphic: Broadcom VideoCore IV, OpenGL ES 2.0, OpenVG 1080p
- Connections: HDMI, LAN 10/100 Mbps, 2x USB 2.0, Audio, Video-Out
- SD-Slot
- Dimensions: 91x64x20 mm

I installed the apcupsd package onto my raspberry pi. I used wheezy-raspbian as my operating system.
I installed the apcupsd packages with these commands:
sudo apt-get update
sudo apt-get install apcupsd
The configuration of the apcupsd package is done this way:
sudo vi /etc/apcupsd/apcupsd.conf
UPSCABLE usb
UPSTYPE usb
DEVICE
NETSERVER on
NISIP 0.0.0.0
NISPORT 3551
sudo vi /etc/default/apcupsd
ISCONFIGURED=yes
sudo /etc/init.d/apcupsd start
I installed the network monitor component, too.
sudo apt-get install apache2 apcupsd-cgi
Now I can check the status of my UPS via Browser:

HomeLab Expansion Part IV:
The last part that I have configured within this Stage was my central monitoring system. I found a free solution for my HomeLab called Opsview. I deployed the OpsView virtual machine at my environment and configured my different systems. Some systems are monitored using ping, some using SNMP and some systems using the opsview agents installed on windows or linux.

My whole HomeLab is monitored via Opsview and grouped into different areas.

I re-used one of my old iPad Generation 1 devices and combined it with a Brodit passive holder. I configured an automatic app start to the OpsView monitoring webpage including logon.

This finishes my Stage X: HomeLab Expansion. The next projects are already planned. Stage XI: Teradici APEX + a new FibreChannel storage.